
Join the Joey'z Family!
This article offers a nurturing step-by-step guide to mastering the installation of blackout attachments for your curtains. We understand that preparing for this task can feel overwhelming, so we focus on addressing your concerns through:
Gathering the right tools is essential, and we guide you in accurately measuring your windows for a perfect fit, ensuring that you feel confident in your approach.
By following our detailed installation steps, you can achieve effective light control and energy efficiency in your home. We’re here to help you create the home you love, providing practical tips and common troubleshooting solutions along the way. Remember, you’re not alone in this process; we’re here to support you every step of the way.
Mastering the art of installing blackout attachments for curtains can truly transform your living space into a sanctuary of comfort and style. We understand that with the right tools and techniques, you can effectively block out unwanted light, enhance energy efficiency, and create a more inviting atmosphere. However, this process can sometimes feel daunting, filled with potential pitfalls that may leave even the most determined DIYers feeling frustrated. You might be wondering how to navigate these challenges to ensure a seamless installation that maximizes both functionality and aesthetics. We’re here to help you create the home you love.
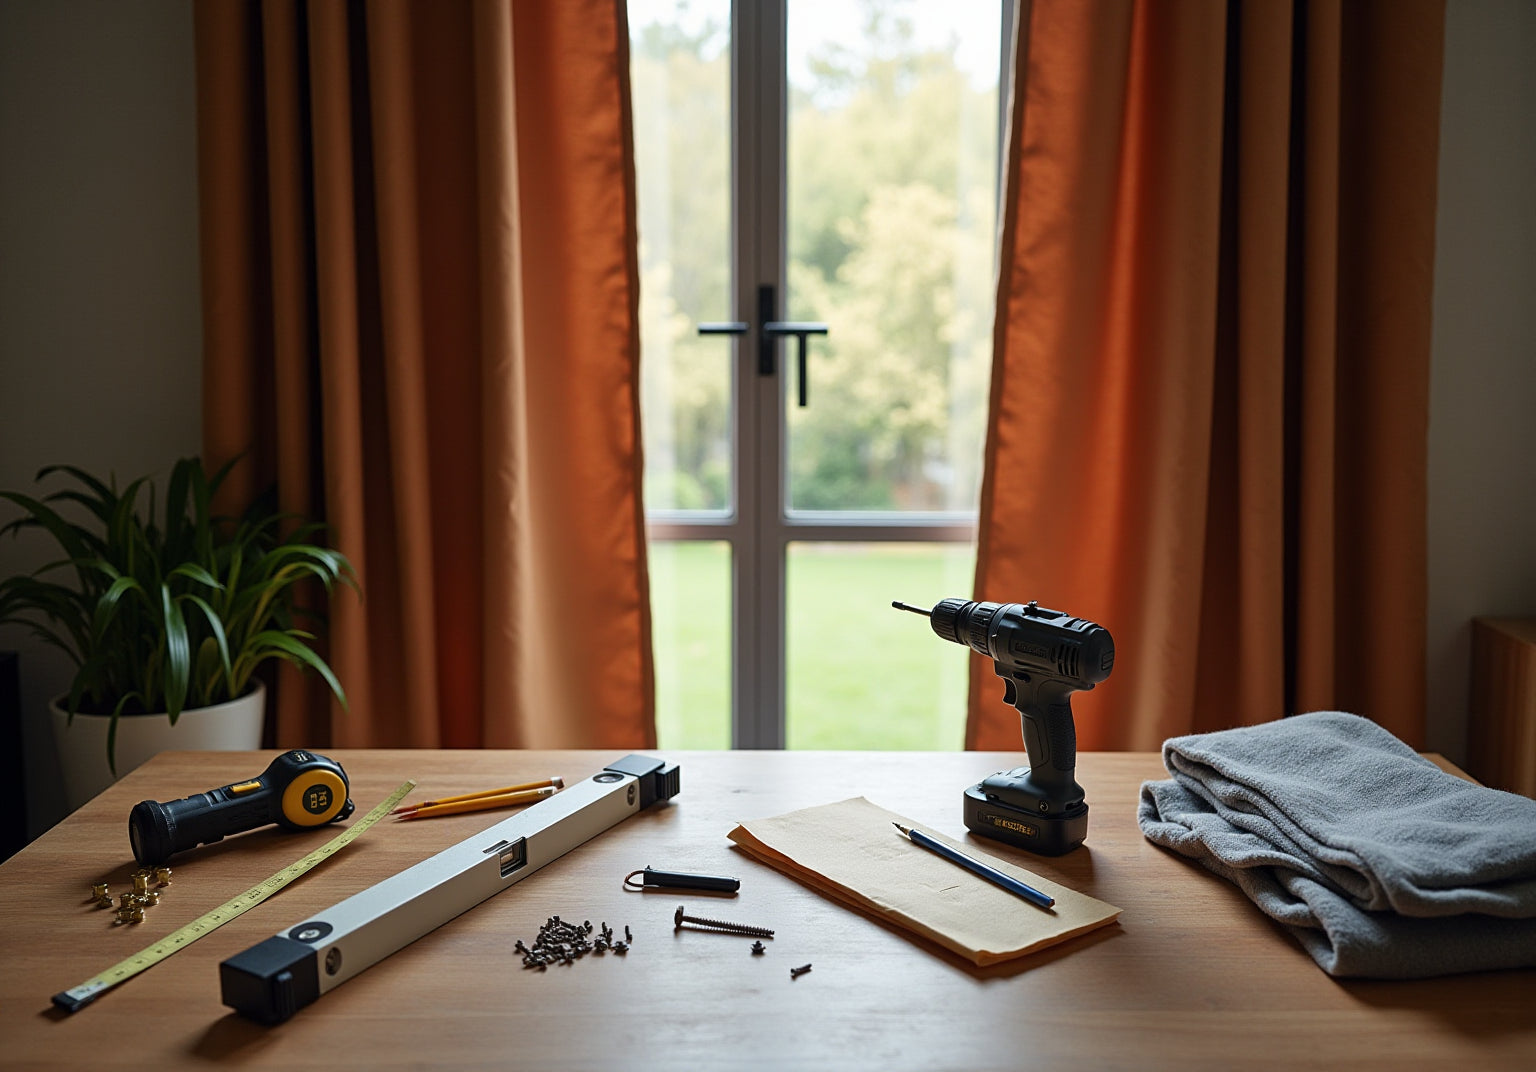
Before you embark on your installation of blackout attachments for curtains, it's important to gather the right tools and materials to ensure a smooth process. We understand that preparation can feel overwhelming, but having everything ready will make a world of difference. Here’s what you’ll need:
Having these items ready will streamline your installation process and help you avoid unnecessary trips to the store. We’re here to support you in creating the home you love, and the average expense for blackout attachments for curtains and rod accessories in 2025 generally begins at approximately $20. This makes it an economical enhancement that can greatly improve your living area.

To achieve the perfect fit for your blackout curtains, we understand how important accurate window measurements are. Here are some essential steps to help you get it just right:
Measure the Width: Start by measuring the width of your window frame from one side to the other. To create a more complete look, consider adding 4 to 12 inches on each side. This allows the fabric to hang beyond the frame, blocking more light. Many of our customers at Joey'z Shopping Spree have shared their appreciation for the stylish and functional designs of our treatments, ensuring they not only serve their purpose but also enhance your home decor.
Measure the Height: Next, measure from the top of the window frame down to your desired drapery length. You might choose to have the curtains just above the sill, at the sill, or extending to the floor for a more dramatic effect. For example, our Buffalo Check Window Curtain Panels offer elegant light-filtering options that are both beautiful and practical.
Record Your Measurements: It’s important to write down both your width and height measurements clearly. This will be crucial when selecting your drapes and installing the rod. Our customers appreciate the easy-care materials of our curtains, which make maintenance simple and contribute to their overall satisfaction.
Double-Check: Always take a moment to double-check your measurements to ensure accuracy before making any purchases or installations. Home improvement specialists emphasize that precise measurements are essential to avoid costly mistakes, as companies typically cannot be held responsible for incorrect sizes if the measurements were self-taken.
Understanding average opening dimensions can also aid in your planning. Currently, the most common window size in U.S. homes is 36 inches wide by 60 inches high, which suits many applications. By following these steps, you can confidently achieve a perfect fit for your blackout attachments for curtains, which will enhance both the aesthetics and functionality of your living spaces. With the positive feedback from our customers, we’re here to help you create the home you love, ensuring our products meet your needs for style and safety.

To successfully install your blackout curtain attachments, let’s walk through these detailed steps together:
Effective setups of blackout attachments for curtains can significantly reduce cooling expenses, with research indicating they can obstruct up to a third of solar gain, resulting in lower energy bills. In fact, blocking sunlight can cut electricity bills by 10-15%, potentially saving homeowners around AED 120 per month, which totals approximately AED 1,440 a year. We recognize that common installation issues include misalignment and inadequate support, but these can be mitigated by following these steps carefully. As Albert Hadley noted, 'the essence of interior design will always be about people and how they live.' Proper installation not only enhances aesthetics but also maximizes the functional advantages of your blackout attachments for curtains. We’re here to help you create the home you love, so let’s make this installation a success!

When installing blackout attachments for curtains, you might encounter a few common issues that can be frustrating. We understand how important it is to achieve the perfect ambiance in your home. Here are some helpful troubleshooting tips to guide you through the process:
Drapes Not Blocking Light: If you notice light seeping in around the edges, it’s essential to ensure that the drapes are wide enough and that the rod is mounted high enough to fully cover the window. Remember, using high-quality blackout attachments for curtains can block up to 99.9% of light, so proper installation is crucial for achieving complete darkness. Consider stylish options like the Buffalo Check Window Curtain Panels, which not only filter light but also enhance your home decor.
Uneven Curtain Length: If the curtains appear uneven, please verify that the rod is level. Adjust the supports as necessary to attain consistency, ensuring a polished look.
Brackets Not Secure: If the brackets feel loose, double-check that the screws are tightened. Using wall anchors can provide added stability, giving you peace of mind.
Drapes Dragging on the Floor: If your drapes are too long, consider adjusting the rod height or trimming them to the desired length for a neat appearance. A well-fitted curtain can make all the difference.
Difficulty Sliding Drapes: If the drapes are hard to slide, inspect the rod for any obstructions. Ensure that the rings or hooks are compatible with the rod to allow for smooth operation.
Incorporating expert advice, Kevin, a Home Automation Specialist, emphasizes that "with proper installation and high-quality window treatments, you can achieve the dark room and improved sleep you desire." By following these troubleshooting steps, you can ensure a smooth installation process and fully enjoy the advantages of your new blackout attachments for curtains. Remember, we’re here to help you create the home you love. A well-installed curtain not only enhances your room's aesthetics but also significantly improves light control and energy efficiency.

Mastering the installation of blackout attachments for curtains can truly enhance the comfort and aesthetics of your living space. By following the detailed steps outlined in this guide, you can ensure a perfect fit and effective light control, ultimately creating a cozy and inviting atmosphere that you deserve.
We understand that gathering the necessary tools, accurately measuring windows, and executing a step-by-step installation process can feel overwhelming. That’s why we’ve thoroughly covered these key elements. Additionally, troubleshooting common issues ensures that any challenges you encounter during installation can be easily addressed. This comprehensive approach not only simplifies the task but also reinforces the importance of proper setup for maximizing the benefits of blackout curtains.
Investing time and effort into mastering blackout curtain attachments is a worthwhile endeavor that pays off in both energy efficiency and improved quality of life. A well-installed blackout curtain system can lead to significant savings on energy bills, enhanced privacy, and a more restful environment. Embrace the opportunity to transform your home into a serene sanctuary by implementing these techniques. We’re here to help you create the home you love, so enjoy the myriad advantages that come with effective light control.
What tools and materials do I need to install blackout attachments for curtains?
You will need blackout curtains, a sturdy drape rod and supports, measuring tape, a drill and drill bits, a screwdriver, a level, a pencil, and a step ladder.
Why is proper sizing of blackout curtains important?
Proper sizing is crucial for effective light control and creating a cozy atmosphere in your space.
How do I ensure my drape rod is securely installed?
Use a sturdy rod with the appropriate number of brackets for support, and utilize a drill to fit the supports securely. Wall anchors are also necessary if you’re not hitting a stud.
What measurements should I take for installing the curtains?
Accurate measurements of your window and curtain rod placement are essential. Designers recommend adding 8 to 12 inches on either side of the window for optimal light access and aesthetics.
How can I confirm that my drapery rod is straight during installation?
Use a level to check that the drapery rod is straight, which will help prevent an off-balance appearance.
What is the estimated cost for blackout attachments and rod accessories?
The average expense for blackout attachments for curtains and rod accessories in 2025 generally begins at approximately $20.