
Join the Joey'z Family!

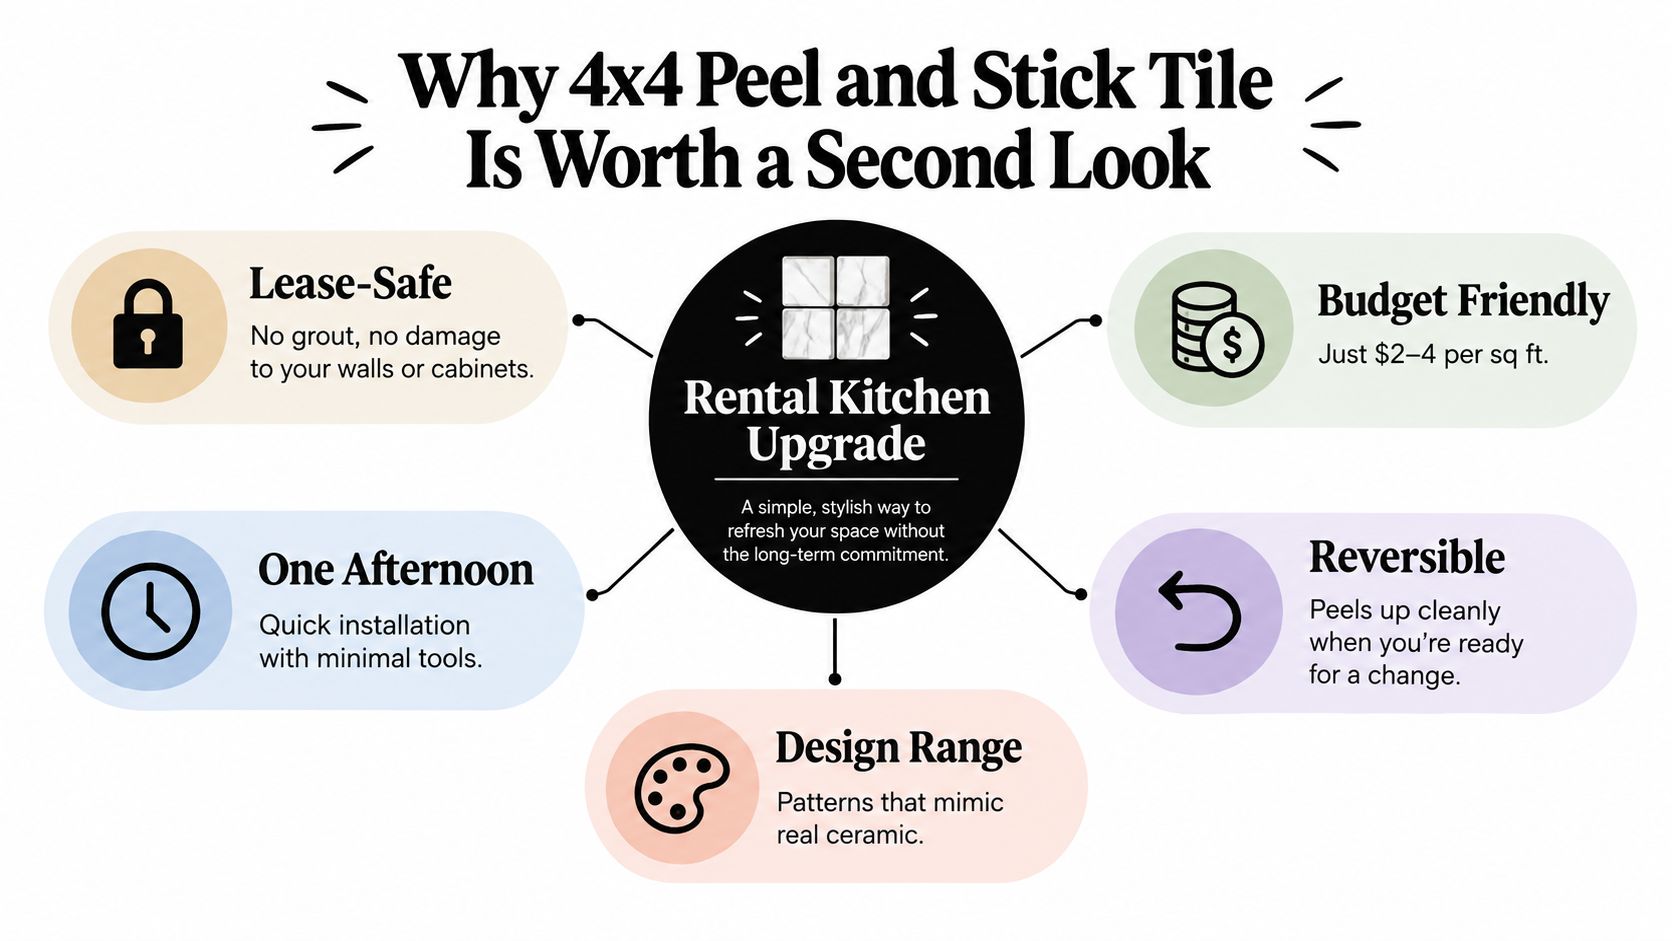
You're standing in a rental kitchen, staring at a beige vinyl floor that has looked tired since move-in day. The lease says no demolition, Saturday is free, and you're wondering whether 4x4 peel and stick tile can deliver a convincing upgrade without thin-set, grout dust, or an uncomfortable conversation with the landlord.
It can, but only when you treat the adhesive like an installation system rather than a magic sticker. I've used peel-and-stick tile for quick kitchen and backsplash updates, and the honest result is mixed. A well-prepared surface can look sharp and stay put. A dusty wall, damp floor, or poorly managed seam can start peeling at the edges, sometimes within a few months.
The appeal is easy to understand. A small-format tile lets you create a checkerboard, a border, a stacked pattern, or a simple grid without committing to mortar-set ceramic. It also works well in spaces where a large tile would expose every crooked corner and uneven transition.
For renters, that low commitment matters. You can refresh a backsplash without removing the original surface, and a DIYer can test a color combination before investing in a permanent tile system. The category itself is relatively recent. Gerflor says its GERFLEX brand designed the first self-adhesive tiles in France in 1985, placing peel-and-stick tile among modern flooring innovations rather than traditional ceramic systems (historical adhesive and tile-setting literature).
A 4x4 tile has four edges, and a small backsplash can contain dozens of edge contacts. Every one becomes a potential lifting point if grease, dust, moisture, or an uneven substrate interrupts the adhesive bond.
That's the trade-off glossy product photos rarely show. The format is forgiving when you're working around outlets, narrow returns, or imperfect walls, but it demands careful alignment and firm edge pressure. On a floor, chair legs, pet claws, grit, and rolling loads can stress those edges even more.
Practical rule: Small tiles make pattern planning easier, not surface preparation less important.
The sweet spot is a dry or lightly splashed backsplash, a rental-friendly decorative update, or a low-commitment floor project on a flat, stable base. It's a poor substitute for ceramic or a properly waterproofed tile assembly in a shower. The rest comes down to matching the product to the substrate, traffic, and amount of water the area sees.
The short answer is that 4x4 peel-and-stick tile sits between permanent tile and temporary décor. It offers more visual control than broad-sheet materials, but its adhesive and seams need more protection than a traditional ceramic installation.
| Option | Substrate Tolerance | Cost/sq ft (USD) | Install Time (10 sq ft) | Wet-Zone Safe? | Renter Friendly |
|---|---|---|---|---|---|
| 4x4 peel and stick tile | Low to moderate, must be flat, clean, and dry | Varies by product | Short DIY project | Splash zones only, verify product limits | Usually, test removal first |
| Ceramic 4x4 tile | Low, requires a sound prepared base | Varies by tile and setting materials | Longer, with mortar and grout | Better for properly installed wet areas | Usually not |
| Luxury vinyl plank | Moderate, but still needs a smooth subfloor | Varies by product | Often faster over open floor areas | Product-specific, not automatically waterproof | Sometimes |
| Larger peel-and-stick tile | Low, imperfections show across larger faces | Varies by product | Short DIY project | Splash zones only, verify product limits | Usually, test removal first |
Ceramic wins for durability, heat tolerance, and water-resistant system design, but it brings demolition, thin-set, grout, and a more permanent commitment. LVP covers a floor quickly and reduces the number of visible joints, though it doesn't create the same compact, grouted-look pattern behind a sink.
Larger peel-and-stick formats can move faster across a room, but their broad faces reveal humps, dips, and texture. The 4x4 format can work around details more gracefully, while its many seams create additional places for dirt and water to collect.
For a broader look at bathroom flooring decisions, Jennifer Gilmer Kitchen & Bath's bathroom floors guide is useful because it places surface appearance alongside moisture, maintenance, and durability considerations. Those same criteria should guide a peel-and-stick decision.
Use 4x4 peel-and-stick when the priority is design flexibility, a tool-light installation, and reversibility. Choose ceramic when the area needs a permanent, properly waterproofed assembly. Choose LVP or a larger format when covering an open, relatively uncomplicated floor matters more than a small-tile pattern.
Most peel-and-stick failures begin before the first liner comes off. The adhesive needs a flat, clean, dry, stable surface with enough grip to support full contact.
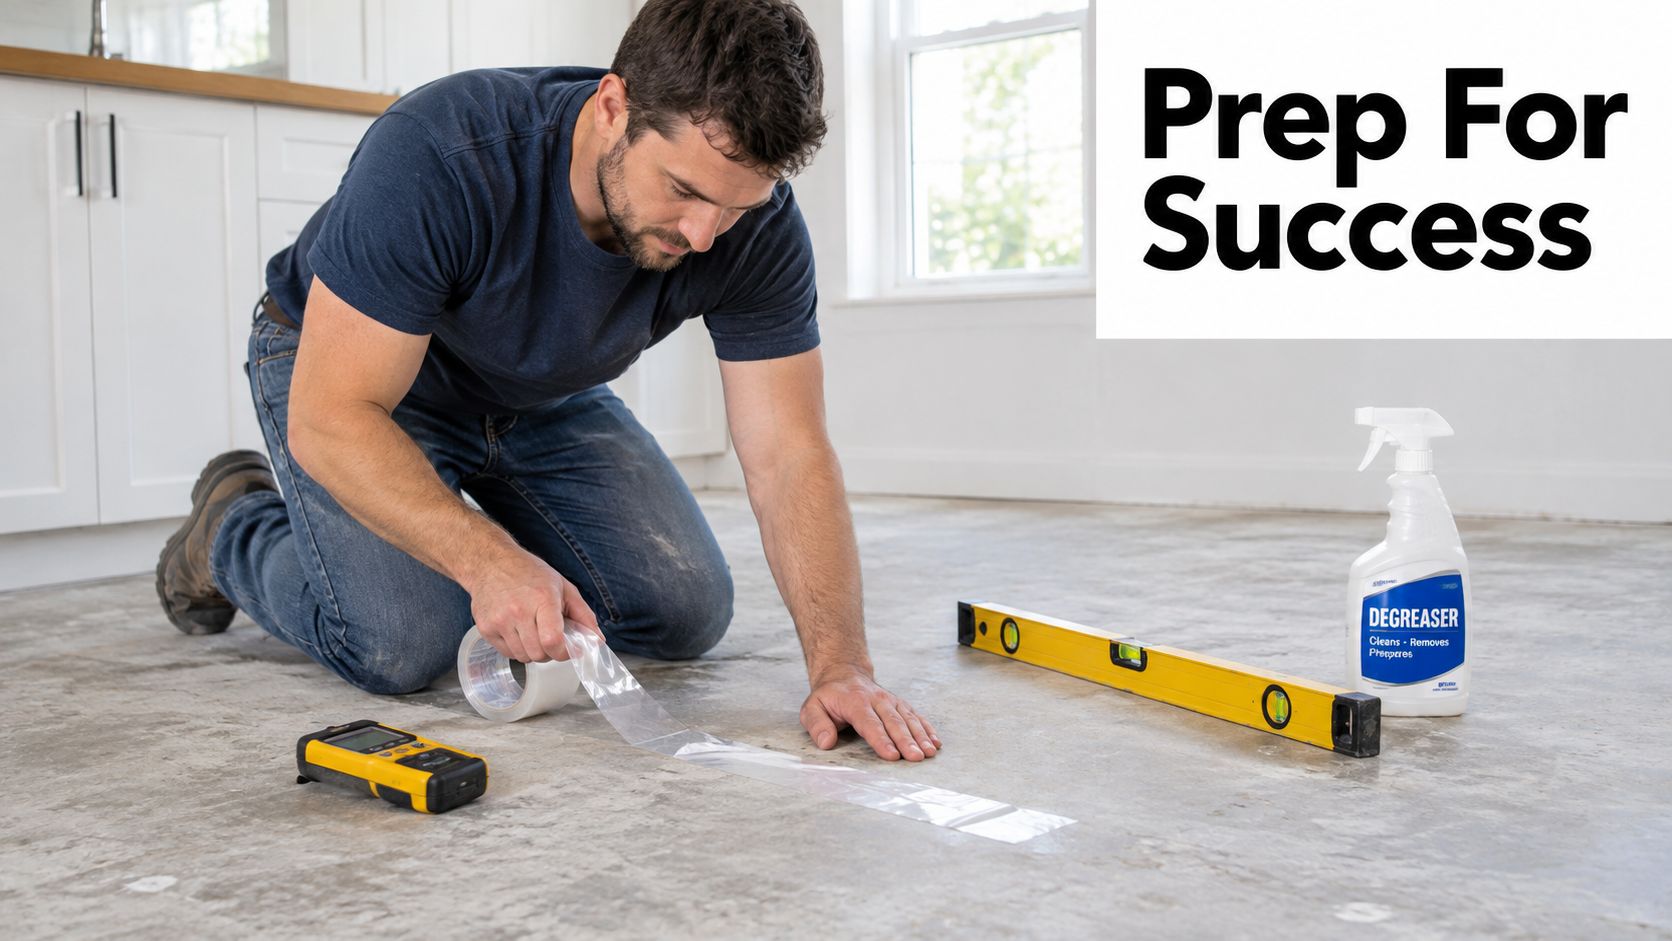
Concrete deserves special attention. Tape a square of clear plastic tightly to the slab and leave it for 24 hours. Condensation or darkening beneath the plastic means you shouldn't cover the surface until you identify and resolve the moisture problem.
Installation guidance also calls for a controlled environment around 60°F to 80°F, with the temperature held within ±5°F for 48 hours before, during, and after installation (technical installation guide). Cold adhesive, shifting temperatures, and dew-point moisture make a marginal surface much less reliable.
Lay a straightedge across the floor or wall in several directions. A manufacturer sheet specifies concrete flatness of 1/8 inch over 6 feet and 1/16 inch over 1 foot (manufacturer installation sheet). Those tolerances are a useful reality check. Small tiles won't hide a ridge, and a dip can leave an edge unsupported.
Fill low spots and remove high spots using a compatible patching compound. On painted drywall, degrease with a TSP substitute, rinse if the product requires it, and let the wall dry completely. Scuff glossy paint with 120-grit paper so the adhesive has some tooth.
Porous drywall or MDF generally benefits from a compatible bonding primer. Sealed laminate and clean, intact vinyl may not need primer, but always follow the tile manufacturer's surface instructions. For more ideas about preparing adjacent trim and finish areas, Joey'z guide to peel-and-stick window trim offers a related example of why clean, sound surfaces matter.
Keep unopened cartons flat in the installation room for 48 hours. This gives the material time to adjust before you force seams into alignment.
Before starting, confirm:
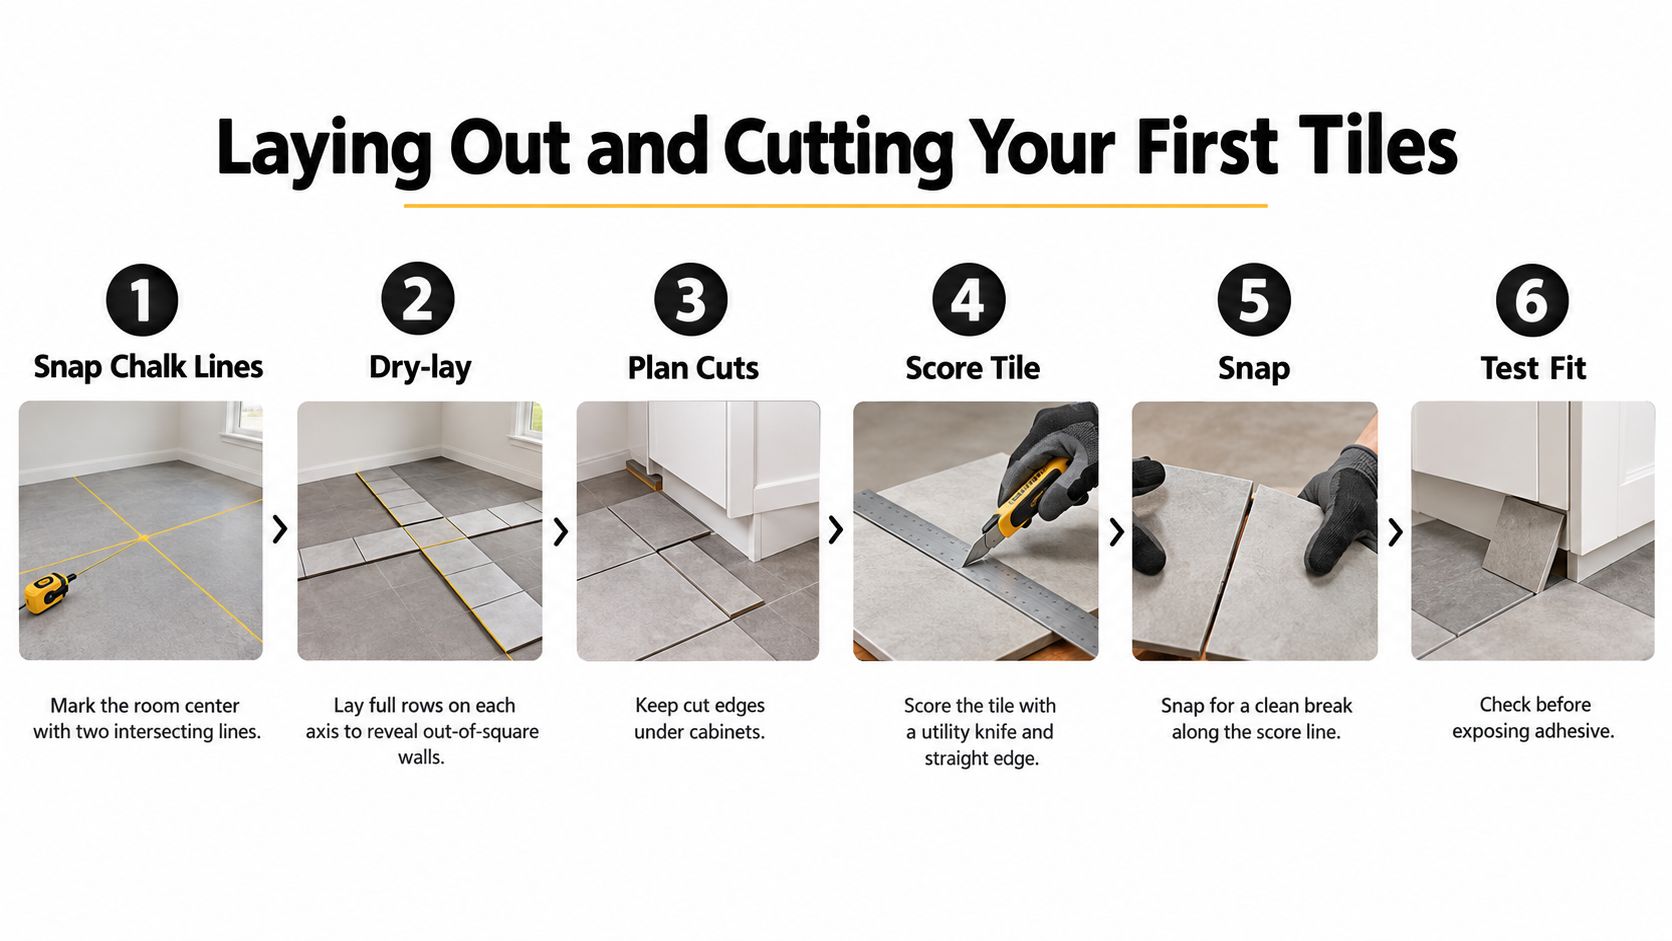
Start with layout, not adhesive. Snap two intersecting chalk lines through the room's center, or establish a level reference on a wall. Then dry-lay a full row along each axis to see what the walls are doing.
A wall can look straight until the final row turns into a narrow wedge. Dry-fitting shows whether you should shift the whole pattern so perimeter cuts look intentional. It also tells you where to place full tiles, which is especially helpful behind appliances, under cabinets, or around a prominent backsplash outlet.
Most 4x4 products mimic grout spacing around 1/16 to 1/8 inch. Check the actual tile or sheet rather than assuming the printed pattern will align automatically.
A stack bond keeps vertical and horizontal joints aligned. A brick offset breaks those lines and can disguise slight wall irregularities. A diagonal arrangement creates more perimeter cuts, so it usually needs the most planning and produces more waste.
Write the intended pattern on your layout sketch. A small shift at the starting line can change every border cut.
Use a sharp utility knife, a steel straightedge, and a sacrificial cutting board. Score the face with controlled pressure, then bend the tile along the cut for a cleaner break. Scissors tend to distort flexible vinyl and leave edges that wander.
For outlets and vents, trace the obstacle onto the tile face. Score the outline twice, make small relief cuts toward the edge, and remove the waste carefully. Number each cut tile on the back with a wax pencil and stack them in installation order.
Pre-cutting border pieces keeps the installation moving once the backing paper is exposed. Test every cut dry. Adhesive is not the time to discover that your outlet cover needs another eighth of an inch.
For measurement fundamentals, use this practical flooring measurement guide before ordering material. You'll also want extra pieces from the same batch for future repairs, though the amount of overage depends on the room shape and chosen pattern.
Peel-and-stick tile rewards slow placement. At the starting corner, remove only the first two inches of backing. Align the exposed edge to your reference line, press that leading edge flat, and draw the paper out gradually while keeping the tile registered.
Don't drop the entire tile onto the surface at once. That traps air, makes pattern correction harder, and can leave one corner carrying more pressure than the others.
Press from the center outward, then run a J-roller or clean rubber grout float across the whole tile. Spend extra time on all four edges and corners. Those are the places most likely to lift when grit or moisture gets beneath the adhesive.
On larger floor runs, avoid creating a repeated four-corner intersection. Staggering the seam direction reduces one concentrated point of stress and makes the pattern look less mechanical. Keep edge gaps consistent, but don't force tiles together so tightly that they buckle.
For edge finishing, matching trim or quarter-round can cover the perimeter where a floor meets baseboards. A thin bead of clear silicone may protect an exposed seam in a splash-prone area, but it doesn't turn the entire tile assembly into a waterproof shower system. Melbourne Tiling Services' overview of bathroom sealer types and costs is helpful for understanding why sealers and perimeter caulks serve different purposes.
Joey'z peel-and-stick tile edge trim is another relevant finish detail when the tile field ends at an exposed edge.
Stay off the new floor for at least 24 hours before water exposure. Sweep rather than mop during the first 72 hours, and follow the product sheet if it requires a longer period before wet cleaning. Some installation instructions require waiting at least five days before wet mopping or scrubbing (installation guidance).
The first cleaning is part of the installation. Treating fresh adhesive like cured flooring is an easy way to create a repair project.
The easiest maintenance routine is also the least dramatic. Sweep or vacuum with a soft brush attachment so grit doesn't settle into the tiny gaps between tiles. Then use a damp microfiber pad with warm water and a small amount of pH-neutral cleaner.
I'd avoid ammonia, bleach, abrasive powders, and steam cleaning unless the product maker specifically approves them. Harsh chemicals can cloud the vinyl wear layer, while heat and forced moisture can soften pressure-sensitive adhesive.
Dry the seams within a few minutes after damp cleaning. Standing water is especially troublesome around corners, transitions, and backsplash joints. Wipe kitchen oils and wine splashes promptly, because residue can attract grit and make a seam look dirty long before the tile itself looks worn.
| Cleaner Type | Safe to Use | Why It Matters |
|---|---|---|
| Warm water with pH-neutral cleaner | Yes, use sparingly | Cleans routine soil without aggressive chemistry |
| Damp microfiber pad | Yes | Limits water around seams |
| Soft-brush vacuum attachment | Yes | Removes grit without scratching |
| Ammonia or bleach | Avoid | Can affect the surface finish and leave residue |
| Abrasive powder | Avoid | May dull or scratch the wear layer |
| Steam mop | Avoid unless approved | Heat and moisture can weaken adhesive |
Protect the floor from concentrated pressure. Felt pads under chairs and movable furniture help, and lifting rather than dragging heavy items reduces edge stress. On a backsplash, keep countertop appliances from rubbing against the lower course.
If a corner pops up, warm it gently with a hair dryer. Peel slowly, remove residual adhesive from the substrate, and check whether the surface is clean and dry before reattaching. Manufacturer-approved adhesive is the safest choice. If the product permits it, fresh double-sided carpet tape or a thin layer of contact cement applied to both surfaces can help with a small repair.
Don't keep pressing a tile down over dust or a damp patch. That only hides the cause until the edge lifts again. If the face is damaged, replace the tile with a spare from the original batch, because a later replacement may have a visibly different print or sheen.
The recurring failures are predictable. Corners lift when the substrate carries dust, grease, texture, or moisture. Seams discolor when water repeatedly wicks into gaps. A pattern drifts when the installer follows an out-of-square wall instead of a deliberate reference line.
A recent home-design overview also emphasizes that peel-and-stick flooring needs a clean, smooth, level subfloor, because bumps and debris can telegraph through the tile and contribute to edge lifting (renter-friendly DIY flooring guidance). That's why “easy DIY” describes the tool list, not the tolerance for sloppy prep.
Before you commit, confirm:
Before using any floor tile in a kitchen, bath, or entry, check whether it meets the performance requirements relevant to that space. ASTM F1066 includes slip-resistance requirements for vinyl composition tile using a static coefficient of friction test (ASTM flooring information). That standard doesn't automatically certify every peel-and-stick product, but it's a reminder to evaluate traction rather than choosing by pattern alone.
For wet zones, separate three situations. A backsplash may handle ordinary splashes when seams and edges are protected. A bathroom floor faces standing water, cleaning, and slip concerns. A shower wall receives constant moisture and steam, where independent testing found water accumulating behind seams within 12 hours, even when the surface beaded water (peel-and-stick shower tile testing). Water-resistant faces are not the same as a waterproof tile system.
Joey'z Shopping offers self-adhesive vinyl floor tile products, including a Flooring & Tiling collection and tile listings designed for peel-and-stick installation without glue or specialized tools. Visit Joey'z Shopping to browse tile options alongside practical home updates for renters, homeowners, and DIY projects.