
Join the Joey'z Family!
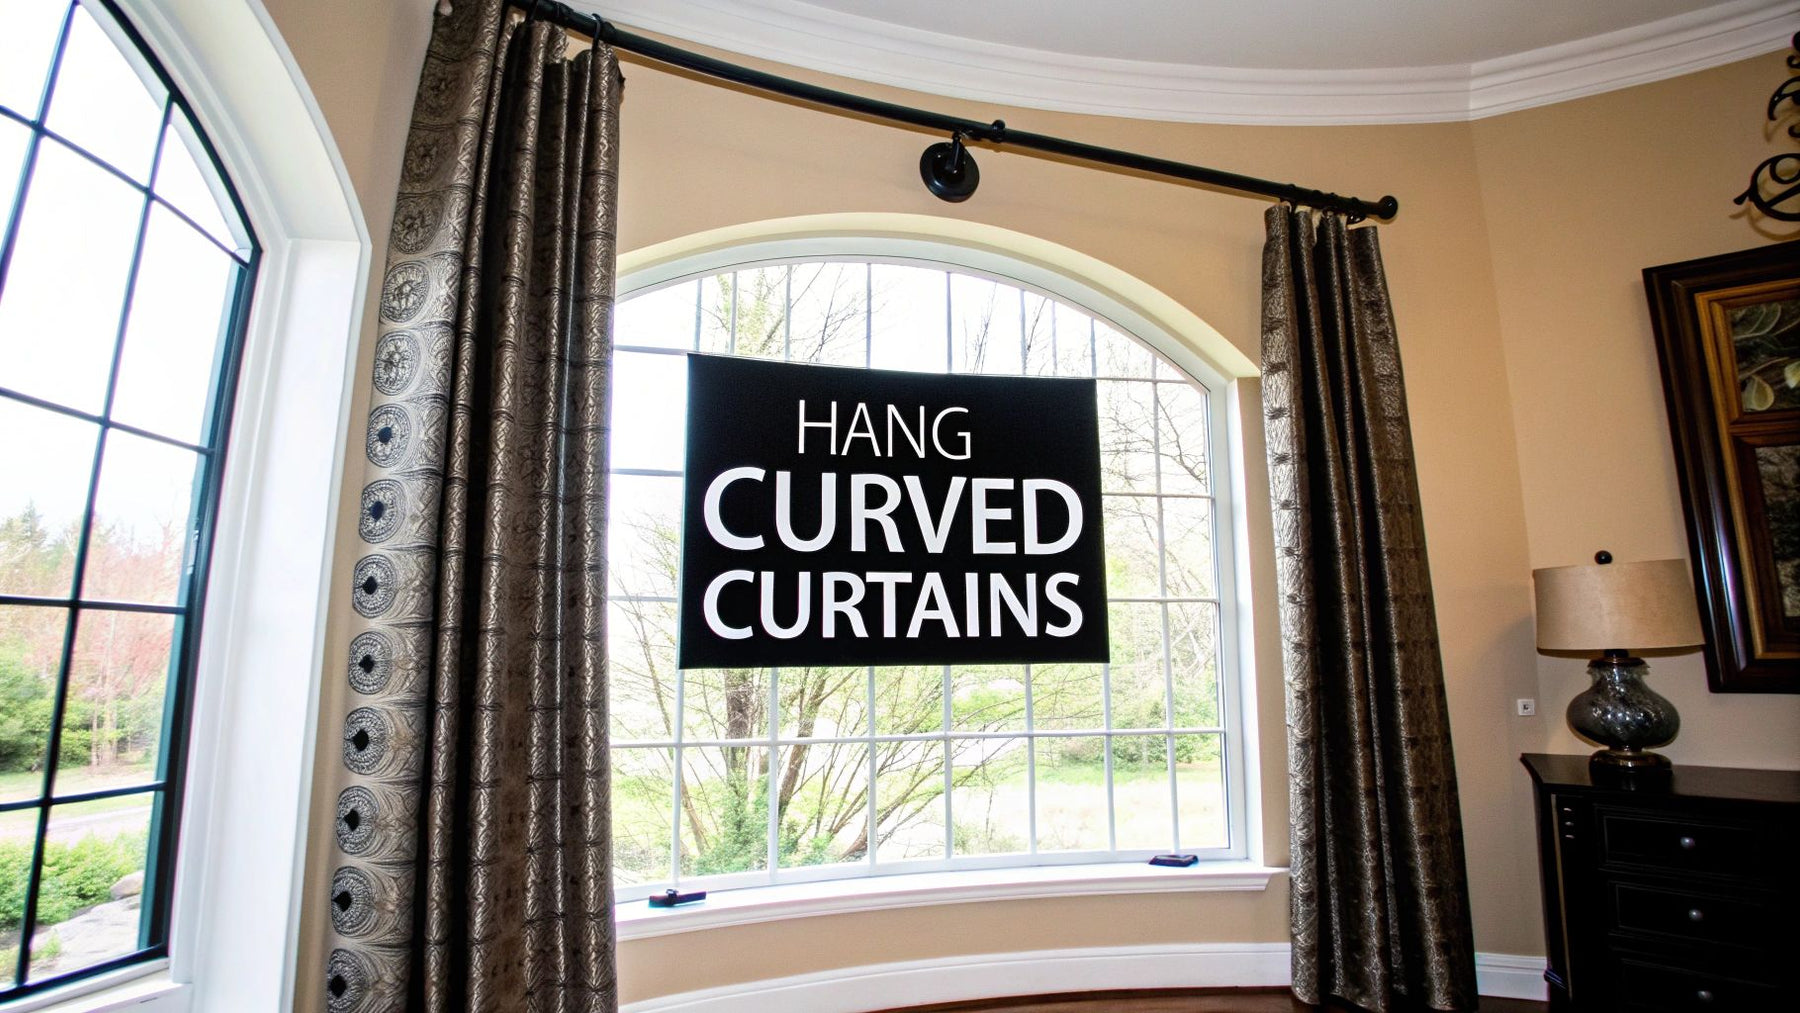
Hanging curtains on a curved window often feels like a custom, professional-only job, but it’s a project you can absolutely tackle yourself. The short answer is you'll need specialized hardware: either a flexible curtain track or a custom-bent rod designed to follow your window's unique arc. Get that part right, and you're halfway to a beautiful result.
This guide will walk you through everything, from choosing the right hardware to measuring flawlessly and avoiding common mistakes, so you can dress your curved windows with confidence.
Figuring out how to hang curtains on a curved window isn't just about picking a pretty fabric—it's a mini-engineering project. Unlike standard windows, you can't just grab any rod off the shelf. The curve demands hardware that can perfectly trace its shape, ensuring your curtains hang beautifully without awkward gaps or snagging when you open them.
The real challenge is getting precise measurements and sourcing that specialized hardware. For architectural features like these, you must measure the curve itself, not just the width. While DIY-friendly flexible tracks are accessible, a professionally bent rod can cost anywhere from $250 to over $1,500, depending on the material and curve complexity, as noted by home service experts at custom window treatment costs over on Angi.com.
Before you drill any holes, consider these crucial elements that will make or break your project:
Expert Tip: Always plan for "stack back." This is the space your curtains occupy when fully open. Ensure your rod extends far enough on either side of the window so the stacked curtains don't block your view or natural light.
Here’s a quick breakdown of the most common hardware solutions for curved windows. Each has pros and cons, helping you narrow down what works best for your home.
| Rod Type | Best For | Flexibility | Average Cost |
|---|---|---|---|
| Flexible Curtain Track | DIY projects, gentle to moderate curves, lightweight to medium-weight curtains. | High - can be bent by hand to fit most curves on-site. | $ - $$ |
| Custom-Bent Rod | Heavy drapery, complex or tight curves, and a high-end, seamless look. | Low - professionally bent to exact template specifications. | $$$ - $$$$ |
| Sectional Rod with Corner Connectors | Bay windows with angled corners, not true curves. | Moderate - adjustable connectors create angles, not a smooth curve. | $$ - $$$ |
A flexible track is often the most accessible starting point, but a custom rod delivers that truly polished, professional finish. Now, let's get into the specifics of how to choose and install each one.
Choosing the right hardware is the most important decision you'll make when figuring out how to hang curtains on a curved window. Your choice here affects everything from the final look to functionality, so it's about matching the hardware to your window's shape and curtain fabric.
The two main players are flexible curtain tracks and custom-bent metal rods. Let's break down which one might be right for you.
A flexible curtain track is a fantastic option for DIY projects. Usually made from PVC or aluminum, they are designed to be bent by hand to follow your window's curve. They're a great fit for lighter fabrics like sheers or cotton blends and create a clean, modern vibe since the track is hidden behind the curtain.
But what if you're dreaming of heavy, luxurious drapes? A flexible track might struggle under the pressure. Some thermal-lined curtains can weigh upwards of 20 pounds per panel, calling for something with more muscle.
This is where a custom-bent metal rod comes into its own. These are serious pieces of hardware crafted from strong materials like steel or iron, professionally shaped from a precise template of your window's curve. It’s an investment, but their strength is second to none, meaning you'll never worry about sagging.
For dramatic turret windows or any window with a sharp curve, a custom rod is essential. A flexible track could kink under that pressure. Plus, a custom rod adds a traditional, decorative element, becoming a beautiful feature in its own right.
Getting the rod right is half the battle; the supporting hardware is just as critical.
As an interior design professional, I see people underestimate curtain weight all the time. To be safe, always pick a rod and brackets rated to hold at least 1.5 times the actual weight of your drapes. A little foresight prevents drooping and ensures smooth operation for years.
Of course, picking the right fabric is just as crucial as the hardware. For more guidance, take a look at our complete guide on how to choose curtains for every room. Combining sturdy hardware with the right fabric is the secret to a beautiful, professional-looking finish.
Getting your measurements right is the absolute key to a professional finish. When you learn how to measure a curved window accurately, you lay the groundwork for a flawless installation, whether you’re using a flexible track or a custom-bent rod.
Unlike a standard window, a curve has its own rules. Be patient and precise—a few extra minutes here saves hours of frustration later. You’ll need a pencil, paper, and a flexible sewing measuring tape. A rigid metal tape measure won't work for this job.
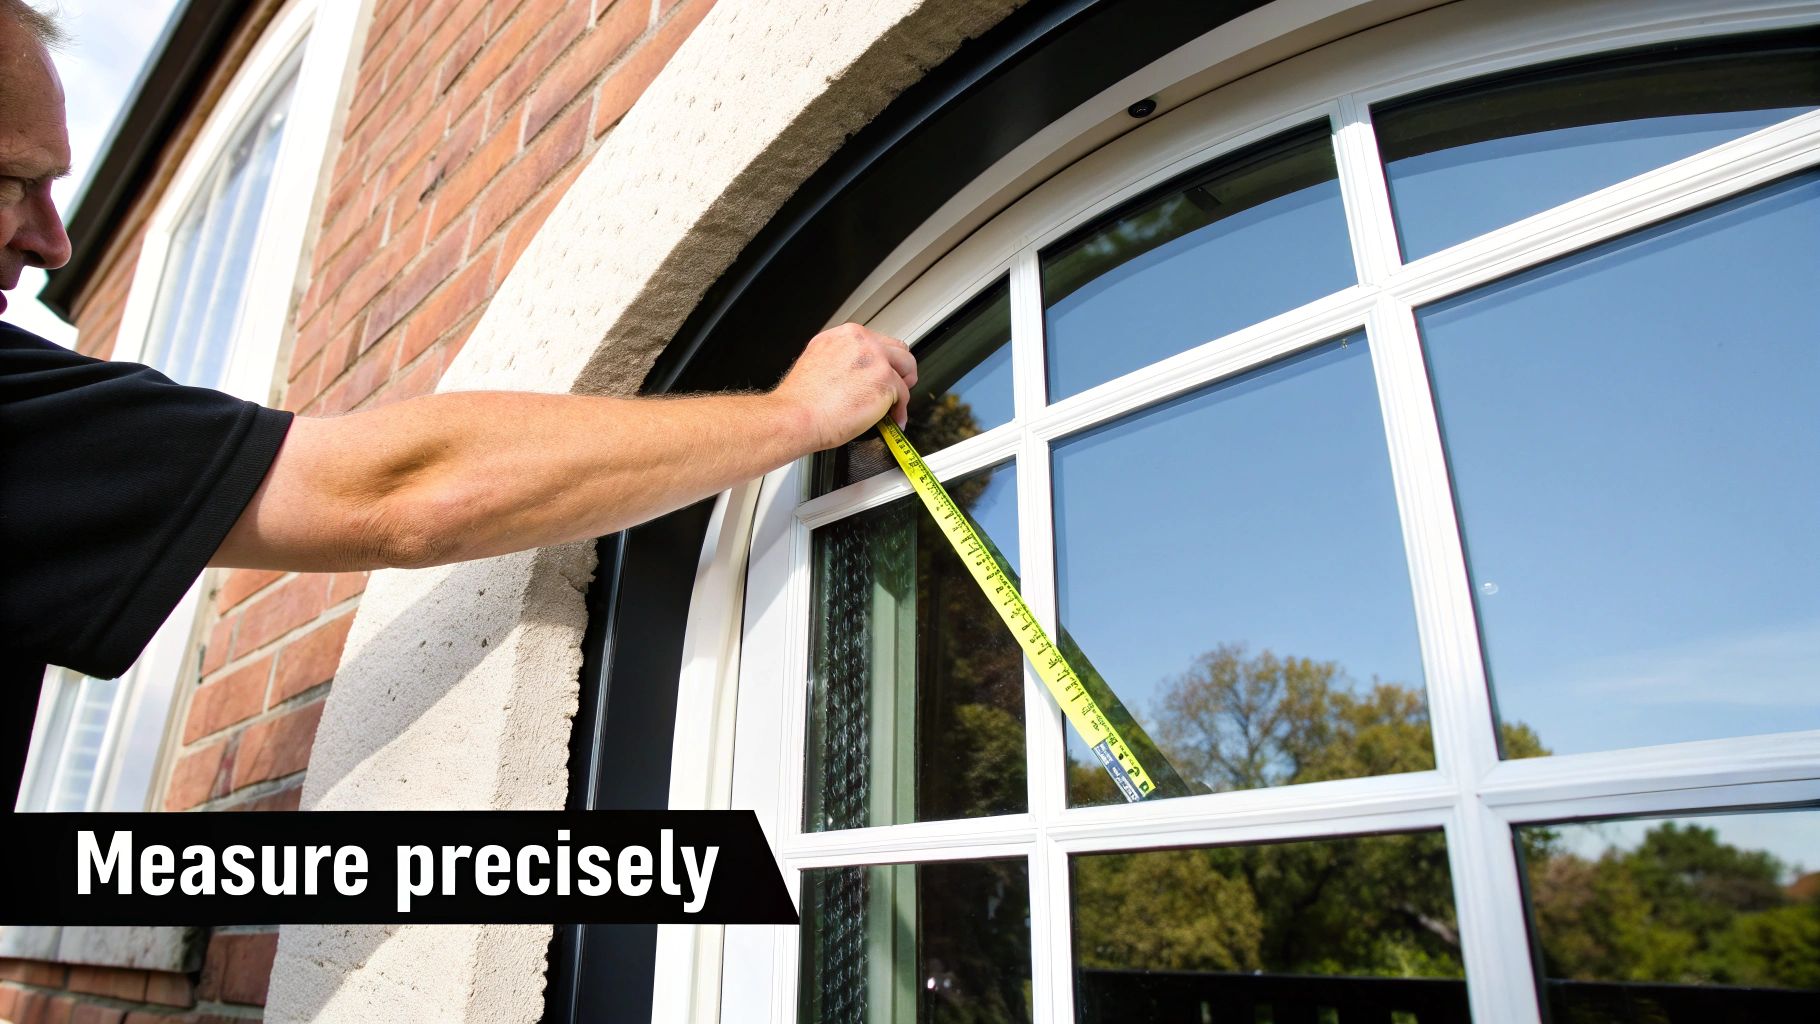
First, decide where your curtain rod will be installed. A good rule of thumb is about four to six inches above the window frame. This spot is your installation line.
With your flexible measuring tape, carefully follow the curve of the wall along this line from one endpoint to the other. This measurement is your arc length. It tells you exactly how long your curtain rod or track needs to be.
Next is the curve’s depth, sometimes called the projection. Find the center of your arc length and measure in a straight line back to the deepest part of the window curve. This number is critical for ordering a custom-bent rod because it defines the bow's sharpness.
Insider Tip: For a foolproof custom rod, make a paper template. Tape large pieces of craft paper together, hold them up to the curve, and trace the wall's exact shape. You can mail this physical template to your rod fabricator to eliminate all guesswork.
The curtain drop is the vertical measurement from your rod to where you want the curtains to end. This choice sets the room's style. You have three classic options:
Measure from your marked installation line down to your desired hem location. Do this in at least three places along the curve—left, center, and right. Floors are rarely level, so use the shortest measurement to ensure your curtains don't drag unevenly.
For more in-depth tips, check our guide on how to measure a window for curtains perfectly. Combining these techniques will ensure your curved window treatment looks nothing short of spectacular.
With hardware in hand and measurements double-checked, it's time for installation. Learning how to hang curtains on a curved window is all about getting the bracket placement right for a secure, professional-looking result.
Think of brackets as the foundation. Whether using a flexible track or a custom rod, improper support is the number one reason for sagging. The weight of the fabric puts constant downward force along the entire curve.
Before you drill, plan where each support bracket will go. Start by placing a bracket at each end of the rod, about four inches in from where the curtains will stack when open.
From there, distribute the remaining brackets evenly along the curve. For most curtains, a bracket every 24 to 30 inches will work. But for heavy blackout or thermal drapes, close that gap to every 18 to 24 inches for extra reinforcement. Use a pencil to lightly mark the wall for each bracket, ensuring they all align with your chosen height. If you need a refresher, see our expert tips for perfect curtain placement.
A Pro’s Reality Check: Always use a stud finder before you drill. If a mark lines up with a wall stud, you've hit the jackpot! Use the included wood screws for a rock-solid hold. If not, don't worry—that's what wall anchors are for.
When a bracket doesn't land on a stud, use wall anchors designed for your wall type (drywall, plaster, or masonry). Most kits include standard plastic anchors, but it’s smart to match the anchor to your wall material.
At each pencil mark, drill a pilot hole, then gently tap the anchor in until it's flush with the wall. Now you can screw the bracket securely into the anchor. Once all brackets are mounted, you're ready for the main event.
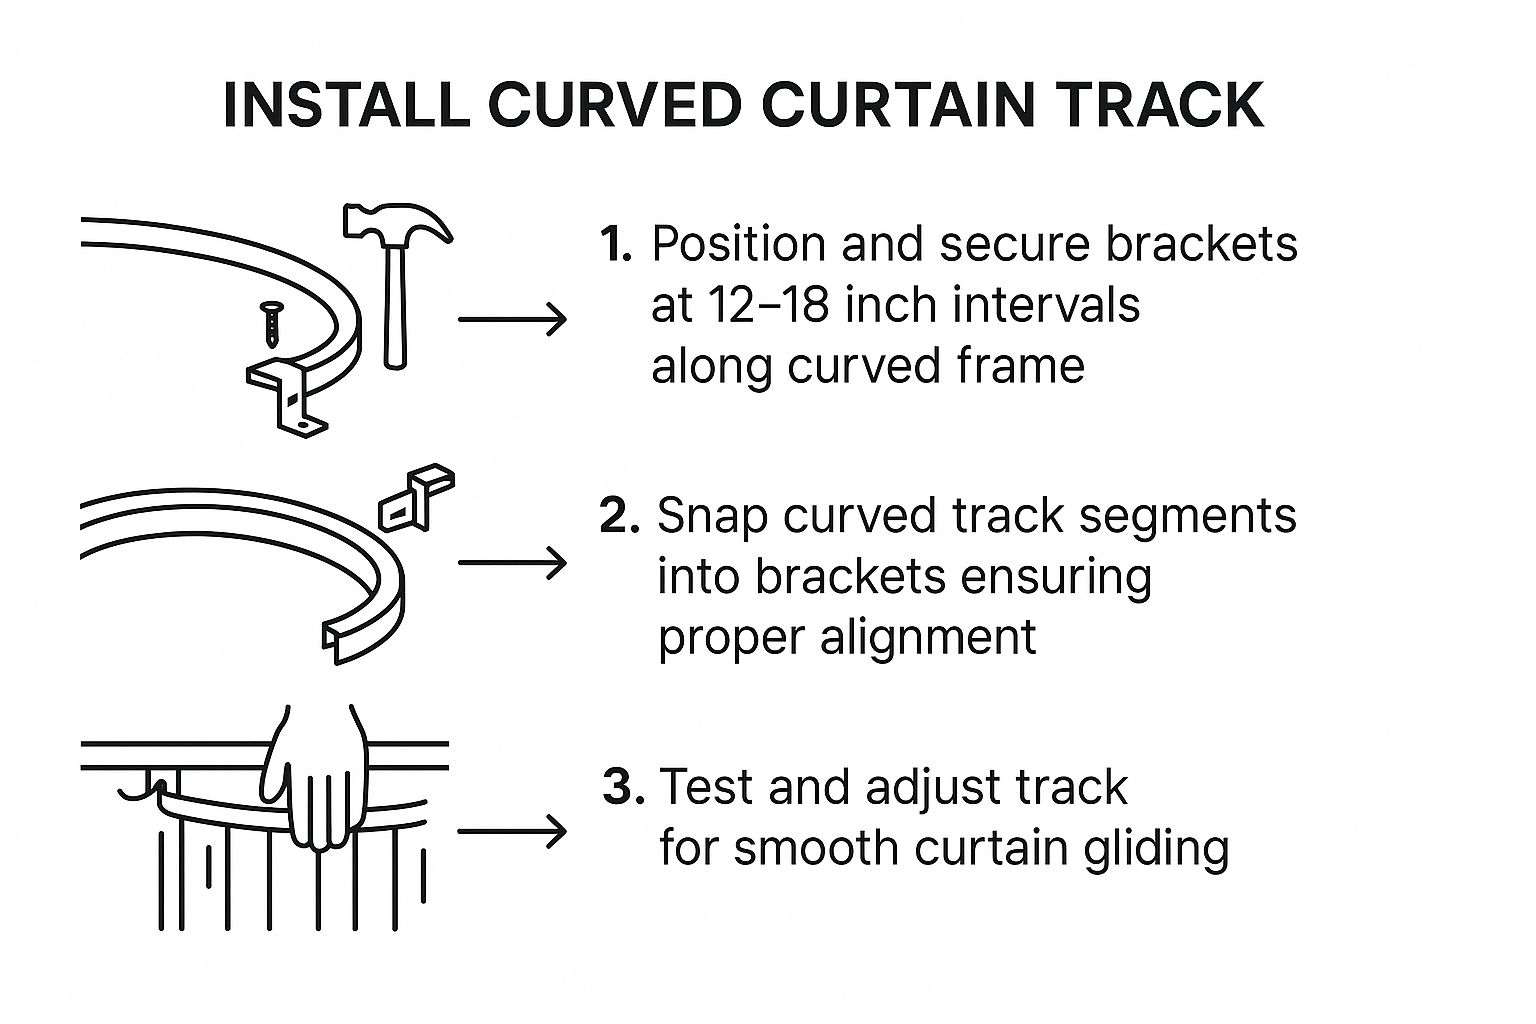
If using a flexible track, gently bend it to match your wall's curve before clipping it into the brackets. For a custom rod, it should already be a perfect fit.
Finally, it’s time for the curtains. Thread them onto the rod or attach hooks to the track's gliders. I recommend getting a helper for this last part. Carefully lift the assembly and settle it into the brackets. Secure it with the setscrews on each bracket, make any final adjustments, and then step back to admire your work.
Hanging curtains on a curved window is a project where little details matter. These small things separate a decent DIY job from a polished, professional look. Let's walk through common slip-ups and how to sidestep them.
One of the first places people go wrong is with the fabric. It's tempting to choose a heavy, stiff material, but it will fight you on a curved rod and won't hang in elegant, soft folds.
My advice? Always lean towards fabrics with a beautiful, soft drape. Think linen blends, lightweight velvets, or sheers. These materials are more cooperative and will follow the curve, creating a graceful, flowing effect.

For curtains to open and close effortlessly, the heading style—the top of the curtain—is incredibly important.
Another classic mistake is not using enough support brackets. With a curved installation, gravity pulls down across the entire arc. If you only place brackets at the ends, you're guaranteed to get a sag in the middle. As a rule, never have more than 30 inches between brackets.
Beyond hardware and fabric, a few measurement missteps can throw off the final look.
The biggest is misjudging the curtain stack-back—the space curtains take up when pushed open. If you don't account for this by extending your rod at least six inches past the window frame on each side, your open curtains will block a good chunk of your window, light, and view. As designers at publications like Style by Emily Henderson often point out, maximizing natural light can make any room feel bigger.
Getting the fullness of the curtains wrong is another common oversight. You want curtains to look lush when closed, not like a flat sheet. The combined width of your curtain panels should be at least 1.5 to 2 times the total length of your curved rod.
By keeping these mistakes in mind, you’ll be well on your way to mastering how to hang curtains on a curved window with confidence.
When figuring out how to hang curtains on a curved window, a few questions always pop up. It’s a unique challenge, so let's walk through the specifics to ensure your project is a success.
No, a standard straight rod will not work for a truly curved window. Trying to use one will create awkward gaps between the rod and the wall, which looks unfinished and compromises light control and privacy. You must use hardware designed for the curve, such as a flexible track or a custom-bent rod.
Lighter, more pliable fabrics like linen blends, soft cottons, or sheers work best as they hang and move more gracefully. The curtain's heading (the top part) is also critical. Pinch pleats and pencil pleats are excellent choices because they create uniform folds that glide smoothly on track carriers or rings. You can use heavier fabrics like velvet, but they require a very sturdy metal rod with extra support brackets to prevent sagging.
The number of brackets depends on the rod's length and the curtains' weight. A good rule of thumb is to place one support bracket every 24 to 30 inches for stability. For heavier drapes like thermal or blackout curtains, place brackets closer together, about every 18 to 24 inches, for extra reinforcement and to prevent drooping.
Yes, absolutely! Creating a layered look with double curtains is completely doable. This popular style often pairs a sheer curtain for daytime privacy with a heavier blackout panel for the evening. To achieve this, you will need to install a double-track flexible curtain system, which features two parallel tracks so each layer can operate independently.
At Joey'z Shopping, we believe beautiful window treatments should be accessible to everyone. We're here to help you find the perfect solution for every window in your home, no matter the shape. Explore our wide selection of high-quality curtains and hardware at https://joeyzshopping.com.