
Join the Joey'z Family!

Learning how to make a pleated curtain is likely much simpler than you imagine. The process boils down to four key stages: precise window measurement, calculating fabric needs, creating crisp pleats with specialized tape, and sewing it all together. This guide offers a step-by-step walkthrough, helping you achieve a high-end, custom look without the high-end price tag.
Taking on a DIY curtain project is more than just a weekend craft; it's your ticket to a truly custom home aesthetic without the hefty designer cost. Let's be honest, store-bought curtains often miss the mark—they can be too short, lack fullness, or simply not match the style you envision.
When you make your own, you're in complete control. You get to hand-pick the perfect fabric, determine the exact length, and choose a pleat style that truly complements your room's decor.
The rewards for creating your own window treatments are immense. While you'll certainly save money, the more significant benefit is achieving a perfect fit that enhances your room's best features. We've all seen it—ill-fitting curtains can make a space feel cramped and unfinished.
Here’s why the effort is always worth it:
To give you a quick overview, here's a simple breakdown of what this project involves from start to finish.
| Stage | Primary Goal | Key Tip |
|---|---|---|
| Measuring & Planning | Get precise window and rod measurements. | Always measure twice! Add extra width for fullness and return to the wall. |
| Fabric Calculation | Determine the exact yardage needed. | Use a fullness ratio of at least 2.5x your rod width for a professional look. |
| Creating the Pleats | Form and secure uniform pleats using buckram and tape. | Mark your pleats and spaces carefully before sewing for even results. |
| Sewing & Finishing | Assemble the panels, sew the side and bottom hems. | Press every seam as you go. It makes a world of difference in the final look. |
| Hanging | Attach pleater hooks and hang your finished curtains. | "Train" your curtains by tying them in their folds for a few days to set the pleats. |
This table helps visualize the journey, but don't worry—we'll dive into each of these steps in detail.
This project is about more than just sewing. It's about adding a truly custom, high-end element to your space with your own hands. You're not just covering a window; you're framing a view and adding a layer of texture and elegance that store-bought options just can't match.
The soul of a truly beautiful curtain lies in its fabric. This is where your project really begins, and your choice here is what separates a homemade curtain from a custom-made one. The right material will drape elegantly, hold a crisp pleat, and transform the light in your room.
This isn’t just about picking a color you love; it’s about understanding how a fabric’s weight, texture, and composition will behave once it’s hanging. Think of this as laying the foundation for your entire project.
When it comes to pleated curtains, the best fabrics are typically medium-weight materials that offer a good balance of structure and flow. You’re looking for something sturdy enough to hold a pleat but not so stiff that it looks rigid or unnatural.
Natural fibers are a fantastic choice, and it's no surprise they're so popular. According to industry analysis, natural fabrics like cotton and linen are leading choices for window coverings due to their durability and classic feel.
Here are a few of my go-to contenders for any pleated curtain project:
Insider Tip: Always pre-wash your fabric before you even think about cutting. Nearly all fabrics, especially natural fibers like cotton and linen, will shrink. Skipping this step could leave you with curtains that are heartbreakingly too short after their first wash.
Lining is the unsung hero of custom curtains. It adds body and weight, helping the pleats hang in those uniform, graceful folds you see in magazines. It also protects your main fabric from sun damage over time, a huge plus for preserving your hard work.
If you want to take a deeper dive, our guide on different curtain cloth types can help you weigh your options.
Having the right tools ready makes the entire process smoother. You don't need a professional workroom, but a few key items are non-negotiable for a polished finish.
Must-Have Sewing and Measuring Tools:
Getting your measurements right is the absolute bedrock of any custom curtain project. Your measuring tape is the most critical tool you'll use—nailing this part ensures your finished curtains will hang beautifully and look professionally made.
This isn't just about noting the window's height and width. We're thinking through every detail, from rod placement to hem length, to create a look that feels intentional and polished.
First, let's figure out exactly how long your curtains should be. This one measurement can dramatically change the feel of your room—a well-hung curtain can make ceilings feel higher and the entire space feel more grand.
To find your finished length, measure from the bottom of your curtain rod (or curtain rings) down to where you want the fabric to end. You have three main options:
Remember to measure in at least three different spots—left, middle, and right. Floors are rarely perfectly level, so using the shortest measurement ensures your curtains don't drag unevenly.
Once you’ve settled on your desired finished length, you need to add extra fabric for the top header and bottom hem. A good rule of thumb is to add 8 inches for a generous double hem at the bottom and another 4-6 inches for the header at the top.
Now we get to the most important calculation: the width. This is what gives pleated curtains their signature deep, luxurious folds. Skimping here is a recipe for flat, sad-looking panels.
The short answer is: the general rule for pleated curtains is to use fabric that is 2.5 to 3 times the width of your curtain rod. This generous ratio is what allows the fabric to fold back on itself, creating classic, crisp pleats without looking stretched or sparse.
Here’s the simple formula to remember:
(Curtain Rod Width x Fullness Ratio) + Side Hem Allowance = Total Fabric Width Needed
For a 100-inch wide window, you'd want 250-300 inches of fabric. If you want to dive deeper into measuring, our comprehensive curtains measuring guide is a great resource.
Let’s walk through a real-world example. Imagine your curtain rod is 60 inches wide and you're aiming for a standard fullness of 2.5.
Since most home decor fabric comes in a standard width of 54 inches, you would divide your total needed width (158 inches) by the fabric width (54 inches). This gives you 2.9, which you’ll round up to 3. This tells you that you need to buy three full panels of fabric to sew together for this window.
This is where the magic really happens. Your careful planning and measuring are about to pay off as you transform flat fabric into a beautifully structured curtain. We're moving from blueprint to build.
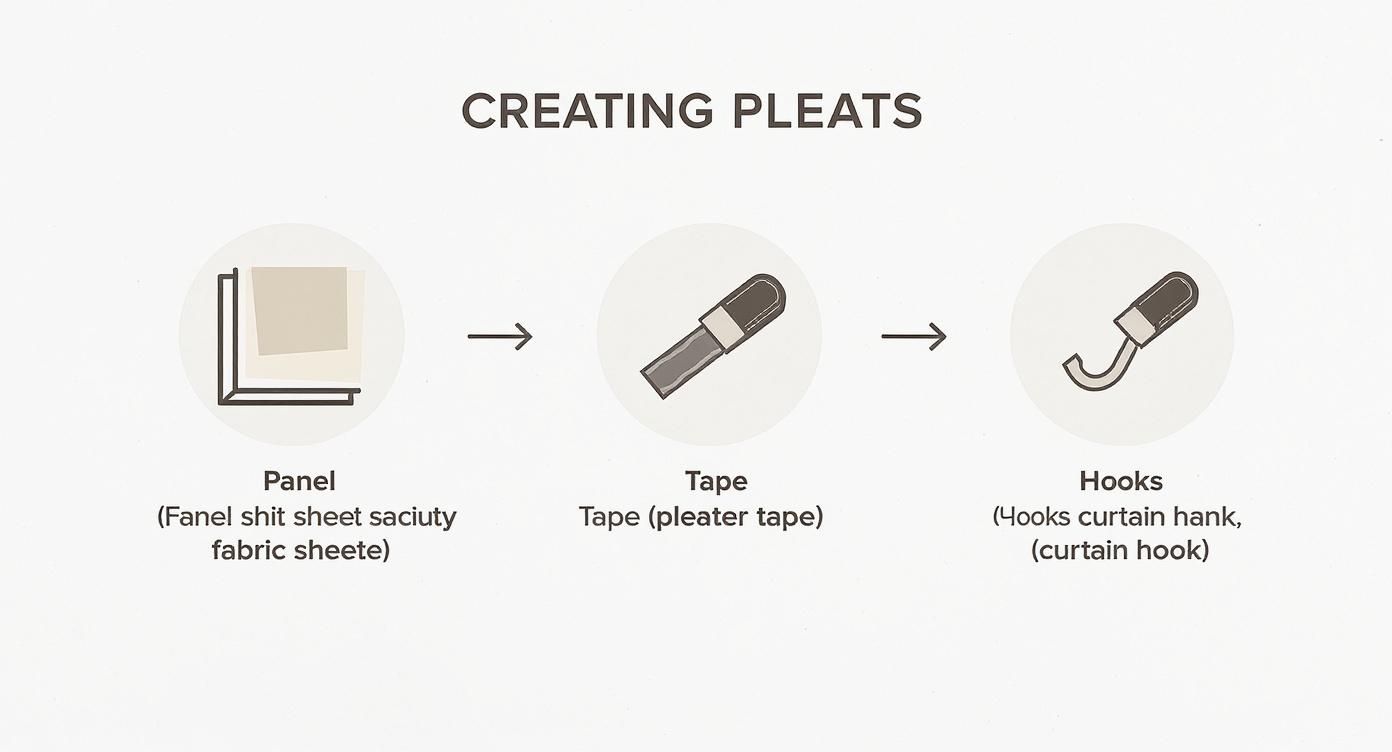
The process comes down to a few key stages. First, we’ll build the main curtain body, then attach the pleater tape that’ll be our guide, and finally, form the pleats themselves.
Before we can think about pleats, we need one large, seamless curtain panel. Since most decor fabric is 54-inches wide, you'll almost certainly need to join several lengths to get that generous 2.5x fullness.
Start by placing two fabric panels right sides together, pinning them along one long edge. Sew a simple straight seam using a 1/2-inch seam allowance. Once done, you absolutely must press the seam open with a hot iron. This isn't a step to skip; it helps the seam lie perfectly flat, making it nearly invisible.
Keep doing this until all your main fabric panels are one piece, then repeat the process for your lining panels. You should end up with two giant panels: one for your main fabric and one for the lining. If you're new to working with lining, our guide on how to make a lined curtain dives deeper into this specific process.
Pleater tape is a brilliant invention that makes creating uniform pleats straightforward. This stiff, woven tape has pockets built in to guide your hooks, so every fold is evenly spaced without tricky math.
To attach it, lay your finished curtain panel flat, wrong side up. Fold the top raw edge over by about 1.5 inches and press. Position the pleater tape along this top edge, covering the raw edge you just folded down, with the top of the tape sitting just below the top fold of the curtain.
Pin the tape securely, then stitch it down along both the top and bottom edges of the tape. A little backstitch at the start and end of each seam will lock everything in place.
The style of pleat you choose sets the tone for the entire window treatment. Here’s a quick look at the most popular options.
| Pleat Style | Look & Feel | Best For | Fabric Fullness |
|---|---|---|---|
| Pinch Pleat | Classic, tailored, and formal. Groups of pleats are "pinched" together. | Traditional living rooms, dining rooms, primary bedrooms. | 2.5x the window width |
| Box Pleat | Structured, clean, and contemporary. Creates wide, flat folds. | Modern or minimalist spaces; great for geometric or solid fabrics. | 3x the window width |
| Goblet Pleat | Ornate and luxurious. Pleats are shaped like a wine glass at the top. | Formal, high-ceilinged rooms where you want a dramatic statement. | 2.5x the window width |
| Pencil Pleat | Casual, relaxed, and gathered. Thin, tightly packed folds. | Bedrooms, nurseries, and casual living areas. | 2x to 2.5x the window width |
With pleater tape attached, it’s time for the most satisfying part: creating the pleats. This is where you’ll insert the pleater hooks into the pockets and watch the fabric transform.
Let's look at how to create the most common style using standard four-prong pleater hooks:
Now that your pleats are formed, the last steps are about creating clean, finished edges. This gives the curtain its final weight and structure.
For the side hems, lay your curtain flat. Fold the raw side edges of both the main fabric and lining layers in by about 1.5 inches, then fold over again by another 1.5 inches to create a sturdy double hem. Press firmly and stitch it down.
For the bottom, a deeper hem is traditional. A 4-inch double hem is the industry standard. Simply fold the bottom raw edge up by 4 inches, press, then fold up another 4 inches and press again.
You can sew the bottom hem with your machine or use a blind hem stitch for an invisible finish. Once the final stitch is in, give the entire curtain one last, thorough pressing.
You've done the hard part—the sewing is finished and your pleats look fantastic. But the magic that transforms a well-made project into a designer-quality window treatment happens right here, in the finishing touches.
These final steps give your work a professional polish, ensuring your curtains hang with the grace they deserve. It's less about sewing now and more about styling your creation.
Before your new curtains go anywhere near a window, they need one last, thorough pressing. A hot iron with plenty of steam doesn't just knock out wrinkles; it locks in your stitches, sharpens the hems, and sets those pleats into a crisp, uniform shape.
Take your time and work on a large, flat surface. Give extra attention to the side and bottom hems. When you get to the pleated header, carefully press the fabric between the pleats, reinforcing the beautiful folds.
This final press gives your curtains their "memory." It encourages the fabric to hang in gorgeous, column-like folds from the moment you hang them.
Where you hang your curtain rod can completely change the feel of a room. A well-placed rod makes windows look bigger and ceilings feel taller.
For professional-looking results, follow these two golden rules:
This strategic approach is a huge part of why the global curtains and window blinds market keeps growing, as homeowners seek that perfect blend of beauty and function.
Okay, your curtains are up. There’s just one last trade secret to make them look absolutely perfect: training the drapes. This simple technique teaches the fabric to hang in neat, consistent folds.
Start at the top by arranging the pleats evenly. Then, using your hands, gently guide the fabric into uniform folds from the header down to the hem. Once arranged, loosely tie the panel together in three spots—top, middle, and bottom—with soft strips of fabric or ribbon.
Leave the curtains tied for 48 to 72 hours. This gives the fabric time to settle into its new shape. When you untie them, the material will naturally fall back into those perfect, memory-set folds.
Learning how to make a pleated curtain is satisfying, but it's normal to have questions. This section tackles the most common queries to help you get unstuck and back to your project with confidence.
The short answer is: a medium-weight fabric with enough body to hold its shape is best.
Natural fibers like cotton duck, canvas, linen, and linen blends are fantastic. They have a lovely drape, form structured pleats, and are easy to sew. For a more formal feel, velvet, faux silk, or dupioni are excellent choices. Avoid anything too flimsy or too rigid, as they won't hold a defined pleat or will be too bulky.
The short answer is: aim for fabric that is 2.5 to 3 times the width of your curtain rod.
This "fullness" is what creates the deep, gorgeous folds that make pleated curtains so special. For example, if your curtain rod is 80 inches wide, you'll want a total fabric width between 200 inches (80 x 2.5) and 240 inches (80 x 3) to ensure your curtains look lush and full.
The short answer is: yes, but it requires much more time and precision.
The traditional method involves manually measuring, marking, folding, and stitching every single pleat. While this "hand-formed" technique offers ultimate control, it is an advanced skill. Pleater tape is a brilliant shortcut that guarantees a uniform, polished finish with a fraction of the effort, making it highly recommended for all skill levels.
The short answer is: care depends entirely on your fabric choice.
Here are a few general guidelines:
Ready to dive into your own curtain-making adventure? At Joey'z Shopping, we have everything you need to bring your ideas to life, from stunning fabrics to all the essential sewing supplies.