
Join the Joey'z Family!

Measuring for outside mount window blinds is straightforward once you know the rules. The short answer is: measure the total width of your window frame and add 3 to 6 inches. For the height, measure from top to bottom and add at least 2 to 3 inches above the frame for the mounting hardware.
This extra coverage is the secret sauce. It’s what blocks out pesky light, maximizes privacy, and gives your new blinds a clean, professionally installed look. Follow this guide to learn exactly how to measure for window blinds outside mount and get a perfect fit every time.
Before grabbing your tape measure, it helps to understand why an outside mount is often the best choice. Unlike inside-mount blinds that fit inside the window casing, an outside mount is installed on the wall or trim around the window. This approach isn't just a Plan B; it’s a design strategy with serious perks.
Choosing an outside mount isn't just a fix for shallow window frames—it's a smart design move. For starters, it can make a small window appear much larger, creating a more open feeling in any room.
It’s also the perfect problem-solver for:
The core principle is simple: add extra width and height to your measurements to ensure complete coverage. This prevents those annoying light leaks that disrupt sleep or cause glare on your TV. The standard recommendation is to add 2 to 3 inches on each side, for a total width increase of 4 to 6 inches.
This table breaks down the simple additions you'll need for a perfect outside mount installation. Following these guidelines ensures you get the coverage you need for light control and privacy.
| Measurement Type | Standard Addition | Reason |
|---|---|---|
| Width | Add 3 to 6 inches total | Prevents light gaps on the sides and makes the window appear larger. |
| Height | Add 2 to 3 inches total | Provides a solid surface above the frame to securely mount the headrail. |
With these simple rules, you can measure with confidence. For those with especially big windows, exploring different blinds ideas for large windows can spark inspiration on how to make the most of this mounting style. As you're planning, you might also consider how smart home devices for modern living could integrate with your new blinds for automated control.
Having the right tools is the secret to getting this job done right the first time. Taking a few minutes to gather your supplies now will save you from making frustrating trips back and forth later.
A little prep work is what separates a perfect fit from a costly mistake. Think of it like cooking: you gather your ingredients before you start. Here, your "ingredients" are simple but essential.
You don't need a professional's workshop for this, just a few key items. Having these ready ensures every number you write down is one you can trust.
Pro Tip: Always, always measure at least twice. It’s a simple habit that catches tiny errors before they turn into big problems. A quick double-check can save you from ordering custom blinds that are off by even half an inch.
When you're measuring for an outside mount, one quick number just won't cut it. To nail it, you need to measure like a pro, which means taking three separate width measurements to account for any quirks in your window frame.
First, measure the width right at the top of the area you plan to cover. Now, do it again in the middle. Finally, take one last measurement at the bottom. The key is to use the widest of these three measurements as your starting point. This ensures your blind will cover the entire opening without light gaps.
With your widest measurement in hand, it’s time for the most important part: adding overlap. This extra width is what stops light from creeping in and gives your window that polished, professionally-installed look.
For a standard outside mount, the industry recommendation is to add 3 to 6 inches to your total width. This breaks down to adding 1.5 to 3 inches of extra coverage on each side of the window frame.
For most rooms, an extra 4 inches total (2 inches per side) is a great sweet spot. But if you're putting blackout blinds in a bedroom, aim for a 6-inch total overlap (3 inches per side) to achieve that pitch-black darkness. In fact, industry data shows that about 65% of recent blind installations were outside mounts, often picked for superior light-blocking. You can learn more about how to measure your windows accurately for these kinds of results.
What if your window is jammed up against a corner wall? In that case, you can't add an even overlap. No problem. Just measure from the corner to the other side of the frame, then add your full 3 to 6 inches of overlap to the open side only.
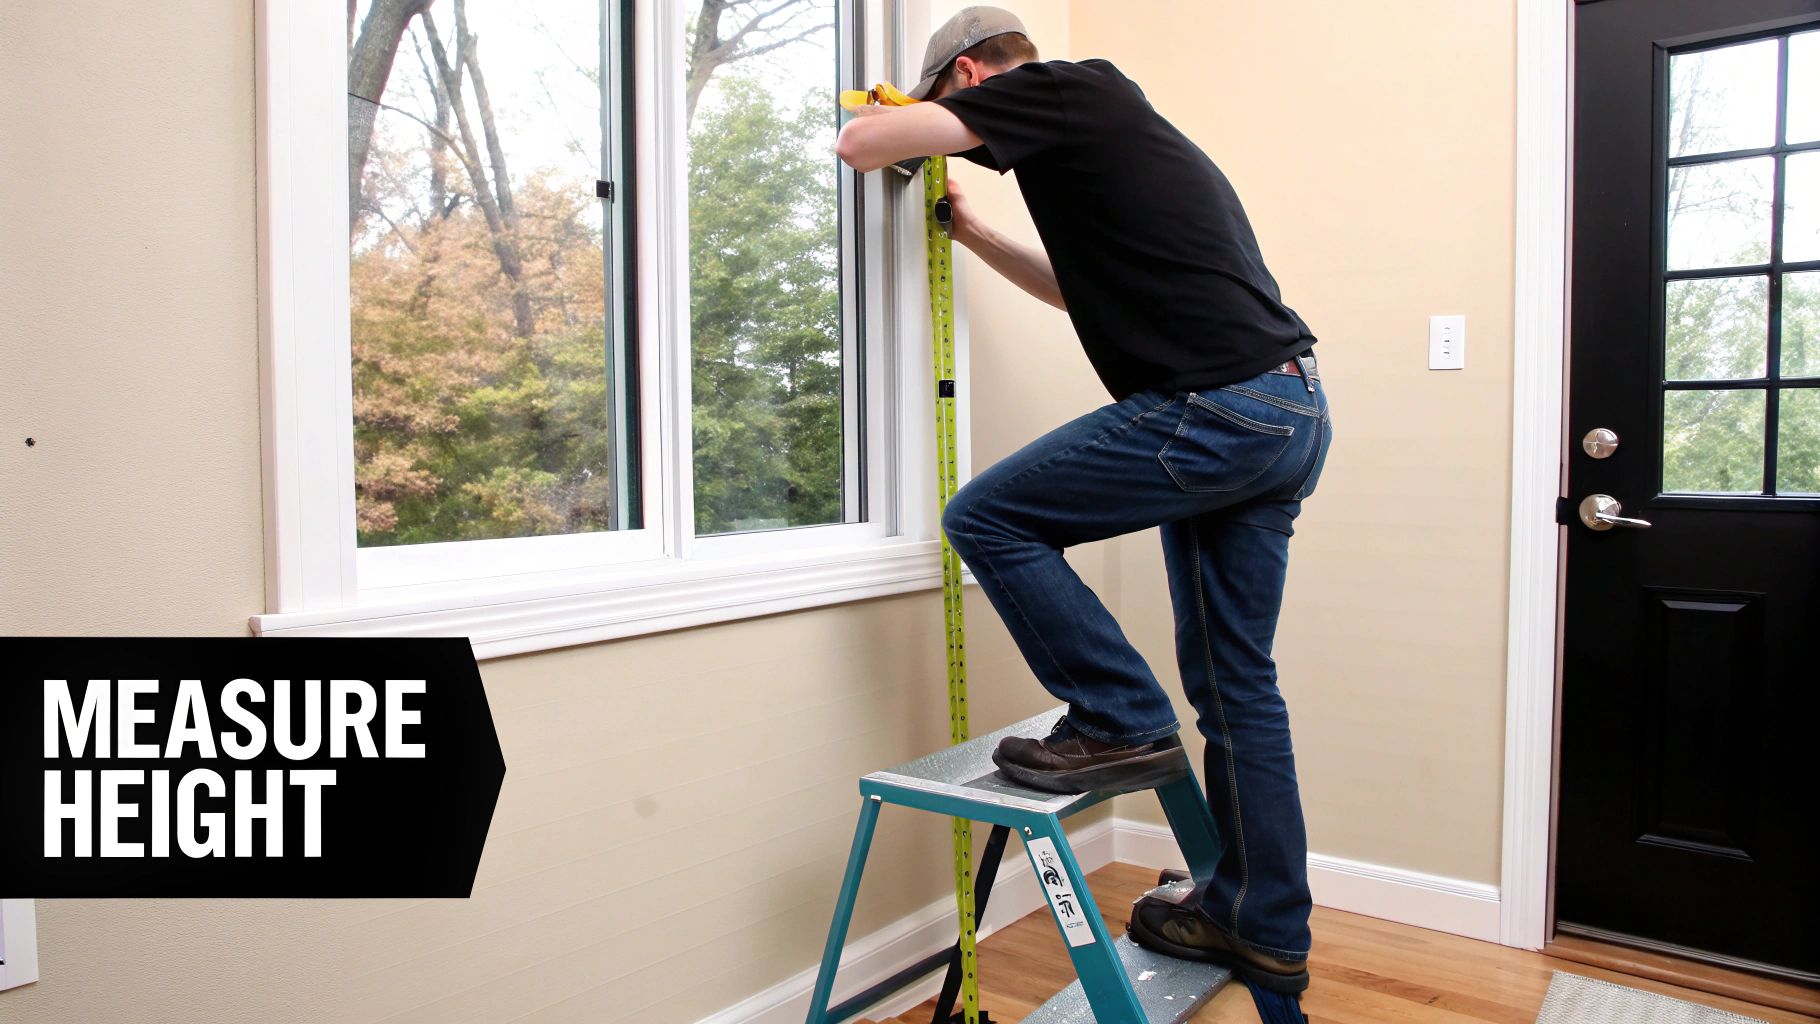
After you've nailed the width, getting the height right is what gives your blinds a polished, custom-made feel. This step is a big part of learning how to measure for window blinds outside mount the right way.
First, decide where the top of the blind—the headrail—is going to live. For a classic look, plan on mounting the brackets on a flat surface at least 2 to 3 inches above the top of the window frame. This ensures the blinds clear the frame when pulled up and creates a better light-blocking seal.
Once you've marked that sweet spot for your headrail, it's time to measure. Run your steel tape measure from your mark straight down to where you want the blinds to end. For most standard windows, the ideal endpoint is the bottom of the windowsill.
Expert Tip: When measuring height, take three separate measurements: one on the left, one in the middle, and one on the right. Just like with the width, frames are rarely perfectly level. Use the longest of the three numbers to ensure your blinds cover the entire opening.
Not every window is straightforward. Here’s how to handle common situations:
Making these adjustments ensures your new blinds—whether they’re beautiful wood or faux wood blinds—will fit and function perfectly.
Even with the best intentions, a small slip-up can lead to ill-fitting blinds. One of the easiest mistakes is accidentally swapping your width and height numbers when you order. To avoid this, always double-check your notes and clearly label which number is which.
Before you finalize your measurements, scan the area around your window. This is a critical step in learning how to measure for window blinds outside mount without issues.
We often see people forget about things like:
A simple solution is to adjust your overlap. If a doorknob is in the way on one side, just add more overlap to the other side to compensate. You can find more tips for precise furniture measurements that are surprisingly helpful here, too.
Not adding enough extra width is perhaps the most frequent mistake. A blind that barely covers the window trim is a recipe for annoying light leaks, defeating the purpose of an outside mount.
A UK survey found that 58% of homeowners preferred outside mounts, with the average overlap being a generous 2.5 inches per side. This highlights how crucial that extra coverage is. To see how these principles apply to other window treatments, check out our guide on how to measure windows for curtains.
The takeaway is clear: Be generous with your overlap. Aiming for at least 1.5 to 3 inches on each side is the safest bet. And never just measure your old blinds; always measure the window opening itself.
For the best light control and privacy, your blinds should be at least 3 to 6 inches wider than your window frame. This creates an overlap of 1.5 to 3 inches on each side, which is essential for blocking light gaps. For bedrooms, we recommend a 3-inch overlap per side (6 inches total).
If you have less than 2 inches of flat, solid wall space between the top of your window trim and the ceiling, a standard outside mount won't work. In this situation, a ceiling mount is the perfect alternative. This involves installing the brackets directly into the ceiling, allowing the blind to hang neatly in front of the window.
Always measure from the outermost edges of the window frame or trim, never the glass itself. The point of an outside mount is to cover the entire window opening, decorative molding and all. Measure the full width and height of the trim first, and then add your desired overlap.
Absolutely. If your window has a simple drywall return with no decorative trim, the process is just as easy. Simply measure the exact width and height of the window opening from edge to edge, and then add your overlap directly to those measurements (3-6 inches for width, 2-3 inches for height). These principles apply no matter your style, from wood blinds or faux wood blinds to modern rollers.
Ready to find the perfect blinds for your perfectly measured windows? Explore the beautiful and accessible collection at Joey'z Shopping and bring your vision to life. https://joeyzshopping.com