
Join the Joey'z Family!

Want your curtains to look like they were hung by a professional? The secret isn’t in how you handle the drill—it’s all in the prep work. The one rule designers swear by is simple: go high and wide. This single trick creates an illusion of space, making your windows and the entire room feel larger and more elegant.
Learning how to hang a curtain rod the right way is a simple DIY project that dramatically upgrades your space. We'll walk you through everything from placement to tool selection, ensuring a flawless finish every time.
Before you even think about picking up a tool, getting the groundwork right is the most important step for a polished, professional look. Nailing the placement, choosing the right rod, and gathering your tools from the start will save you a ton of frustration later on. This is where a simple DIY task turns into a real design upgrade.
Think of your curtain rod as the "eyebrows" for your window. When you get the placement right, it frames the view perfectly, enhances the room's architecture, and even makes the ceiling feel taller. This isn't just a piece of hardware; it’s a crucial part of your room’s overall vibe.
The single most impactful piece of advice from any interior designer is to hang your curtain rod "high and wide." This simple strategy instantly makes your windows look bigger and lets in as much natural light as possible.
Key Takeaway: Hanging your rod just a few inches higher and wider is a zero-cost trick that dramatically elevates your space. It stops the window from looking small and cramped, which is a common mistake that can make an entire room feel boxed in.
Picking out the right curtain rod is about more than just looks—it’s about function and durability. The rod must be strong enough to hold up your curtains without bowing or sagging over time.
First, think about the weight of your curtains. Sheer, lightweight fabrics don't need much support, but heavy, insulated blackout drapes demand a seriously sturdy rod. Always check the product's weight capacity. For heavier curtains, a rod with a diameter of at least one inch is a safe bet. You should also grab a center support bracket for any rod spanning more than 60 inches to prevent that dreaded dip in the middle.
Of course, getting your measurements right is just as important. Our guide on how to measure curtains has all the details you need for a perfect fit.
Next, consider the material and finish. Metal rods offer strength and a modern, sleek look, while wood brings a classic, warm vibe. For renters, tension rods are a fantastic solution where you can't drill into the walls. The finish should also tie in with your room's other hardware, like light fixtures or drawer pulls, to create a cohesive, put-together look.
Nothing brings a DIY project to a screeching halt faster than a missing tool. Gathering everything you need before you start is the key to a smooth, uninterrupted process. A little prep now saves you that annoying mid-project dash to the hardware store.
Here's a quick checklist to make sure you're ready to go.
| Tool or Material | Its Purpose | Insider Tip |
|---|---|---|
| Tape Measure | For accurate measurements of window height and width. | A locking tape measure is your best friend here—it keeps your measurement steady while you mark. |
| Pencil | For marking bracket placement on the wall. | Use a light pencil mark that can be easily erased or covered by the bracket. |
| Level | To ensure your rod is perfectly horizontal. | A 24-inch level is ideal for spanning across the window to check both bracket marks at once. |
| Drill & Bits | To create pilot holes for screws. | Use a drill bit slightly smaller than your screw's diameter to ensure a snug, secure fit. |
| Wall Anchors | To provide support in drywall where no stud is present. | Don’t skip these! Drywall alone won't hold the weight of curtains and will eventually fail. |
| Stud Finder | To locate wall studs for the most secure mounting. | Whenever possible, screw at least one bracket into a stud for maximum stability. |
With these tools in hand, you’re all set to hang your curtain rod with confidence and achieve that flawless, designer-approved look.
Alright, you’ve got your measurements and your tools are lined up—now for the fun part. This is where the planning pays off and we actually get that curtain rod up on the wall. Don't stress, I'll walk you through it. We're aiming for a professional-looking finish, and it's easier than you think.
Getting this right is more about being careful than being strong. A little patience and trusting your measurements will make all the difference. Let's get those numbers off your notepad and onto the wall.
The first real step is to translate your measurements onto the wall. Grab your pencil and tape measure and mark where the brackets will go, keeping that "high and wide" rule in mind. As a refresher, that's typically 4-6 inches above the window frame and 4-10 inches out from each side.
Once you have the first bracket spot marked, your level becomes your best friend. Hold it up to your mark and extend it over the window. Nudge it until the bubble is dead center, then pencil in the spot for the second bracket on the other side. This is the secret to a perfectly straight rod, even if your ceiling or window frame isn't quite level (which happens more often than you'd think).
To be extra sure about your placement before you make any holes, using a useful calculator can help you visualize the final look and confirm your numbers.
This simple visual breaks the process down perfectly.
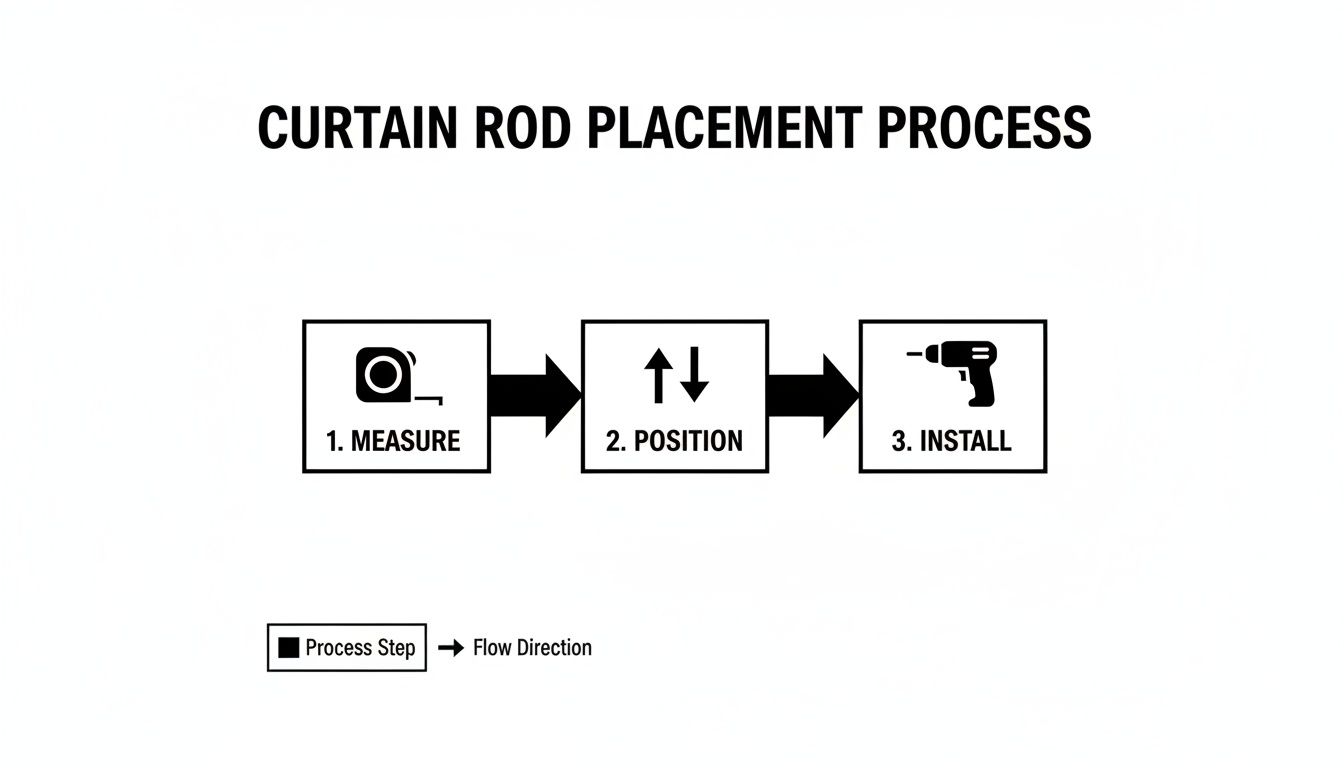
Think of it as three distinct stages: measure, position, and install. It’s a simple sequence, not one complicated job.
Now that your spots are marked, you might be tempted to just send a screw right into the wall. Hold up—don't skip this next part. Drilling pilot holes first is a non-negotiable step if you want a clean, secure finish.
So, why bother? A few good reasons:
Pick a drill bit that’s just a little bit smaller than your screw. You want the threads of the screw to have plenty of material to bite into.
Before you drill, let's talk about what's inside your wall. If you're lucky, one of your marks will land on a wall stud (the vertical wood beams that frame your house). Use a stud finder to check. Drilling into a stud is the gold standard for support.
Insider Tip: To catch that annoying drywall dust, fold a sticky note in half to make a little shelf. Stick it right below where you're drilling, and it'll catch most of the mess. Cleanup just got a lot easier.
If you don't hit a stud, you absolutely have to use wall anchors. Drywall is too soft to hold the weight of curtains on its own; the screw will just pull right out over time. An anchor expands behind the drywall, spreading the load and creating a secure point. Most rod kits include them, but I always keep a pack of good-quality ones from the hardware store just in case.
With your pilot holes drilled (and anchors tapped in, if needed), it’s time to attach the brackets. Hold each one over its spot and use your drill or screwdriver to drive the screws in until they’re snug. Just be careful not to overtighten—you could strip the screw or damage the wall.
Once both brackets are solid, go ahead and thread your curtains onto the rod. Carefully lift the rod and set it into the brackets. The final touch? Pop on the decorative finials at each end.
Now, step back and take a look. You did it—a perfectly level, securely hung curtain rod that’s ready to completely change the feel of your room.
Not every project to hang a curtain rod goes exactly as planned. We’ve all been there—you’re ready to drill, only to realize you’re dealing with something other than standard drywall. Or maybe you’re renting, and putting holes in the wall just isn’t an option. Let's walk through these real-world challenges so you can hang your curtains with confidence, no matter what your walls throw at you.
The short answer is yes, you can absolutely hang curtains on tricky surfaces or without making any holes at all. The secret is simply using the right tools and hardware for the job or choosing a reliable, damage-free alternative.

When you’re up against materials like plaster, brick, or concrete, standard screws and drywall anchors just won't do the trick. Each of these surfaces has its own quirks and requires a specific approach to get a secure, lasting installation. Trying to force the wrong hardware can quickly lead to crumbled plaster, cracked bricks, and a curtain rod that comes crashing down.
Here’s a quick guide to help you get started with the right gear.
| Wall Type | Required Tools | Recommended Hardware | Key Consideration |
|---|---|---|---|
| Plaster | Power drill, toggle bolts or molly bolts | Toggle bolts are excellent for the hollow space behind plaster and lath. | Plaster is brittle and loves to crack. Place a piece of painter's tape over your mark before drilling to help prevent chipping. |
| Brick | Hammer drill, masonry drill bit, safety glasses | Masonry screws (like Tapcons) or lead/plastic anchors designed for brick. | Always aim to drill into the mortar joints, not the brick itself. Mortar is much softer and far easier to patch up later if you need to. |
| Concrete | Hammer drill, masonry drill bit, safety glasses | Concrete anchors and their corresponding screws. | A hammer drill is non-negotiable here; a standard drill just doesn’t have the power to get through dense concrete effectively. |
While drilling into standard walls is fairly straightforward, as we cover in our guide on how to hang curtain rods in drywall, these tougher materials demand more specialized equipment and a little more patience.
For many of us, drilling holes is a major barrier. Whether you're a renter worried about getting your security deposit back or you just want to avoid permanent marks, there are some fantastic damage-free options out there. The key is to match the solution to the weight of your curtains and the type of window you have.
Premium Tension Rods
Forget those flimsy shower rods from back in the day. Modern tension rods are surprisingly robust and come in a variety of stylish finishes. They work by using spring-loaded tension to fit snugly inside a window frame, no drilling required.
High-Strength Adhesive Brackets
Adhesive technology has come a long way. Brands like Command now offer metal hooks and brackets specifically designed to hold curtain rods. They can support a surprising amount of weight and, best of all, they remove cleanly without damaging your paint.
Important Takeaway: Damage-free options are fantastic, but you have to respect their weight limits. Overloading a tension rod or an adhesive hook is the fastest way to have your beautiful curtains end up on the floor. Heavier drapes, like blackout or velvet curtains, will almost always require a traditional, drilled installation for safety and security.
Learning from someone else’s mistakes is the fastest way to get a professional look when you hang a curtain rod. Trust me, even a tiny error can make your beautiful new curtains look awkward and cheapen the whole feel of your room. We'll walk through the most common pitfalls so you can sidestep them completely.
The best part? Hanging curtains the right way costs exactly the same as doing it the wrong way. It’s all about technique, not your budget. By steering clear of these frequent blunders, you’ll get that polished, intentional look that elevates your entire space.
One of the most common slip-ups I see is placing the rod just above the window frame and only an inch or two wider on each side. This move instantly shrinks your window and blocks precious natural light, even when the curtains are wide open. You're essentially making the room's best feature look smaller.
Instead, always live by the “high and wide” rule. Mount your rod 4-6 inches above the window frame, and extend it 4-10 inches beyond the frame on each side. This one tweak creates an illusion of height and width, making your ceilings feel taller and the room feel so much more open and airy.
A flimsy curtain rod sagging in the middle is a dead giveaway of a DIY job gone wrong. Always go for a rod with a diameter of at least one inch for standard curtains. And please, don't forget to add a center support bracket for any span over 60 inches—it’s absolutely critical for heavier fabrics like velvet or blackout drapes.
Another aesthetic mistake is skimping on fabric. When closed, your curtains should still have some soft, billowy fullness—not be stretched taut like a bedsheet.
Pro Tip: As a rule of thumb, the total width of your curtain panels should be at least 1.5 to 2 times the width of your window. For a really luxurious, full look, I always aim for 2.5 times the width.
This might mean you need to buy four panels for a wide window instead of just two, but the final look is worth it.
Wall anchors are a lifesaver when you can’t drill into a stud, but they have their limits. For heavy, insulated, or extra-long drapes, relying only on standard plastic anchors is a recipe for disaster. The constant pulling and sheer weight can cause the anchors to loosen and eventually rip right out of the drywall.
Whenever you can, find a wall stud for at least one of the brackets. It provides the most secure anchor point you can get. If you have no choice but to use anchors for heavy curtains, upgrade to more robust hardware like toggle bolts or molly bolts. They provide a much stronger hold in hollow walls.
The DIY market has really pushed convenient options, especially for renters trying to avoid drilling. But while drill-free products are great for lightweight curtains, professionally installed, drill-mounted brackets are still the industry standard for securing heavy drapes safely. To get a better sense of these market trends, you can explore more DIY home improvement statistics.
You’ve successfully hung your curtain rod—congratulations, the hard part is over! But getting the rod on the wall is just the foundation. The real magic happens in the details, the little things that transform your window treatments from simply functional to truly fantastic.
These final steps are what give your room that polished, professionally styled look.
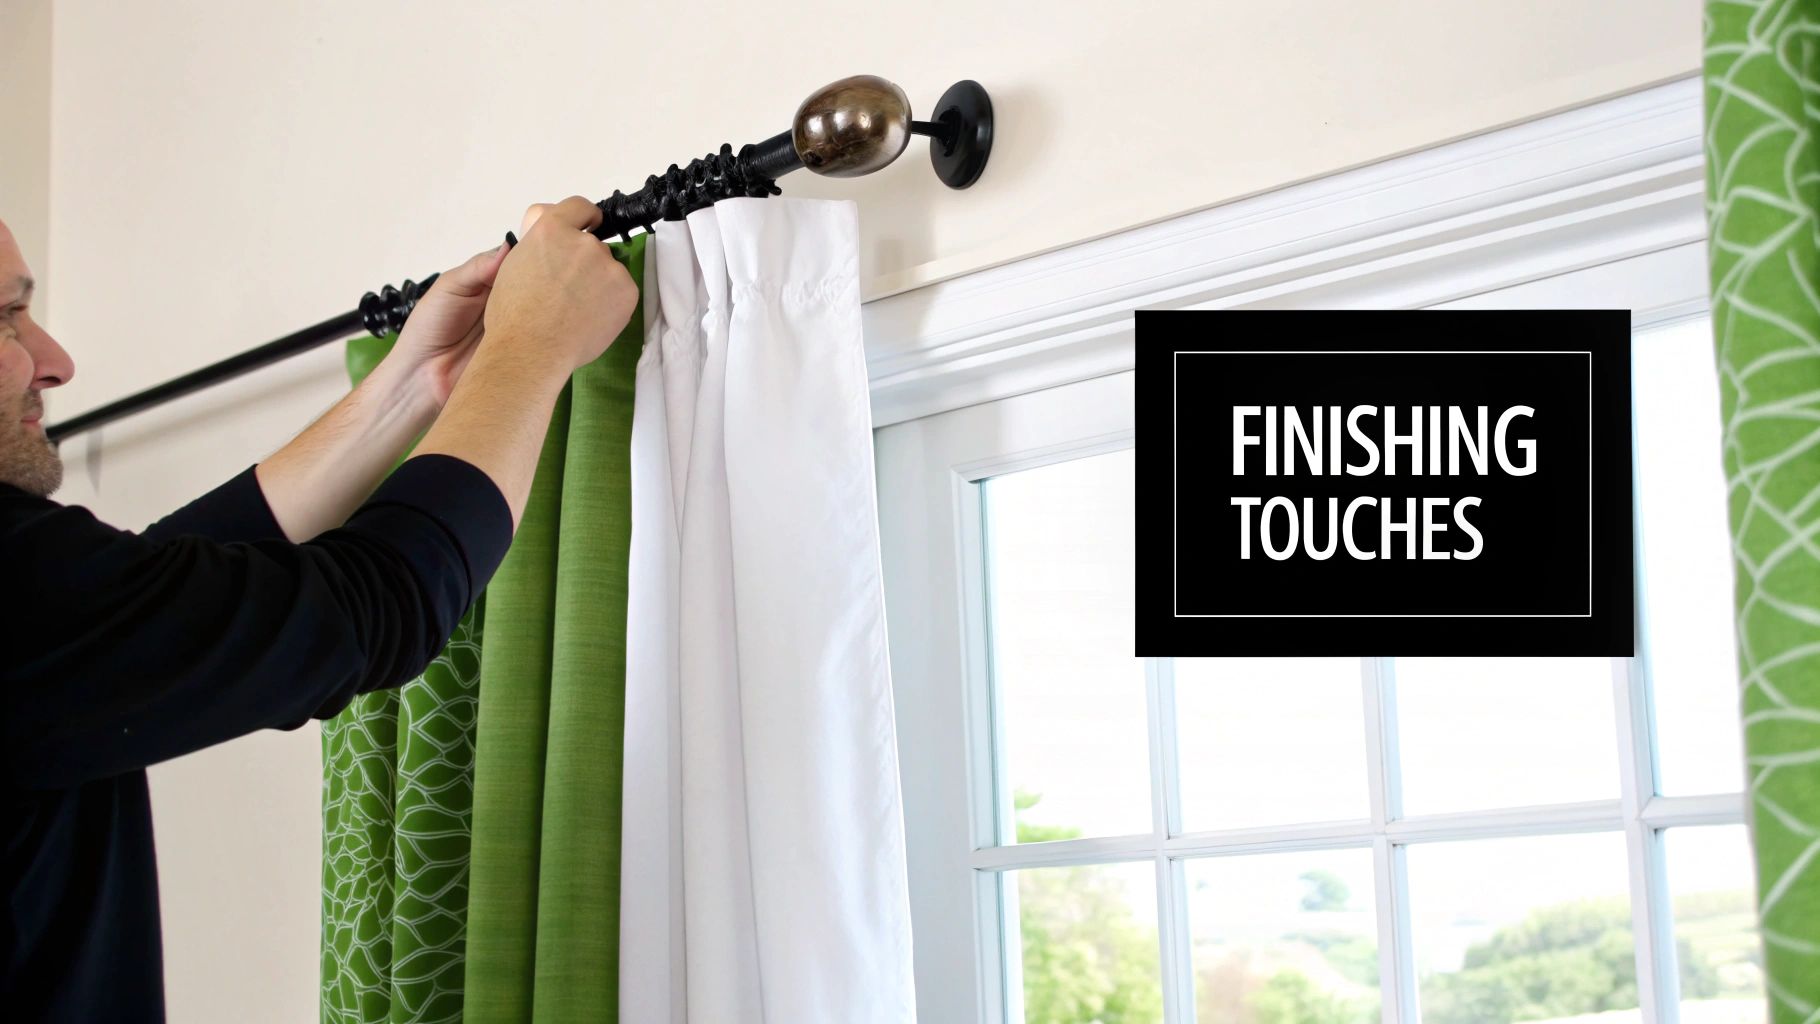
It’s these small additions—finials, tiebacks, and perfectly pressed fabric—that signal an intentional design choice rather than just a quick fix. Taking a few extra minutes here will pay off every single time you walk into the room.
Think of finials as the jewelry for your curtain rod. These decorative end caps are a small detail with a massive impact, helping to tie your window treatments into the rest of your room's decor. The right choice can reinforce your style, whether it’s modern, traditional, or something in between.
Don't let them be an afterthought. The goal is for the finials to complement, not compete with, the other elements in the room.
Ever wonder how designers get curtains to fall in those perfect, uniform pleats? They "train" them. It’s a simple trick that costs nothing and makes your curtains look incredibly high-end.
After hanging your curtains, arrange them into neat, even folds, just like an accordion. Then, loosely tie strips of fabric or ribbon around the bundled sections—one near the top, one in the middle, and one at the bottom. Leave them tied for about 48-72 hours.
When you undo the ties, the fabric will remember the shape, creating elegant, consistent pleats that hang beautifully from rod to floor.
Curtain holdbacks and tiebacks do more than just let the light in; they are styling accessories that add a layer of sophistication. They create a graceful drape and keep your curtains neatly out of the way. Beyond just the functional aspect, consider how your window treatments contribute to the overall aesthetic; for more ideas on enhancing a room's appeal, explore the art of home staging.
The ideal placement for holdbacks is typically one-third of the way up from the bottom of the curtain or level with the windowsill. Installing them here creates a classic, appealing cascade of fabric. For a deeper dive into choosing the right style for your space, check out our ultimate guide to curtain tiebacks for inspiration.
Final Pro Tip: Never underestimate the power of a good steam. Wrinkles and creases from packaging can make even the most expensive curtains look cheap. A quick pass with a handheld steamer or a cool iron (check the fabric care label first!) will give your curtains that crisp, straight-from-the-decorator finish.
Even with the best instructions, questions come up. We've pulled together the most common things people ask when hanging curtain rods to give you clear, expert answers.
The short answer? Mount your rod 4 to 6 inches above the top of the window frame. This is a tried-and-true designer trick that creates a powerful illusion of height, making your ceilings feel taller and the whole room more spacious.
For a more dramatic look with higher ceilings (9 feet or more), you can place the rod up to 12 inches above the frame, or about halfway between the top of the window and the ceiling. This technique really draws the eye upward, maximizing that feeling of vertical space.
Your curtain rod should extend 4 to 10 inches past the window frame on each side. This makes a window feel wider and lets in as much natural light as possible.
This extra width is key. It gives your curtains a place to "stack back" against the wall when they're open, framing the view beautifully instead of bunching up and blocking the edges of the glass. For especially wide windows or heavier drapes, that extra extension also just looks more balanced.
If your bracket isn’t going directly into a wooden wall stud, the answer is an absolute yes. Wall anchors are non-negotiable for a secure, long-lasting installation in drywall.
Drywall itself is too soft to hold the combined weight of a rod and curtains, especially with the daily tug of opening and closing them. Without an anchor, the screw will eventually work loose and pull right out of the wall. A wall stud is always your best bet, but when one isn't available, a quality wall anchor is the next best thing.
Uneven surfaces are a common reality in many homes, but they don't have to derail your project. The most important rule here is to always trust your level, not your eye. A slightly sloped ceiling or window frame can easily trick you into hanging a crooked rod.
Mark the spot for your first bracket, then place your level on the wall at that mark. Adjust it until the bubble is perfectly centered, and that's where you'll mark the spot for your second bracket—a true horizontal line. If you find a small gap behind a bracket once it's secured, you can tuck a small shim behind it before fully tightening the screw to ensure it sits flat and secure.
Ready to find the perfect curtains and hardware to bring it all together? Joey'z Shopping offers a huge selection of beautiful, high-quality window treatments to fit any style.
Explore our collection of curtains and rods at Joey'z Shopping today!