
Join the Joey'z Family!

That luxurious, layered window look you see in design magazines isn't some complicated designer secret—it’s the magic of a double curtain rod. Honestly, learning how to hang double curtain rods is the key to unlocking that elegant style, letting you pair a light, airy sheer curtain with a heavier drape for total control over light, privacy, and ambiance.
Table of Contents
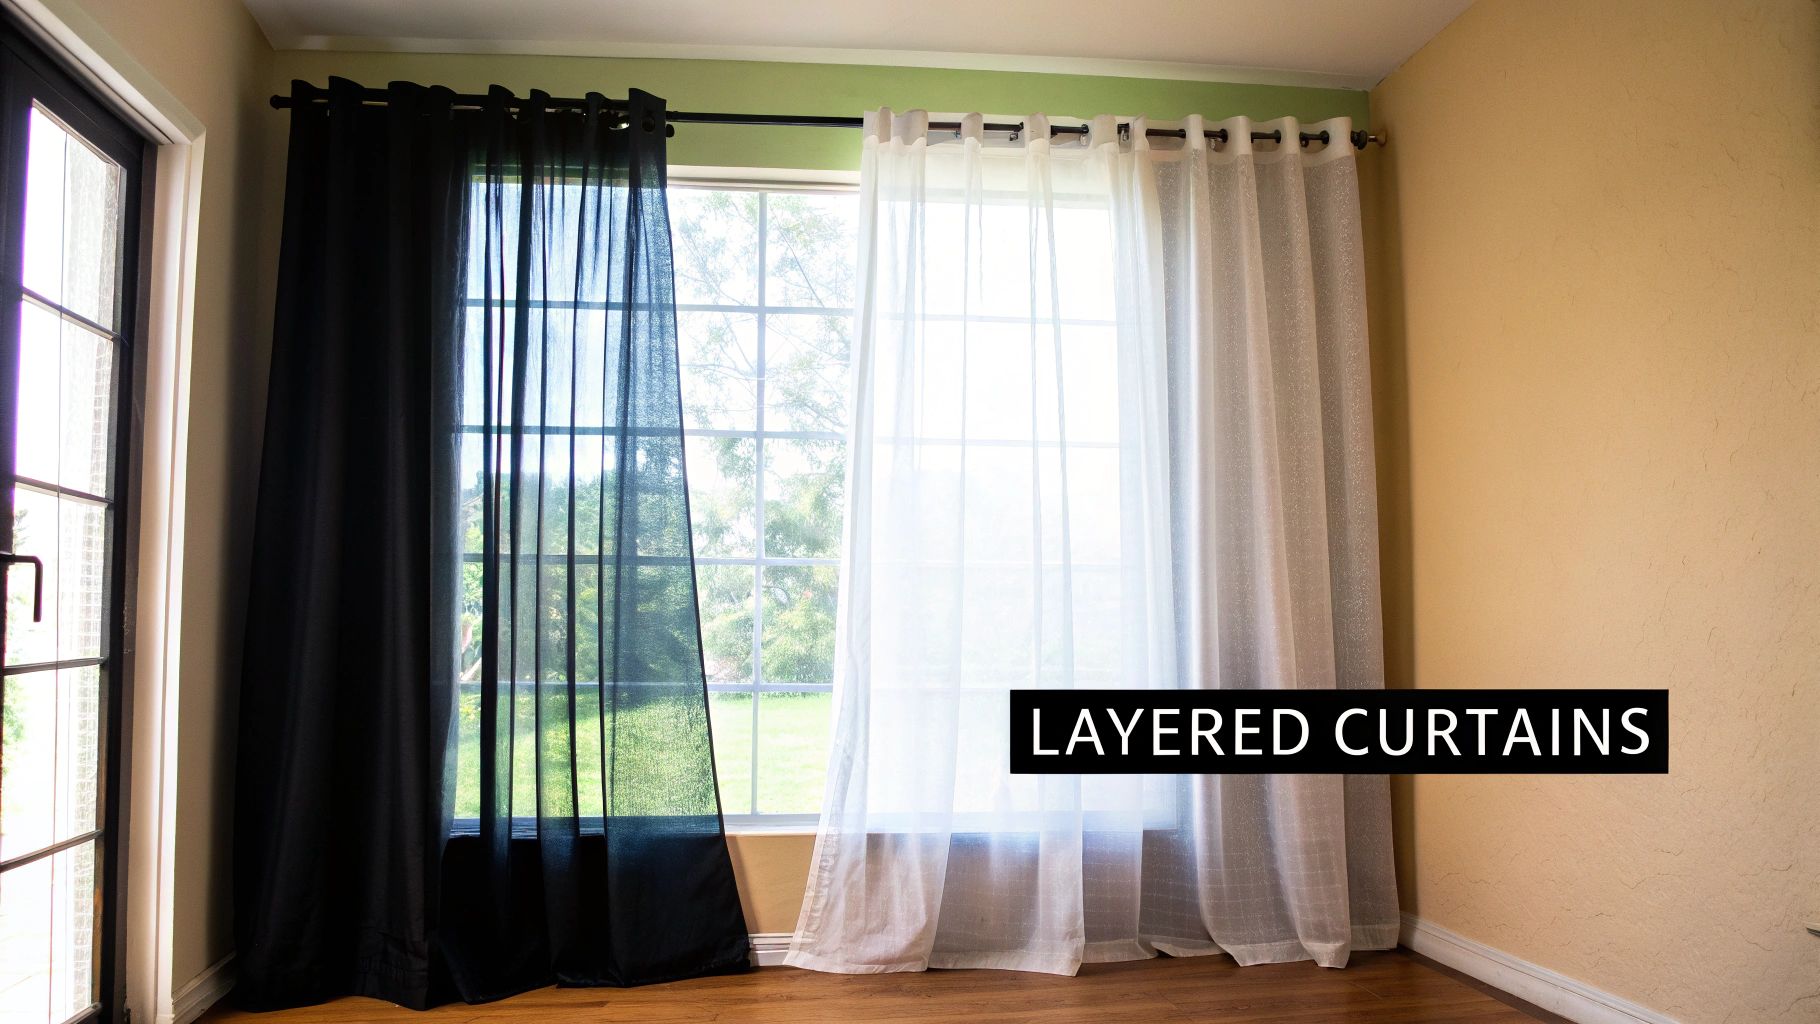
So, what exactly are double curtain rods? The short answer is they are a dual-rod system that allows you to hang two different sets of curtains over the same window. This setup offers incredible versatility and is far more than just a decorative choice; it's a functional powerhouse for any room.
Typically, this involves a lightweight sheer curtain on the inner rod (closer to the glass) and a heavier, more decorative curtain on the outer rod. This combination isn't just for show—it serves distinct purposes that can completely transform your living space.
The real beauty of this system is how adaptable it is throughout the day. You get precise control over both natural light and your home’s privacy, which is a game-changer.
Insider Tip: Well-hung curtains can make a room feel significantly larger. By mounting the rod higher and wider than the window frame, you create an illusion of height and space—a trick designers use all the time.
Beyond just controlling light, layering curtains adds incredible depth and texture to your decor. The interplay between a delicate sheer and a rich fabric like velvet or linen brings a sense of sophistication and thoughtfulness to your design. For some deeper guidance on pairing fabrics, check out our guide on how to layer curtains with sheers.
This setup is your ticket to a polished, custom look without the high price tag. To get your creative juices flowing, you can also explore various modern window covering ideas that work beautifully with layered curtains.
Jumping straight into drilling is a recipe for crooked curtains and a wall full of extra holes. A successful installation starts with a solid plan, the right tools, and precise measurements. Getting this part right is the most critical step of the entire project.
A common mistake is measuring only the window frame itself, which can make the final result feel cramped and small. To get that designer look, you need to think beyond the glass.
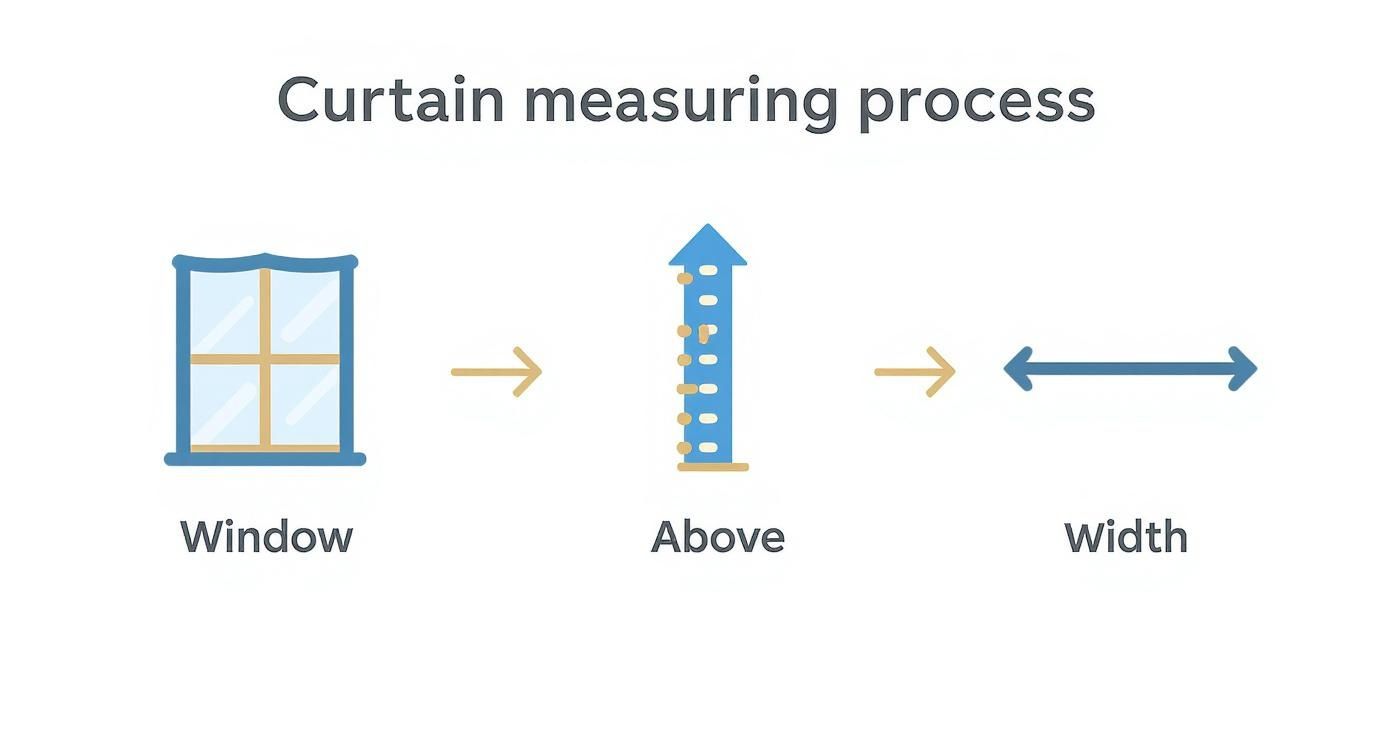
The goal here is to create an illusion of a bigger, brighter window. We do this by hanging the rod higher and wider than the actual frame.
Determine Rod Width: First, measure the width of your window frame from one outer edge to the other. Now, add 6 to 10 inches to each side. This extra length lets your curtains pull completely clear of the window when they're open, flooding the room with light. So, for a 40-inch wide window, you'll want a rod that's at least 52 inches long.
Establish Curtain Height: Next, measure from the top of the window frame upwards. The sweet spot for placing your brackets is typically 4 to 6 inches above the frame. This simple trick draws the eye upward, creating a wonderful sense of height and making your ceilings feel taller.
For a complete breakdown of how to match your measurements to the perfect hardware, our in-depth curtain rod size chart is an excellent resource.
Having all your tools ready before you start saves you from frustrating mid-project trips to the hardware store. Think of it like a chef's mise en place—everything in its right place for a smooth process.
Here’s your essential checklist:
Pro Tip: When using a stud finder, mark the locations of both edges of the stud. This helps you find the exact center, ensuring your mounting screw has the maximum amount of wood to bite into for a super-strong hold.
With your measurements taken and tools assembled, you've laid the groundwork for a flawless installation. This careful preparation separates a DIY-looking job from a truly professional result.
With your measurements down and your tools ready, it's time for the main event. This is where your planning turns into a beautiful, functional window treatment. The secret to a professional-looking installation is simply patience and attention to detail.
Grab your tape measure, level, and a pencil. Using the measurements you took earlier (4-6 inches above the window frame and 6-10 inches out to the side), mark exactly where your brackets will go.
Now, it's time to drill. The strength of your entire setup depends on how well these brackets are secured, especially since double rods support twice the weight.
First, run your stud finder over your marked spots. If you hit a stud, you're in luck! Simply drill a small pilot hole (slightly narrower than your screw) and drive the screw directly into the wood for a rock-solid hold. If you don't find a stud, you must use wall anchors. For more detail, see our guide on how to hang curtain rods in drywall.
A Quick Word of Advice: Proper anchoring isn't just a recommendation—it's essential for safety. A screw in drywall alone can only handle a few pounds, but the right anchor can hold 25 pounds or more.
Choosing the right anchor for your wall type is critical. This quick reference guide helps you pick the best option.
| Your Guide to Wall Anchors | |||
|---|---|---|---|
| Wall Type | Recommended Anchor | Weight Capacity | Best Use Case |
| Drywall | Self-Drilling Anchor | 25-75 lbs | Most common and easy to install for standard curtain weights. |
| Plaster | Toggle Bolt | 50-100+ lbs | The wings provide a very strong hold behind brittle plaster. |
| Concrete/Brick | Sleeve Anchor or Masonry Screw | 100+ lbs | Requires a special masonry drill bit for a super-secure mount. |
| Wood Stud | No Anchor Needed | 75-150+ lbs | The gold standard. Screw directly into the stud. |
Drill a pilot hole sized for your chosen anchor, gently tap the anchor into the wall until it's flush, and you're ready. For tougher materials like brick, specialized techniques for hanging items on brick walls are a huge help.
With your anchors ready, position each bracket over its holes and drive the screws in until they are snug. Don't overtighten, but make sure there's no wiggle room.
Once all brackets are firm, get the curtains ready. Slide your sheer curtains onto the inner, thinner rod and your main drapes on the outer, thicker rod. Before placing the rod, arrange the curtain rings or grommets so they're spaced evenly for a neat look.
Finally, carefully lift each rod and settle it into its holder on the double brackets. Most have a small set screw you'll want to tighten to keep the rod from shifting. Step back and admire your handiwork!

The success of your window treatment isn't just about a perfect installation—the hardware and fabrics you choose are just as critical. The demand for functional and stylish window treatments is on the rise. In fact, the global curtain rod market is projected to climb to $6.91 billion by 2030, according to datainsightsmarket.com, showing how much homeowners value versatile solutions like double rods.
The material of your double curtain rod sets the tone for your whole window setup. Each brings its own energy and practical benefits.
Beyond material, consider the rod's diameter. A rod that’s too thin for heavy drapes will sag.
Expert Tip: For most standard-weight curtains, a rod diameter of 0.75 to 1 inch is fine. But for heavier fabrics like velvet or thermal blackout curtains, you need a sturdier rod with a diameter of at least 1 inch to prevent bowing.
The real magic is how the two fabrics play off each other. The inner rod is almost always for sheers, which filter sunlight while offering daytime privacy.
For the outer rod, you can bring in color, texture, and personality.
At Joey'z Shopping, we've curated a fantastic selection of double curtain rod sets to complement any decor. Explore our collection to find the ideal hardware for your vision.
Even after you’ve measured twice and drilled once, a DIY project can still throw you a curveball. Don't sweat it—almost every little installation hiccup has a simple fix.
Here's how to tackle the most common snags when learning how to hang double curtain rods.
You step back and see one bracket is higher than the other. It’s a classic mistake, but the fix is easy. You should always adjust the higher bracket.
A sagging curtain rod is a sign of too much strain, common with windows over 60 inches wide or heavy drapes.
The fix is a center support bracket. This extra hardware distributes the weight evenly and stops the rod from bowing. Most of our double rod kits at Joey'z Shopping include one for this very reason.
Pro Tip: To install a center support, find the exact midpoint between your end brackets. Use your level to ensure it sits at the same height, mark your holes, and mount it.
Sometimes, the wall itself is the problem.
A slip of the drill happens. Don't worry, this is a five-minute fix.
Even after the best tutorials, a few questions always seem to pop up. Here are answers to the most common queries about how to hang double curtain rods.
The distance between the two rods is built into the double bracket hardware, typically between 3 and 6 inches. This provides ample space for both the inner sheers and outer drapes to hang and move freely without getting tangled.
Most standard double curtain rods are rated to hold between 20 and 40 pounds. However, the rod's strength is only as good as its installation. For heavy fabrics like velvet, choose a rod at least 1 inch in diameter. For any window wider than 60 inches, a center support bracket is a must. Most importantly, always secure brackets into wall studs or use high-quality drywall anchors rated to hold at least 25 pounds each.
Absolutely! Ceiling-mounted double rods are a fantastic designer trick for creating a dramatic, floor-to-ceiling curtain effect, making any room feel taller. You'll need to purchase specific ceiling-mount double brackets, as standard wall-mount versions won't work. The installation process is similar: use a stud finder to locate ceiling joists for the most secure hold.
This is where you can make the biggest visual impact. The professional recommendation is to mount the brackets 4 to 6 inches above the top of the window frame. This trick draws the eye upward, creating a powerful illusion of height. Also, extend the rod 3 to 6 inches past the frame on each side to maximize natural light and make the window feel larger. As design experts like Emily Henderson often point out, proper curtain height is one of the easiest ways to make your home look more professionally designed.
Ready to create that beautiful layered look in your own home? At Joey'z Shopping, we have a curated selection of high-quality double curtain rods, curtains, and all the accessories you need to get the job done right. Explore our collection and find the perfect pieces to bring your vision to life.