
Join the Joey'z Family!

Hanging curtains can transform a room, but a poorly installed rod can ruin the effect. Knowing how to install a curtain rod correctly is the difference between a droopy, crooked mess and a window treatment that looks professionally done. It all starts with the right tools and a solid plan.
Think of this guide as your personal expert, walking you through each step. We'll cover everything from gathering your tools to troubleshooting common issues, ensuring your curtains hang perfectly straight and stay securely on the wall for years to come.
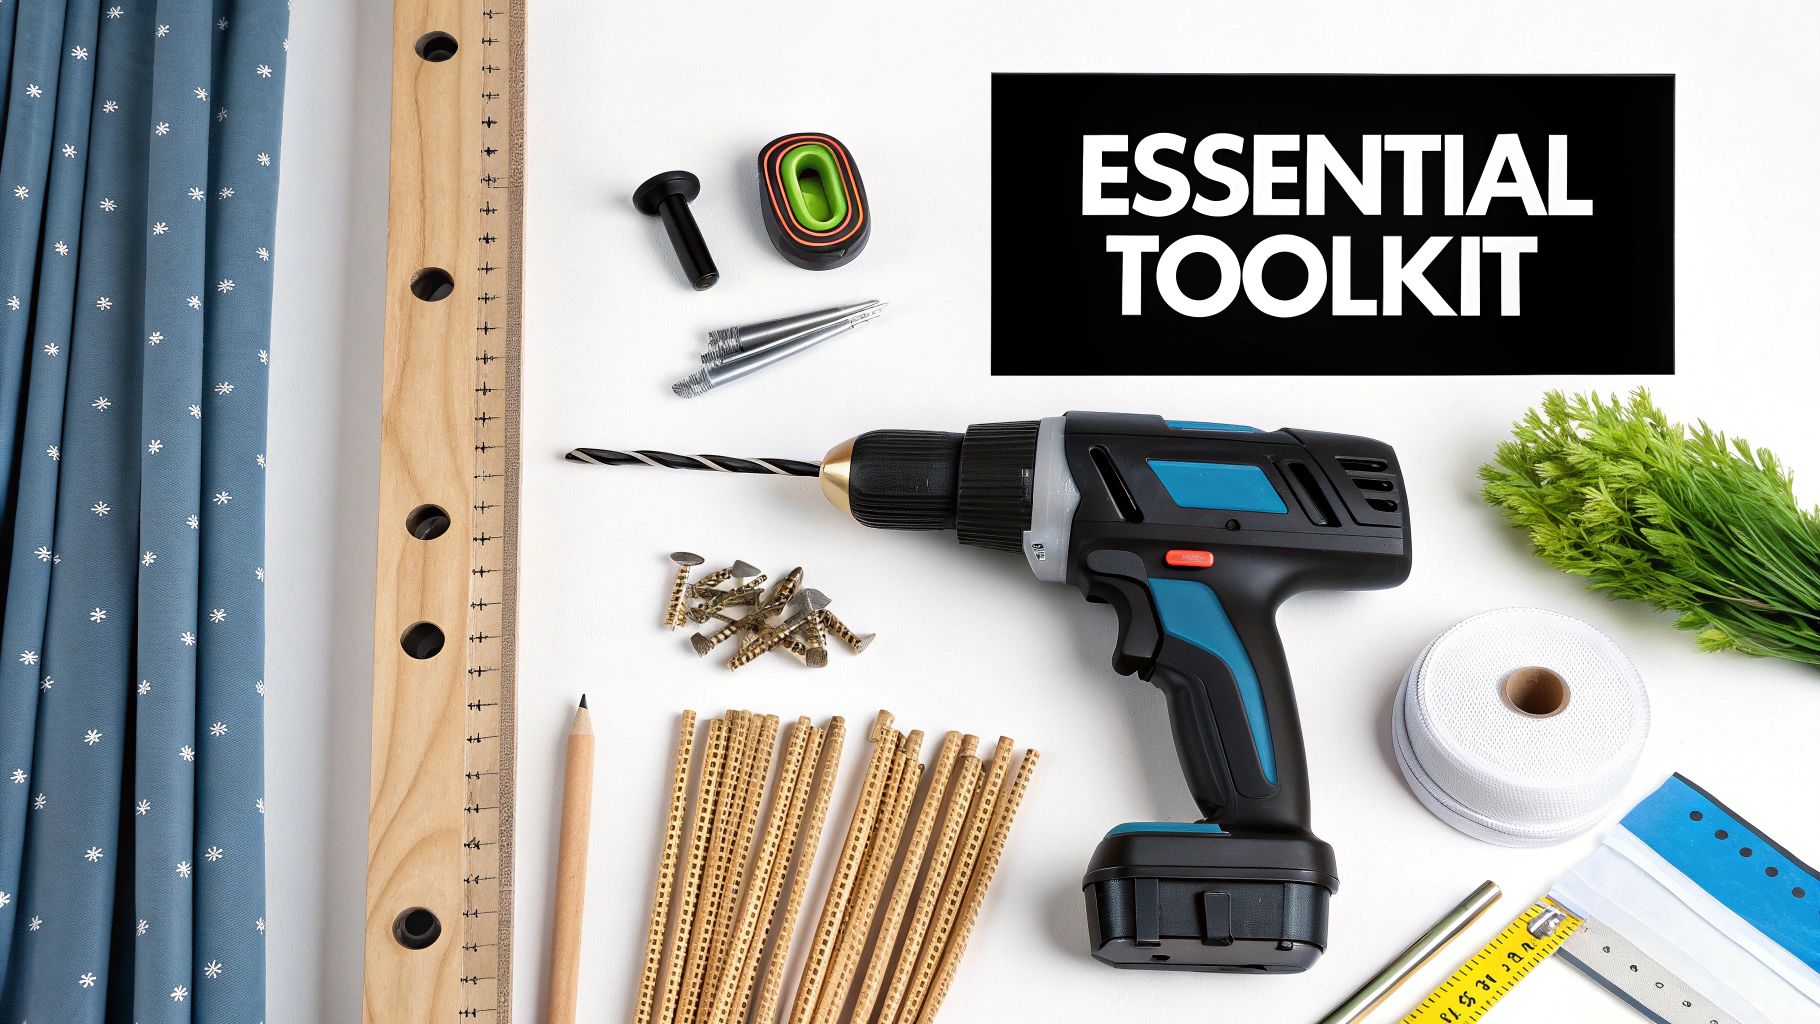
Before drilling a single hole, let's talk about preparation. A well-stocked toolkit is the secret to a professional-looking installation. Having everything ready prevents mid-project scrambles and helps you avoid pitfalls like crooked rods or brackets that pull out of the wall.
The right tools ensure a secure and lasting result. For instance, a stud finder is your best defense against mounting on weak, hollow drywall. Using the correct wall anchors provides the necessary grip where studs aren't available, preventing that dreaded sag over time.
For a standard installation, some tools are simply non-negotiable. These basics will get you through almost any curtain-hanging scenario.
Here’s a quick-reference table separating the essentials from the "nice-to-haves" that streamline the process.
| Tool | Essential or Recommended | My Pro Tip |
|---|---|---|
| Tape Measure | Essential | A locking tape measure frees up your hands. |
| Pencil | Essential | Keep it sharp for precise marks. |
| Level | Essential | A longer level (24 inches or more) gives a more accurate reading. |
| Drill & Drill Bits | Essential | Match the drill bit size to your screws/anchors. |
| Screwdriver (or Drill Bit) | Essential | Using the correct bit type prevents stripping the screw head. |
| Stud Finder | Recommended | Don't skip this! Hitting a stud provides the strongest possible anchor point. |
| Wall Anchors | Recommended | If you can't find a stud, these are essential for a secure mount in drywall. |
| Painter's Tape | Recommended | Great for marking spots and helps prevent drill slipping. |
| Ladder or Step Stool | Recommended | A must for safety and stability when working above your head. |
If you're hanging particularly dense drapes, knowing about the best curtain rods for heavy curtains is a crucial first step. Heavier fabrics demand sturdier rods and robust mounting hardware to prevent bending and ensure safety.
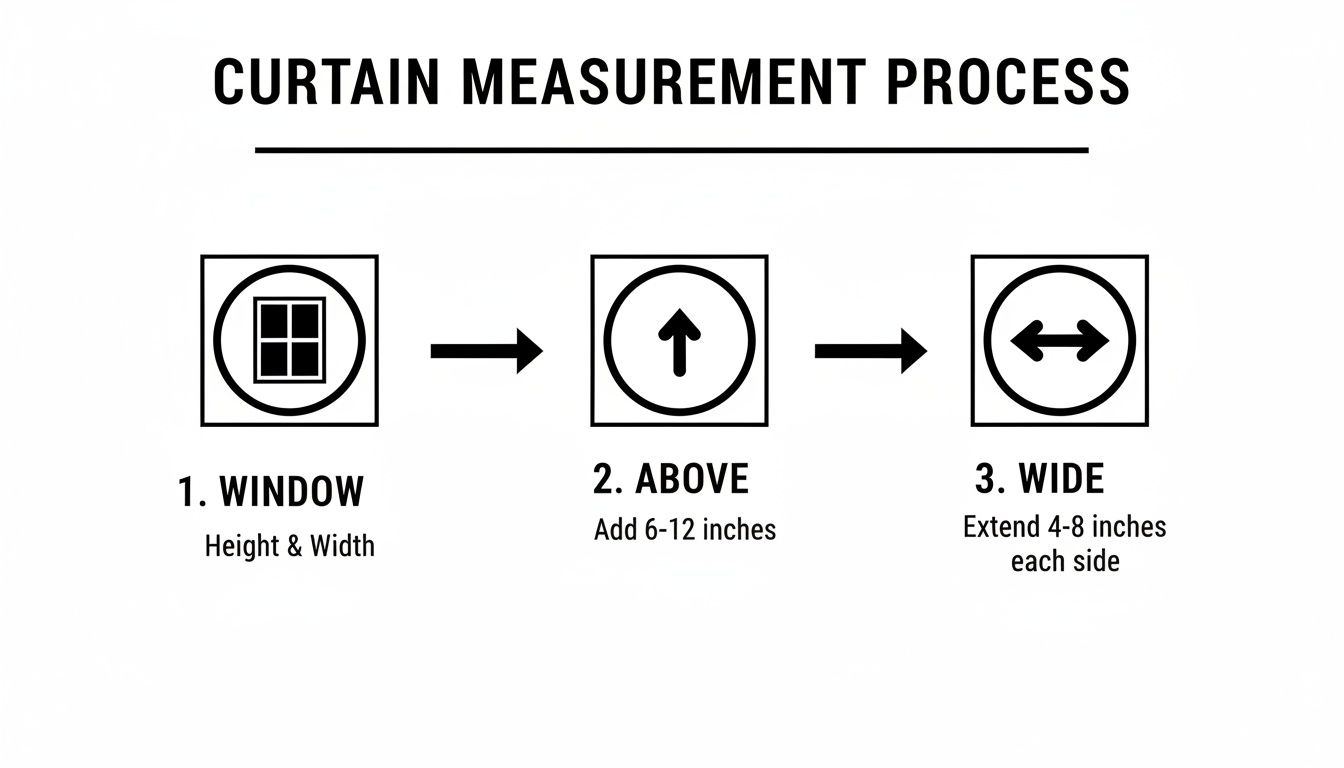
Hanging curtains is a design choice that can make a room feel bigger and brighter. We're going to use a simple but transformative technique: the "high and wide" method. This is the single most effective trick I know for adding a touch of drama and elegance without a huge budget.
By hanging the curtain rod higher and wider than the window frame, you trick the eye into seeing taller ceilings and more expansive windows. Let's break down how to do it.
Q: How high above the window frame should I install a curtain rod?
A: The short answer is 4 to 6 inches above the top of the window frame. This is the sweet spot for most rooms with standard 8-foot ceilings, as it draws the eye upward and creates an illusion of height.
Mounting the rod just an inch or two above the trim is a common mistake that visually squashes the window. If you have taller ceilings, feel free to go even higher—sometimes halfway between the top of the frame and the ceiling.
Insider Tip: I can't stress this enough: always use a level when marking bracket locations. Even a tiny, unnoticeable angle will look completely off-kilter once the curtains are up.
Q: How far past the window frame should the curtain rod extend?
A: Plan to extend your curtain rod 3 to 6 inches past the window frame on each side. For larger windows or heavy drapes, you can push that out to 10 inches.
This extra width gives your open curtains a place to rest (called stack back) without blocking natural light. If the rod is only as wide as the window, the curtain panels will always cover part of the glass, making the room feel smaller.
These measurements can be adjusted based on the style of your curtains and rod.
Precise measurements are the foundation of a great-looking window treatment. It’s a key skill for homeowners, especially in a home decor market that was valued at $833.8 billion in 2022 and continues to grow.
You’ve marked your measurements and laid out your tools. Now it's time to get that rod on the wall. A little extra precision here makes the difference between a wobbly rod and one that looks professionally installed.
First, use your level to lightly draw a straight line connecting the height marks you made on either side of the window. This line guarantees both brackets will be perfectly level.
Hold a bracket up to the wall, lining up its screw holes with your level line. Use a pencil to mark the exact spots for the screws. Repeat on the other side. If you’re using a center support bracket, mark its position now.
Before driving in screws, you must drill pilot holes. A pilot hole guides the screw in straight and prevents drywall from cracking or wood from splitting. Choose a drill bit that’s slightly smaller than the screw's core and drill a clean hole on each mark.
My Favorite Trick: To avoid a mess, fold a sticky note in half to create a small shelf and stick it to the wall just below where you’re drilling. It will catch almost all the dust.
Q: What do I do if my bracket location lands on hollow drywall?
A: The answer is simple: use wall anchors. Do not skip this step. Screws driven directly into drywall will eventually pull out, especially with the weight of curtains.
Your wall material determines the type of hardware you need.
To install an anchor, tap it into your pilot hole until it's flush with the wall. Now you have a solid mounting point. Attach the brackets, driving the screws firmly into the anchors. Give each bracket a gentle tug to ensure it’s solid.
For a deeper look into this topic, we've created a guide specifically on how to properly hang curtain rods in drywall. A perfect surface is key, so if you're doing prep work, knowing how to fix bubbles in drywall mud can also save a headache.
Even with careful planning, things can go wrong. Don't worry—most issues are minor detours, not dead ends. Knowing these quick fixes will turn potential frustration into a confidence boost.
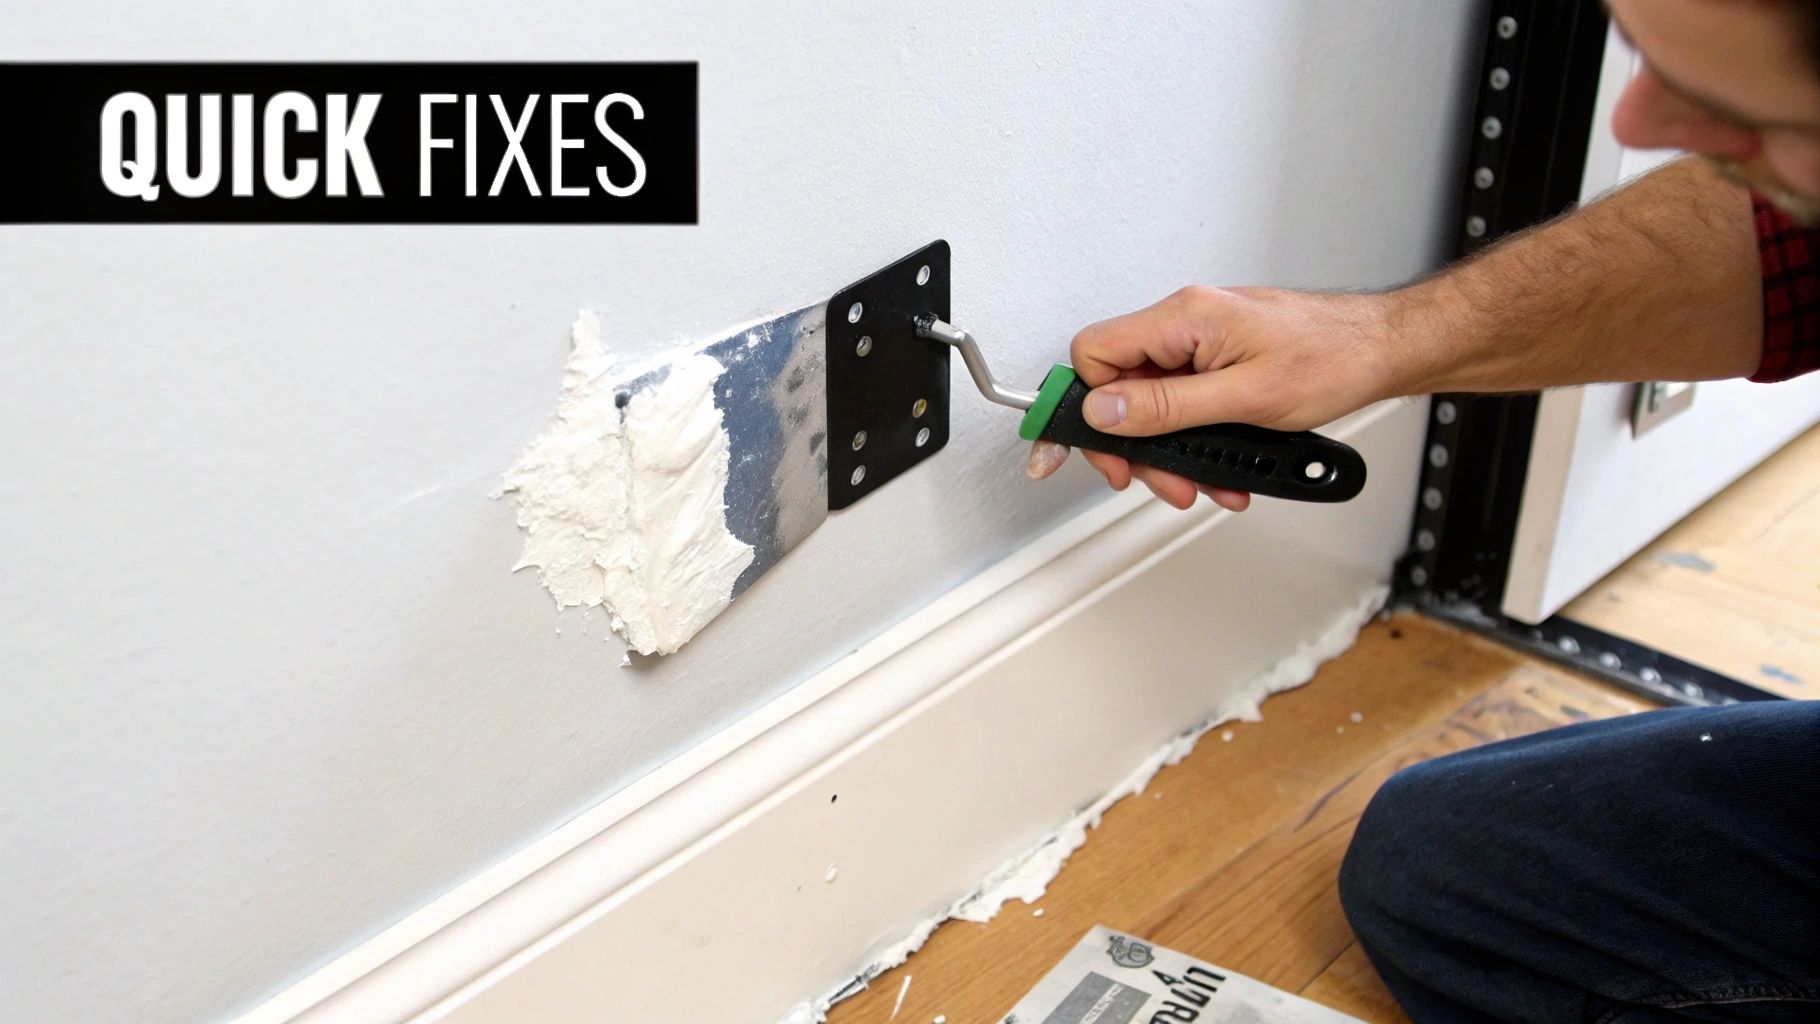
It happens. You drill a hole and realize it’s slightly off. No panic necessary.
The fix is simple: fill the hole with spackling paste using a putty knife. Scrape off the excess, let it dry, then give it a light sanding. A quick dab of touch-up paint will make the mistake vanish.
A sagging curtain rod means it's either too long for its diameter or the curtains are too heavy. This puts stress on the end brackets and can cause them to fail over time.
The solution is a center support bracket. As a general rule, any curtain rod over 60 inches long needs one. Find the midpoint of your rod, install the bracket level with the end brackets, and the sag will be gone. This is increasingly important as recent industry analyses show a trend toward wider, more dramatic window treatments.
If a screw just keeps spinning without tightening, the hole is stripped. It has nothing to grip and won't hold any weight.
Pro Tip: Use an old carpenter's trick. Dip a few wooden toothpicks in wood glue and gently tap them into the stripped hole until it's snug. Break them off flush with the wall. Once the glue dries, you've created a solid new surface for the screw to bite into.
Let's tackle some of the most common questions people ask after they learn how to install a curtain rod.
The sweet spot is 4 to 6 inches above the window frame. This classic design trick makes ceilings feel taller and the room more open. For ceilings higher than 8 feet, you can go even higher, aiming for about two-thirds of the distance between the window frame and the ceiling.
Yes, you can! This is a great option for renters.
If you can't find a stud, you must use wall anchors. Don't just drive a screw into hollow drywall—it won't hold. The small plastic anchors included in most kits are only suitable for very light curtains. I almost always recommend upgrading.
My personal experience: I always swap out the included hardware. Self-drilling threaded anchors offer a massive boost in holding power. For heavy blackout drapes, I go straight for toggle bolts. They are unbeatable for sheer strength.
If the project feels like more trouble than it's worth, calling a professional is a great option. Learning about finding a reliable handyman can ensure the job gets done right, saving you time and headaches.
At Joey'z Shopping, we believe beautiful windows should be easy for everyone to achieve. Dive into our huge collection of curtains, rods, and all the accessories you need to find that perfect finishing touch for your home.