
Join the Joey'z Family!

You've found the curtains you like, measured the window, and ordered what looks like the right rod. Then the panels arrive, the rings barely slide, and the finished window looks either stiff or oddly short. Curtains with grommets, also called eyelet curtains, are simple to hang, but their clean appearance depends on mechanical details that style guides often overlook.
The inner ring must clear the rod, the grommets need sensible spacing, and the fabric has to suit the room's light and comfort needs. Get those decisions right, and you'll have an easy-moving treatment with neat, architectural folds. Get them wrong, and even an attractive panel can look like a rushed renovation.
A homeowner usually chooses grommet curtains after fighting with a different header. A rod-pocket panel bunches instead of opening smoothly. A pinch-pleat treatment needs careful hooks and rings. The fabric may look lovely when it's still, but daily use becomes a small household chore.
Curtains with grommets solve that particular annoyance with a row of metal eyelets embedded directly into the top hem. The rod passes through each opening, so the panel moves as one connected unit. The rings create broad, repeated folds rather than random gathering, giving a window a clean shape that suits contemporary rooms, apartments, and practical family spaces.
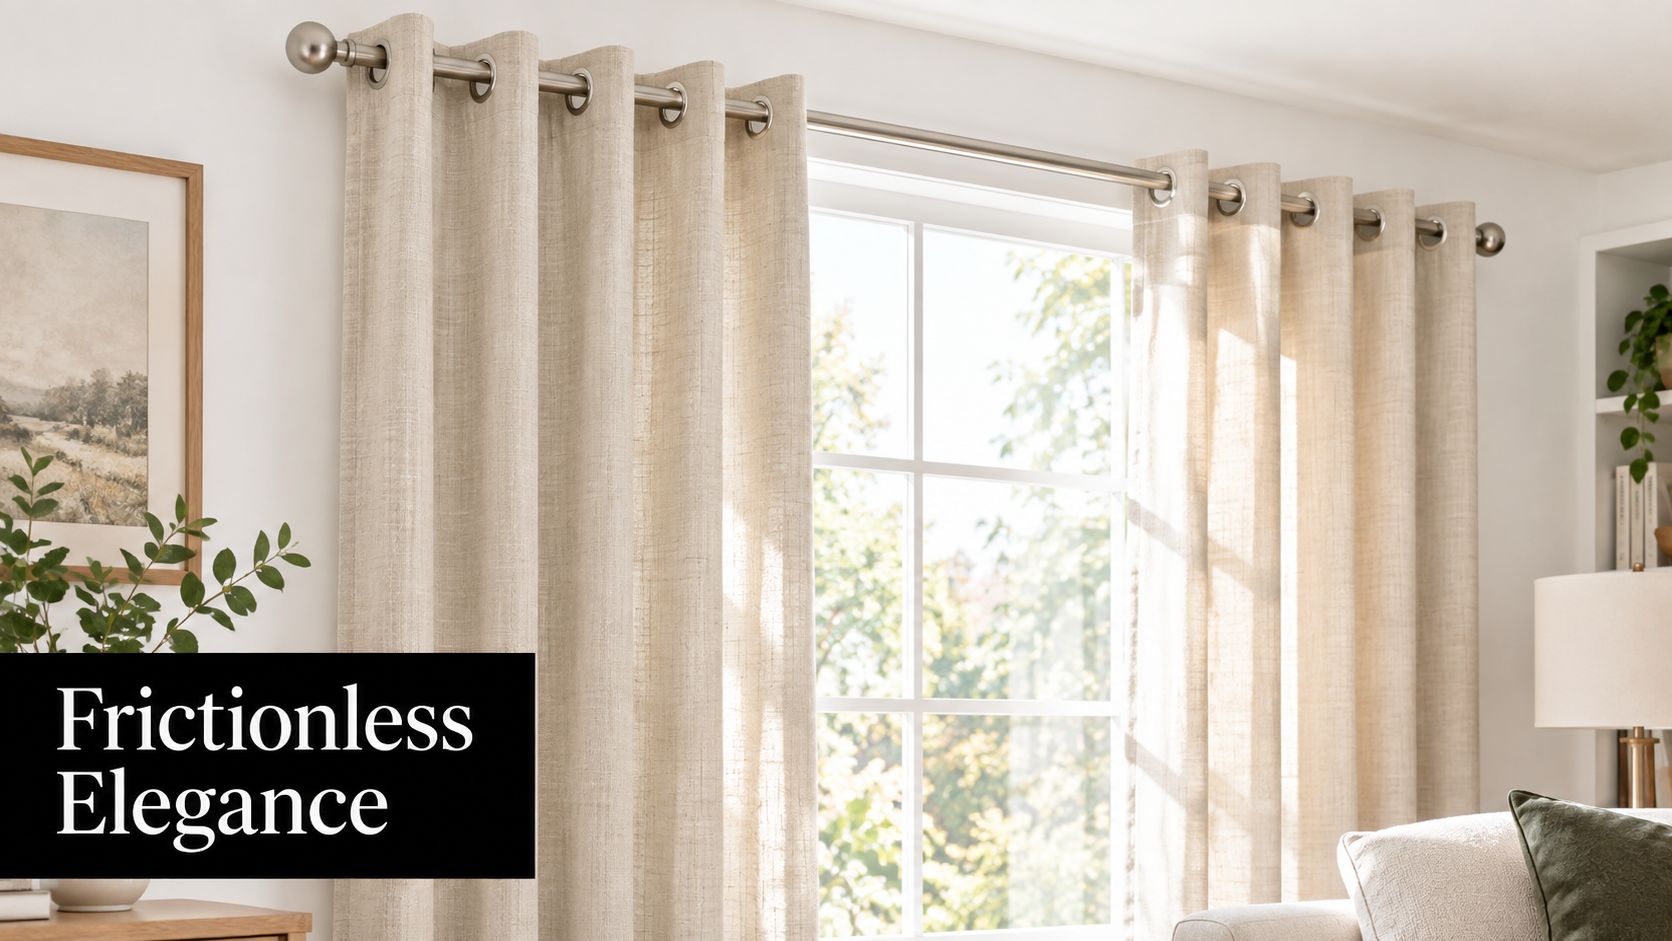
Unlike a hidden rod pocket, an eyelet header makes the hardware visible. That isn't a flaw. The ring finish becomes part of the room's visual language, much like a cabinet pull or light fixture.
Matte black rings emphasize a graphic, modern mood. Brushed metal feels quieter and more adaptable. A warm brass finish can soften neutral fabric, while silver works naturally with cool gray, white, or pale blue schemes. The panel's material changes the result too. A dense fabric creates deeper folds and more visual weight, while a lighter cloth keeps the window relaxed and airy.
Practical rule: Treat the grommet finish as a room accent, not an afterthought. It should relate to nearby hardware rather than compete with it.
The style has an unusually practical history. Historical summaries explain that grommets first served functional roles in sails and tents, where reinforced holes helped fabric pass over hardware without tearing. Manufacturers later adapted the construction for home furnishings in the early twentieth century.
Pre-made grommet kits helped the idea reach a larger consumer market in the 1960s, and mass-produced kits became widely available in hardware stores in the 1980s, according to this historical summary of grommet curtains. The style became more broadly democratized in the late 2000s, when affordable kits and online tutorials made do-it-yourself installation easier.
That evolution explains the look. Grommet curtains weren't shaped by ornate tailoring first. They grew from repeatable industrial construction, then moved through retail and home projects. Their visual character is therefore clean, functional, and deliberately unfussy.
The short answer is simple. Choose grommets when you want smooth daily movement and a modern appearance. Choose a rod pocket when the panel will mostly stay in place. Choose back tabs for a softer concealed-rod effect, or pinch pleats when a refined finish matters more than quick installation.
The header changes more than appearance. It affects how easily the curtain opens, how much structure the folds have, and how much space remains for light to enter near the rod.
| Header Style | Glide Smoothness | Aesthetic Vibe | Top Light Seal |
|---|---|---|---|
| Grommet | Smooth and practical | Modern, casual, architectural | Moderate, because the rod line can leave a small gap |
| Rod pocket | Restricted, especially with frequent movement | Soft, gathered, traditional | Generally tighter at the top |
| Back tab | Moderate, with a relaxed hidden-rod look | Casual and understated | Generally tighter than exposed grommets |
| Pinch pleat | Smooth with suitable rings or a track | Tailored, formal, custom-looking | Can seal well, depending on fullness and installation |
Grommets are usually the easiest option for a window that opens and closes every day. The rod travels through the rings rather than rubbing directly against a fabric pocket, so the movement feels more predictable. That convenience suits living rooms, bedrooms, sliding doors, and rental homes where a homeowner wants a finished look without a complicated track system.
Rod pockets have a softer visual effect, but the fabric can drag along the rod. They're better for stationary decorative panels, lightweight layers, or windows that rarely need adjustment. For readers considering that approach, custom rod pocket drapery from Lewis and Sheron Textiles offers useful context on how the heading creates its characteristic gathered finish.
A bedroom needs a different compromise from a bright living room. If your priority is darkness, a tight top treatment or layered construction may be more important than effortless glide. If the panels will be adjusted several times a day, easy movement may justify accepting a little light at the rod line.
Property managers often favor grommets because the installation is straightforward and the visible hardware gives multiple units a consistent appearance. A decorator furnishing a formal dining room may prefer pinch pleats because their vertical folds look more refined. A renter who wants a quick update without a track may find grommets the most forgiving choice, provided the rod fits correctly.
The most expensive-looking mistake is often the smallest one. A curtain can have the right color and length, yet still hang badly because the rod is too wide for the eyelets or the grommets are positioned poorly for the panel's width.
Start with the ring, not the window. The rod diameter must be smaller than the grommet's inner diameter. One sizing guide says most grommet panels use an inner ring of 1.5 to 1.6 inches, designed for rods up to roughly 1 3/8 inches in diameter, as shown in this grommet curtain compatibility guide.
A snug fit is not the same as a tight fit. The panel should slide without scraping, binding, or forcing the header to twist.
Common technical references list a grommet inner diameter of 1.6 inches, or 4 cm, with an outer diameter of 2.2 inches, and recommend rods under 1.5 inches for that construction. Another manufacturer lists a 1 5/8-inch inner diameter, a 2 13/16-inch outer diameter, and a 9/16-inch ring width, showing why product specifications matter more than a generic “standard rod” label. Compare the panel's stated opening with the rod before drilling any brackets, using this header dimension guide.
Grommet components also have defined mechanical sizes. A catalog lists size #7.5 with a 1-inch hole, a 1.73-inch flange diameter, a 0.39-inch overall length, and a 0.32-inch neck length. Size #8.5 has a 1 1/8-inch hole, a 1.89-inch flange diameter, a 0.41-inch overall length, and a 0.32-inch neck length. Size #12 has a 1 1/2-inch hole, a 2.46-inch flange diameter, a 0.48-inch overall length, and a 0.42-inch neck length, according to this curtain grommet size catalog.
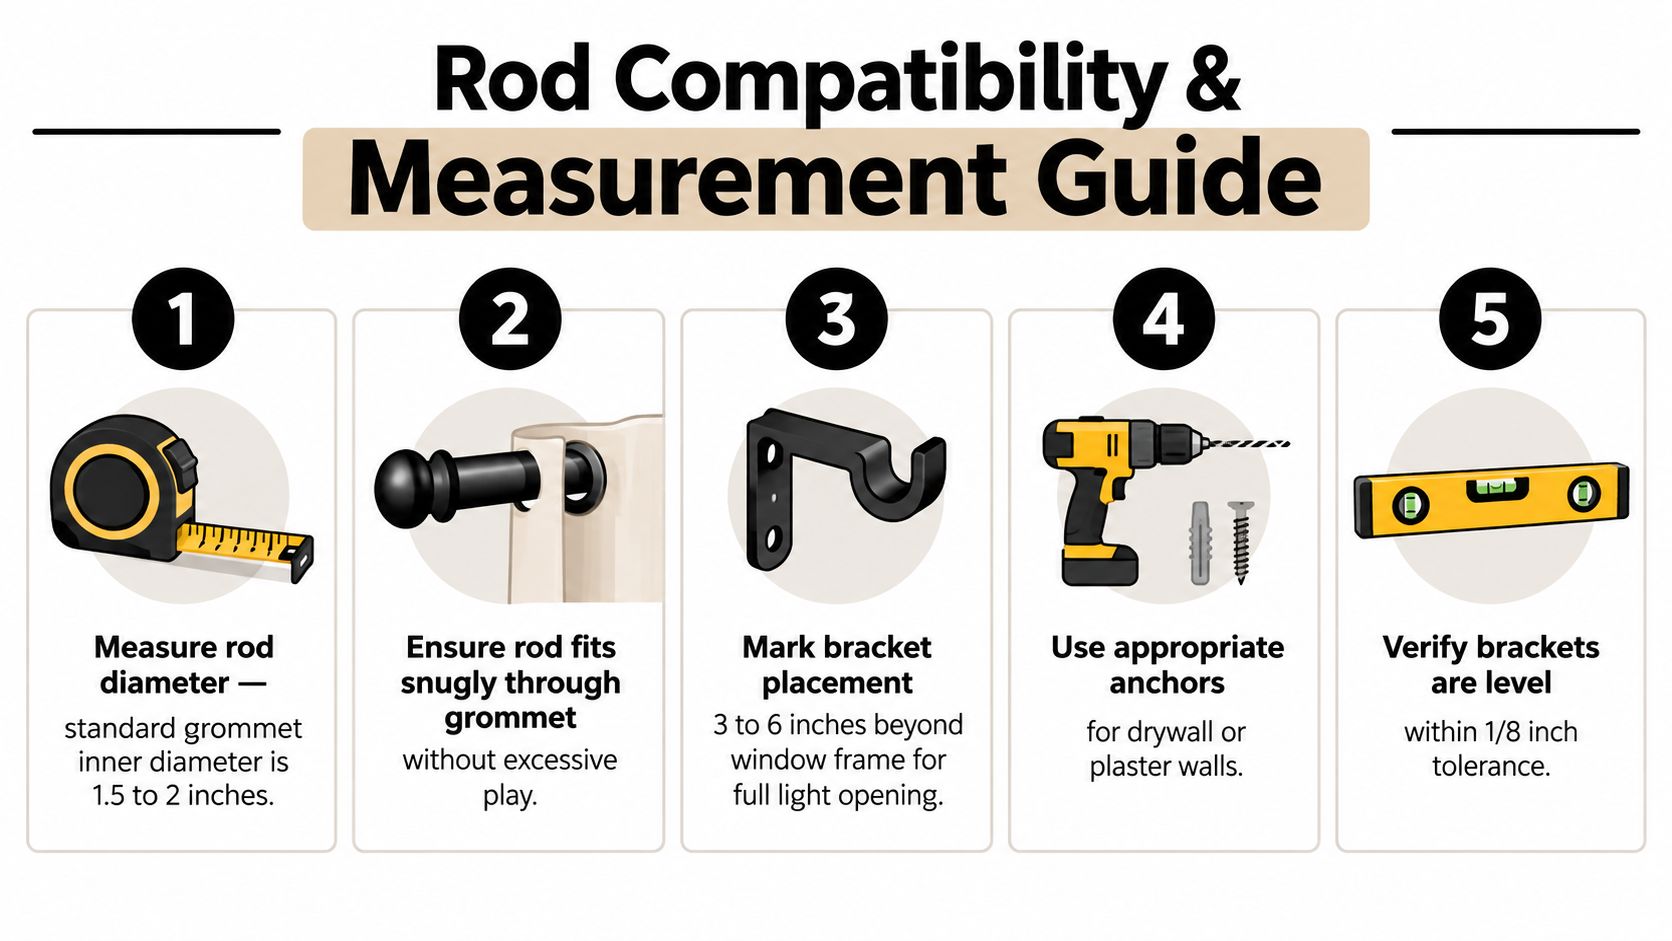
Grommet spacing controls the folds. A practical applications guide places common grommets at even intervals of 5 to 7 inches, or 13 to 18 cm, depending on the style and rod diameter. Another installation recommendation places grommets every 12 to 18 inches for standard drapes, so always follow the panel maker's construction rather than trying to retrofit a different interval. See the grommet applications guide for the relationship between placement and fabric distribution.
For a ready-made reference point, one sizing guide shows a common panel format of 140 cm wide by 225 cm long with 8 eyelets. Other technical references describe grommet curtains in residential and commercial sizes ranging from approximately 1.52 to 3.05 meters in height, 1.22 to 3.66 meters in width, and around 7.6 cm in depth, as reflected in this eyelet curtain product category.
Use this sequence before ordering:
For a visual explanation of rod selection, use Joey'z Shopping's guide to choosing a drapery rod size.
A grommet header creates a recognizable rhythm across the top of the window. That rhythm can look crisp, relaxed, soft, or dramatic depending on the fabric and finish you place around it.
For a living room, begin with the largest existing visual elements. If the sofa, rug, or artwork already carries a pattern, use a solid panel with texture rather than adding another busy motif. A medium-weight linen-look fabric with matte black rings can support an organic modern room, especially when the rod echoes black shelving or a nearby lamp.
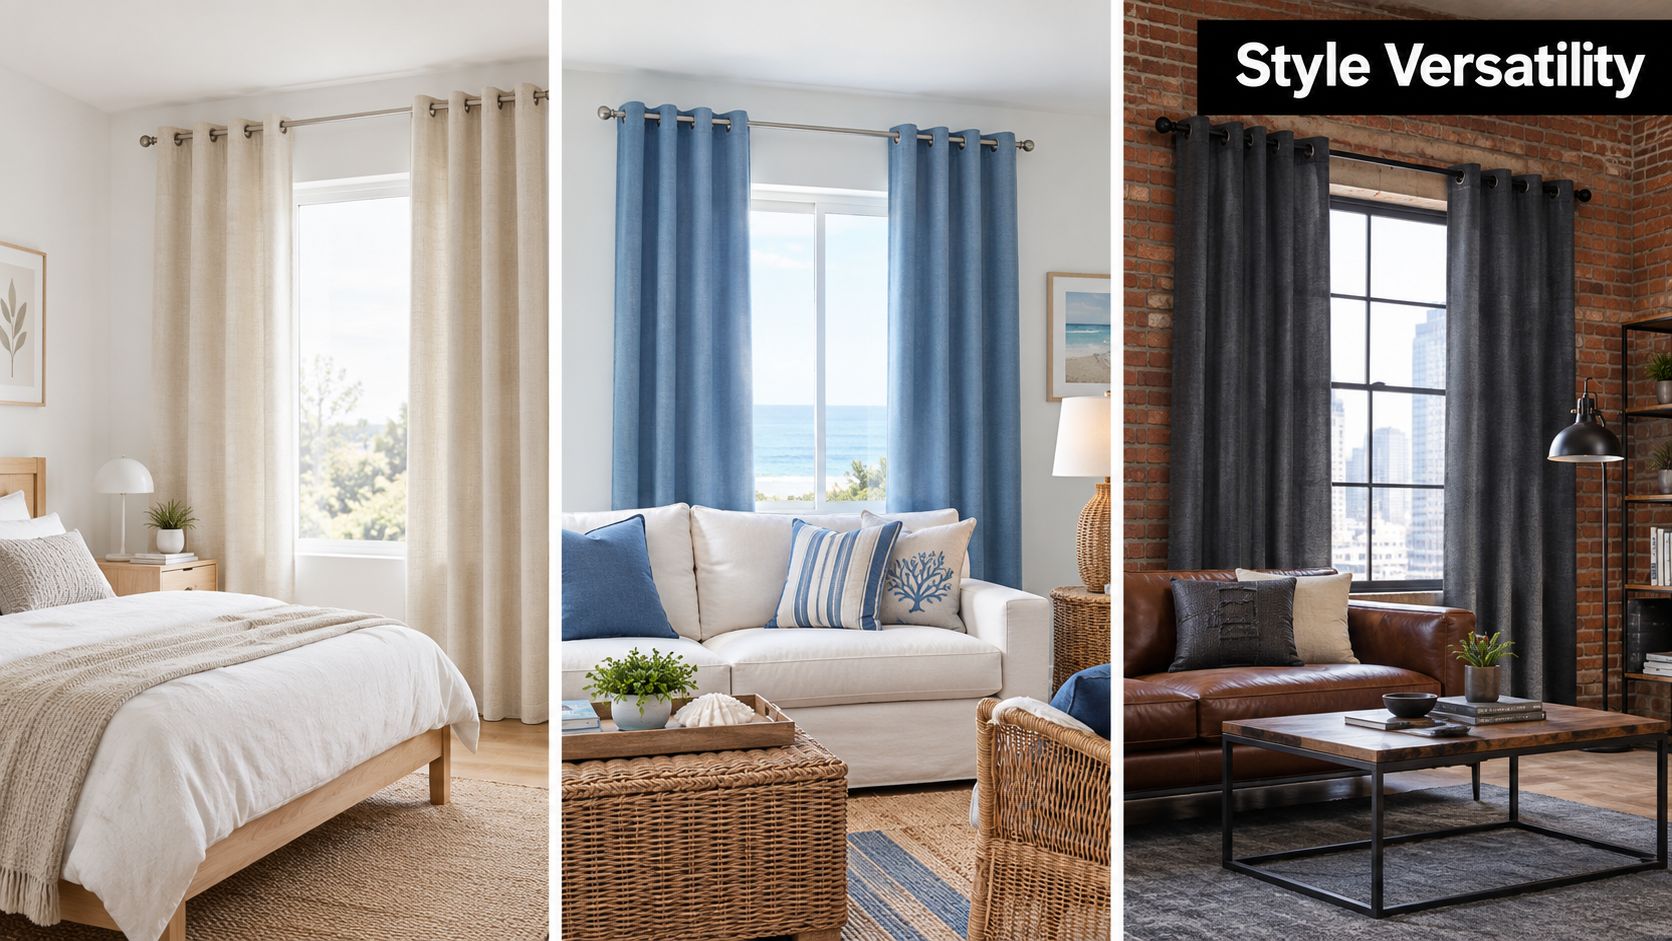
The same header can behave very differently in different materials.
In a bedroom, use the eyelets as a controlled design detail rather than the room's main feature. A dark gray lined panel can anchor pale walls and reduce visual glare, while a muted blue panel adds color without requiring a full room redesign. Keep the rod and ring finish quiet if the bed, headboard, or artwork already draws attention.
A useful designer habit is to repeat the metal finish at least once elsewhere in the room. Black grommets can relate to a black curtain rod, cabinet handles, picture frames, or a reading lamp. Brushed brass rings can connect with warm lighting and drawer pulls without making the window feel overly decorated.
Home offices benefit from controlled contrast. A neutral panel with a dark rod can define the window without distracting from a desk or screen. If glare is the primary issue, prioritize lining and coverage first, then choose the color and finish.
The grommet is visible, so give it a job. It can sharpen a casual room, warm up a neutral one, or repeat a finish that already exists nearby.
The short answer is that fabric and lining do most of the performance work, not the metal rings. A grommet header slides easily, but the opening around the rod can leave a small path for light, air, and sound at the top of the window.
That matters in a bedroom where blackout performance is important. It also matters in a drafty room or a street-facing space where the homeowner wants better acoustic comfort. A panel can be thick and well lined, yet still allow some leakage at the rod line and along the sides if it barely overlaps the window.
Independent acoustic guidance identifies dense, multilayer curtains as the more effective construction for sound control. It also notes that sound-blocking curtains may reduce noise by 15 to 20 dB, depending on the fabric and lining, and repeatedly identifies heavier fabrics above about 200 GSM as more useful for sound dampening and thermal insulation. These figures come from the sound-blocking curtain guidance.
That doesn't mean a grommet curtain will transform a noisy room. The wall, glass, frame, side gaps, and installation all affect the result. Think of the curtain as one layer in a larger barrier, not as a replacement for sealing a poorly fitted window.
For light control, prioritize:
Rod-pocket and back-tab headers can create a tighter-looking top edge, but they often give up some ease of movement. Grommets make opening and closing straightforward, which is valuable in a living room or rental, but the rod-line gap is a real tradeoff.
If you need both convenience and darkness, consider a lined grommet panel with careful overlap, or add a separate layer. A valance or cornice can visually cover the top area, while side returns and wider mounting reduce exposed edges. Joey'z Shopping's explanation of curtain lining materials can help you compare the role of standard, thermal, and blackout linings.
Natural light still matters during the day. Clean glass can improve the room's brightness before you close the panels, so guidance on how to brighten your home with clean windows is relevant to the larger window treatment plan. Use the curtains for control, not as a substitute for maintaining the window itself.
Good installation starts on the wall, not with the fabric. Check the rod diameter, panel length, bracket position, and wall surface before you pick up a drill. Heavy fabric and metal eyelets place more demand on the brackets than a lightweight decorative panel.
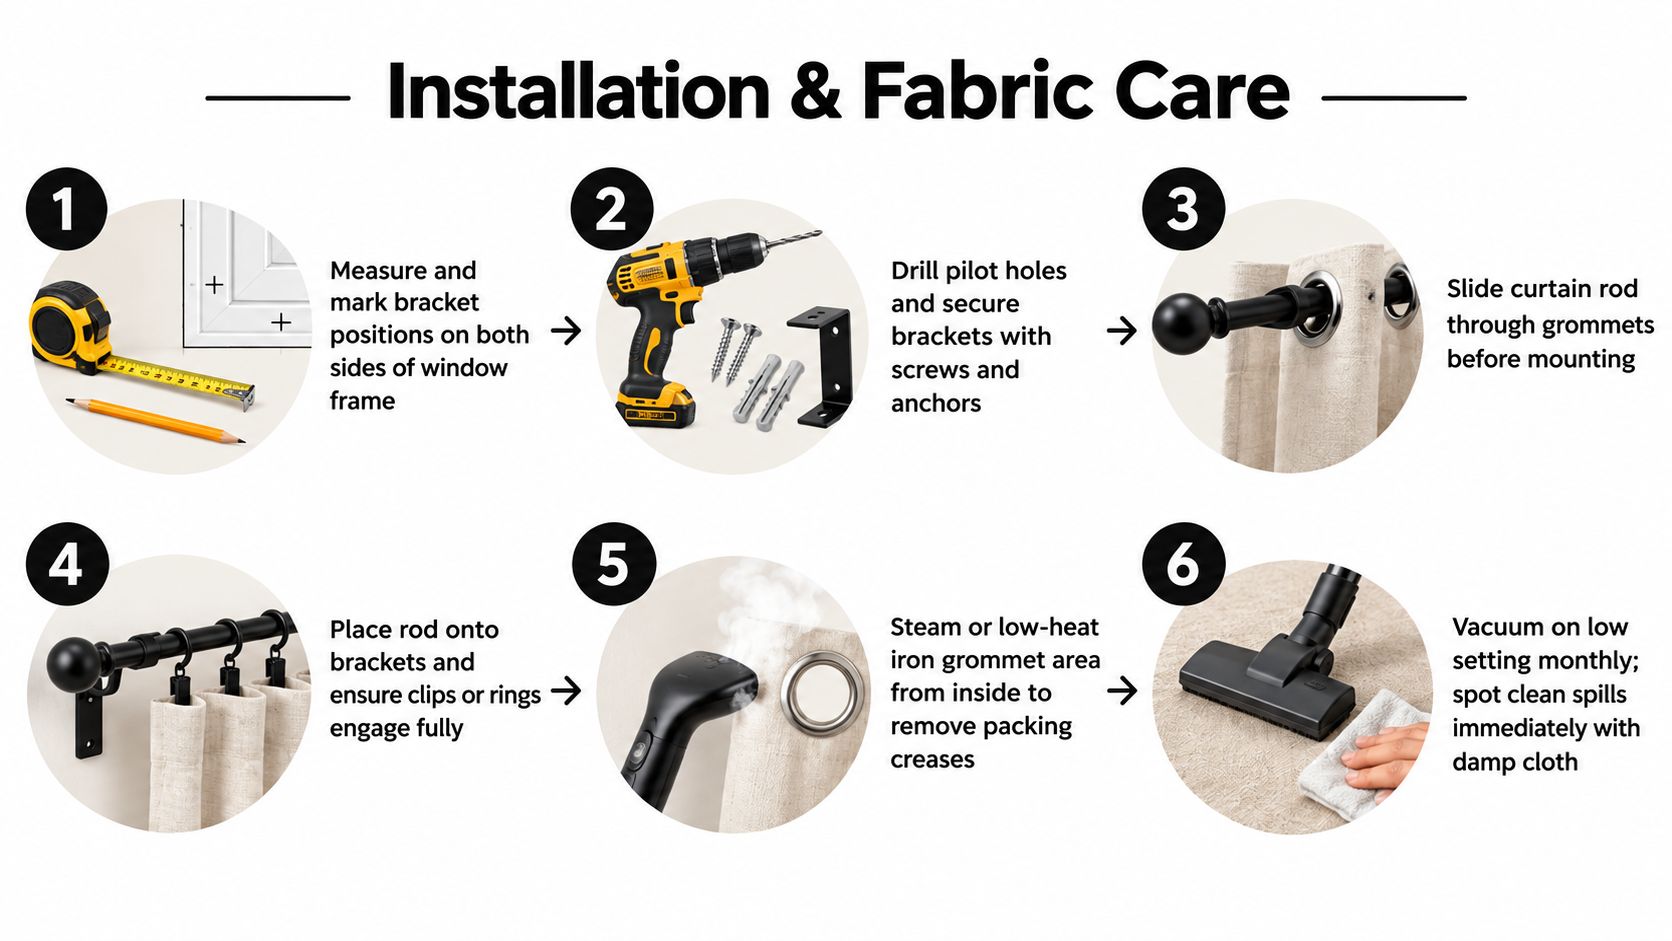
Joey'z Shopping's curtain installation guide provides additional practical context for the hanging sequence.
Dust and grit increase friction between the rod and rings. Vacuum the panels on a low setting each month, and spot clean spills promptly with a damp cloth. Follow the care label before washing, because shrinkage can change the finished length and distort the reinforced header.
Avoid harsh cleaners on the eyelets. They can dull or tarnish some finishes, while excess moisture may affect the header tape or fabric near the ring. If the panels begin to drag, clean the rod first and inspect the rings for rough edges rather than applying an unapproved lubricant that could stain the curtain.
A smooth glide starts with a correctly sized rod and ends with a clean, undamaged header.
If you're replacing panels during a room update, Joey'z Shopping offers window treatments including the Vogue Grommet Window Curtain Panel and the Tranquil Lined Grommet Blackout Window Curtain Panel, with product details to review for fabric, lining, and finished dimensions. Visit Joey'z Shopping to compare curtain options, check measurements, and choose a grommet treatment that fits both your window and your daily routine.