
Join the Joey'z Family!

Table of Contents
Learning how to hang a curtain is one of those DIY projects that seems simple, but getting it just right is truly an art. The secret to hanging curtains like a professional comes down to one core principle: go high and wide. This single technique creates an illusion of taller ceilings and a more spacious room, instantly elevating your space.

The foundation of a flawless window treatment is proper curtain rod placement. Many people default to placing the rod just above the window frame, but this is a classic design mistake. This approach can make a window feel smaller and the room shorter, "boxing in" beautiful natural light.
Instead, interior designers use specific measurements to maximize a room's potential. By extending the rod beyond the window's edges and mounting it higher than the frame, you trick the eye. This ensures that when the curtains are open, they frame the window without blocking precious light, making the window appear much grander.
To achieve this polished, intentional look, you just need to remember a few key numbers. Think of it as a simple formula for success. Sticking to these guidelines is the difference between curtains that look like an afterthought and curtains that look like a deliberate, stylish choice.
Pro Tip: Always buy longer curtain panels. It's much easier to hem curtains that are too long than to fix the awkward look of panels that are too short. Buying a 95-inch panel and having it tailored is often a better choice than settling for an 84-inch panel that won't quite reach the floor.
This table summarizes the essential measurements for hanging curtains to achieve a professional, high-end look.
| Measurement Area | Standard Rule | Pro Tip for Impact |
|---|---|---|
| Rod Height Above Frame | 4 to 6 inches | For rooms with high ceilings, go halfway to the ceiling. |
| Rod Width Beyond Frame | 6 to 12 inches on each side | Wider placement makes windows seem larger and lets in more light. |
| Curtain Length | Kiss the floor or float 1 inch above | Avoid "high-water" length. If between sizes, always size up. |
| Curtain Fullness | Total panel width should be 2x the window width | For a truly luxurious look, aim for 2.5x the window width. |
Another critical aspect of hanging curtains correctly is achieving the right fullness. Skimpy, flat panels can look cheap and unfinished, no matter how beautiful the fabric is.
The general rule is that the combined width of your curtain panels should be at least twice the width of your window. For a truly luxurious, billowy effect that you see in magazines, aim for 2.5 times the width.
This means if you have a 50-inch wide window, you'll want at least 100 inches of fabric. Often, this requires purchasing four standard panels instead of just two. While it might seem like an extra expense, this detail adds a softness and high-end feel that makes a significant impact on the whole room. You'll find a great selection of panels at Joey'z Shopping that can help you achieve this exact look.
There's nothing more frustrating than getting halfway through a project only to realize you're missing a crucial tool. A smooth installation comes down to prep work. Getting everything in order now means no last-minute trips to the hardware store.
Having the right tools isn't just about getting the job done; it's about getting it done right. A flimsy tape measure can leave you with crooked curtains, and the wrong drill bit can chew up your walls. Taking a few minutes to gather these essentials will pay off with a polished, professional look that lasts.
Before you drill, make sure you have these items ready. This is the core set of tools you’ll need for almost any curtain-hanging job.
The hardware you pick does more than just hold up your curtains—it’s a major design element. At Joey'z Shopping, we have plenty of styles to match your decor.
Curtain Rods: Your choice of rod depends on your desired look and curtain type.
Insider Tip: Always check that your rod is rated to hold the weight of your curtains. Heavier fabrics like velvet or lined blackout panels need a thicker, sturdier rod—and often a center support bracket—to keep them from bowing.
Brackets, Finials, and Rings: These are the finishing touches. Brackets mount to the wall, finials are decorative end caps, and rings hang certain curtain types. Many of our curtain rod kits include all these pieces.
What happens when there isn't a stud exactly where you need a bracket? This is where wall anchors become crucial. Driving a screw directly into drywall without an anchor is a recipe for disaster.
Using the right anchor for your wall type is one of the most critical steps in learning how to hang a curtain securely. It’s a small detail that makes a massive difference.
Getting your measurements right is the single most important part of hanging curtains. It’s less about guesswork and more about a simple formula that designers use to make windows look bigger and ceilings feel taller.
Precise measurements prevent that dreaded "high-water" look—curtains that are too short—or panels so narrow they look stretched out when closed. Think of it like a tailored suit; the perfect fit changes everything.
First, let's tackle the width. Measure the full width of your window frame. Now, here comes the secret: don't stop there.
For that luxurious, full look, extend the curtain rod 6 to 12 inches on each side of the frame. This extra space lets your curtain panels "stack back" against the wall when they're open, which floods the room with light and makes the window seem grander.
Once you have that final rod length, you can figure out the panel width.
A Common Mistake to Avoid: Many people buy just two panels for a wide window, creating a flat, skimpy look. It's better to use four standard panels (two on each side) to get that beautiful, billowy effect.
Next up is height, where you can create a real illusion of space. The standard advice is to mount your curtain rod 4 to 6 inches above the top of the window frame. If you have tall ceilings (9 feet or more), you can go even higher, placing the rod about halfway between the window frame and the ceiling.
Once you’ve marked where your rod will go, measure from that point down to the floor. This measurement is your guide for curtain panel length. You've got three stylish options:
Before you start marking your walls, it's a good idea to get comfortable with your tools. Understanding choosing the right ruler for fabric and other measuring tapes ensures accuracy.
This simple visual breaks down the three key steps for getting your tools in order before you start.
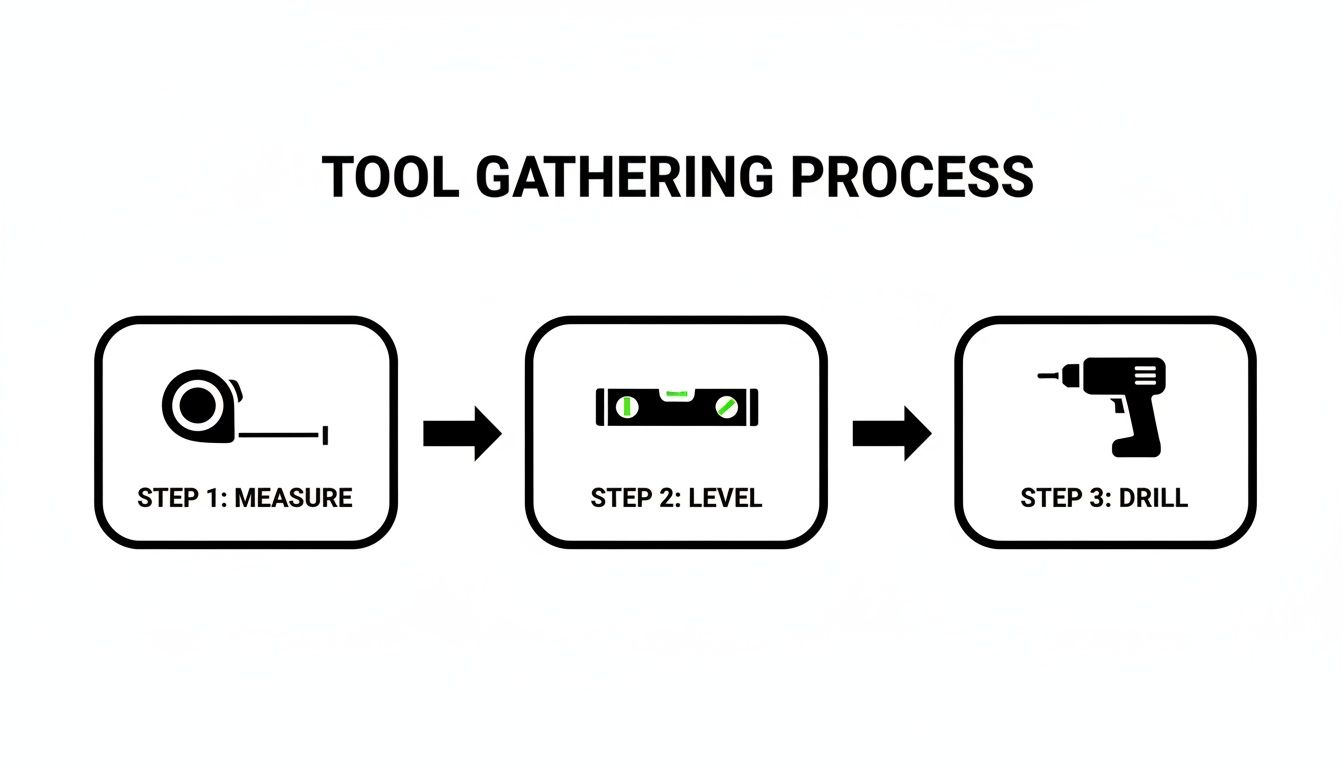
It’s a great reminder that the project comes down to three things: measuring accurately, getting everything straight with a level, and securing it all with a drill.
Finally, you’ll need to decide between an inside or outside mount. While the "high-and-wide" method is an outside mount, an inside mount sometimes makes more sense.
The global curtains market is expected to hit USD 19,365.2 million by 2030. Grommet styles hang best when the rod is placed 4-6 inches above the frame, a detail that improves light control. Correctly hung curtains can also reduce heat loss through your windows by up to 25%.
Alright, you've got your measurements marked and your tools laid out. This is where your careful planning pays off.
First, check for wall studs—the vertical wood beams in your home's frame. Drilling brackets into them provides the gold standard for a secure hold. A stud finder makes this easy.
Slide it across the wall where you plan to hang your brackets. Once it beeps or lights up, you've hit a stud. If a stud isn't perfectly aligned, don't sweat it. For a rock-solid installation in drywall, you'll need wall anchors. These expand behind the drywall, creating a strong anchor point for your screws. It's worth getting familiar with the different types, and this guide to wall mounting brackets is a great resource.
Now it's time to mark your bracket spots. Hold your first bracket up to your mark and use a pencil to dot the screw holes.
Before marking the second one, get your level. Rest it on top of the first bracket and extend it across the window. Nudge it until the bubble is centered, then mark the spot for the second bracket. This simple check guarantees your rod will be perfectly straight.
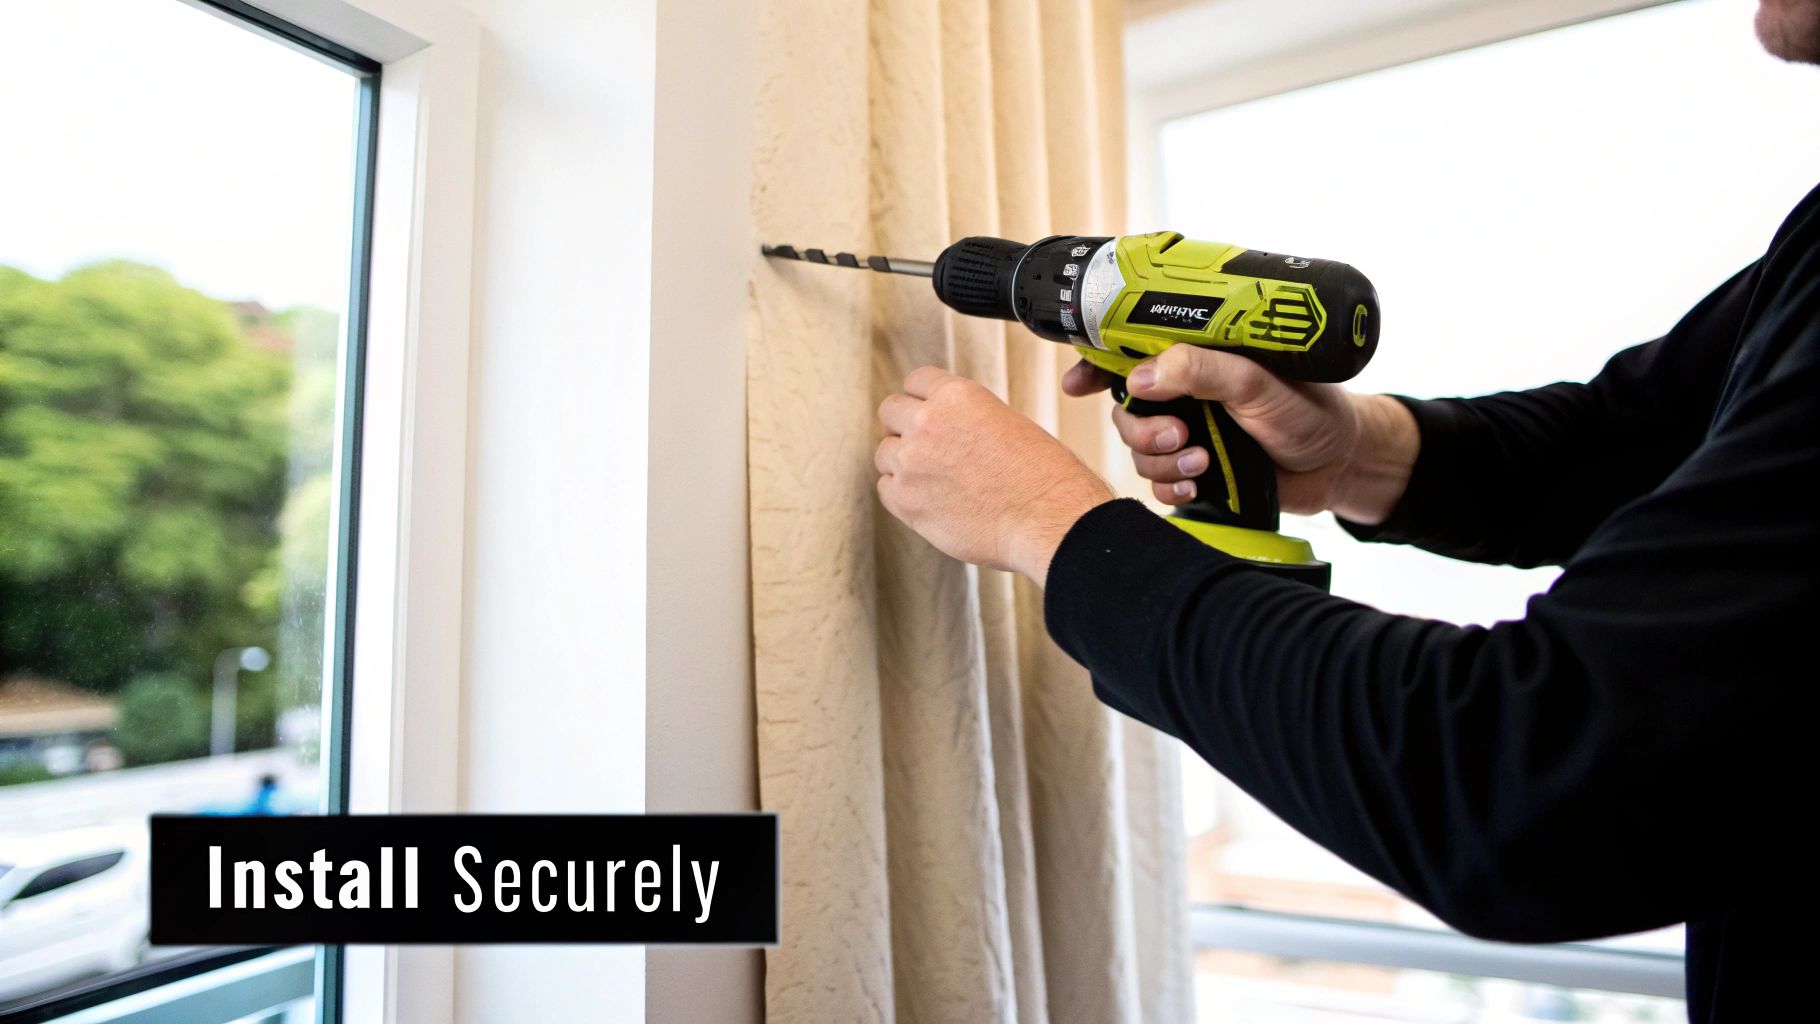
Expert Tip: Always drill a pilot hole. A pilot hole, drilled with a bit just slightly smaller than your screw, prevents the wall from cracking and makes driving the screw in much easier.
Once your pilot holes are ready, gently tap in your wall anchors until they sit flush with the wall.
Position the brackets over your prepared holes. Using your drill, drive the screws firmly into the anchors (or studs). You want them snug, but don't overtighten and risk stripping the screw. If your rod is over 60 inches long, install a center support bracket to prevent bowing.
And now, the fun part! Get your curtains on the rod.
With the curtains threaded on, lift the rod and set it into the brackets. Tighten any set screws to lock the rod in place. Take a step back and admire what you've done—you now know how to hang a curtain like a pro.
Drilling holes isn't always an option. Whether you're a renter or just prefer not to leave permanent marks, there are plenty of great, damage-free ways to hang your curtains. These no-drill solutions offer surprising stability and style without a power tool.
Window treatments are a huge part of home decor. The market is projected to hit USD 44.58 billion by 2035, as curtains are an affordable way to refresh a space. Smart installation choices can even trim your energy bills by 10-15% each year.
Let's clear something up: "no-drill" doesn't have to mean flimsy. Today's damage-free options are impressively strong.
Tension Rods: These are a go-to for renters. They use a spring-loaded mechanism to fit snugly inside the window casing. They're perfect for lightweight curtains but not built for heavy drapes.
Adhesive Hooks and Brackets: Modern adhesives are seriously impressive. High-strength adhesive brackets can hold up to 15 pounds. The trick is to prep the wall surface by wiping it with rubbing alcohol first and letting the adhesive cure for the recommended time.
For a deeper dive, take a look at our complete guide on how to hang curtains without drilling.
Not every window is a perfect rectangle. From concrete surfaces to unusual shapes, here’s how to approach common installation headaches.
Hanging Curtains on Concrete or Brick Mounting anything on masonry calls for a hammer drill and a proper masonry bit to create a pilot hole. Once that's done, insert a specialized masonry wall anchor, then screw your bracket into it for an unshakeable hold.
Dressing Corner Windows For windows that meet at a corner, a specialized corner connector is your best friend. This elbow-shaped piece joins two separate curtain rods, letting your curtains glide smoothly around the bend.
Handling Arched or Oversized Windows You can either mount a straight rod high above an arched window to accentuate height, or use a flexible curtain rod that bends to match the curve. For extra-wide windows, always use a center support bracket to prevent sagging.
Safety First: If you have children or pets, cordless curtain solutions are non-negotiable. Dangling cords are a serious hazard. We recommend wand-operated curtains or smart, motorized options from Joey'z Shopping to create a safer environment.
Your curtains are up—fantastic! But a few final steps can take your work from "done" to "designer-finished."
The first secret from the pros is to train your curtains to hang in uniform folds. Start by arranging the fabric into neat, accordion-style pleats.
Once they're arranged, loosely tie soft fabric strips around the top, middle, and bottom of each panel. Let them sit for 48-72 hours. This trick encourages the fabric to "remember" the crisp folds, giving you that gorgeous, structured drape.
Even the most stunning curtains look sad when they're wrinkled. For most fabrics like cotton or linen, a handheld steamer is your best friend. Just run it down the length of the panels once they're hung.
If you don't have a steamer, an iron on a low-heat setting will also work before you hang them. Be sure to check the fabric care label first!
For delicate materials like velvet or silk, never apply direct heat. A great trick is to hang them in the bathroom while you take a hot shower. The steam will gently release the wrinkles.
Now that you know how to hang a curtain perfectly, keeping them looking great is all about simple maintenance.
The short answer is 4 to 6 inches above the window frame for a standard 8-foot ceiling. This placement creates the illusion of height and makes the room feel more spacious and airy. If you have higher ceilings (9 feet or more), you can go even higher—placing the rod about halfway between the top of the window and the ceiling for a more dramatic, elegant look.
The best way is to use the right tools. You will need a hammer drill, a masonry drill bit, and masonry-specific wall anchors. First, use the drill to create a clean pilot hole. Then, insert a plastic or lead wall anchor designed for masonry. Finally, screw your curtain rod bracket securely into the anchor for a rock-solid hold that won't budge.
The rule of thumb for curtain width is 2 to 2.5 times the width of your window. For a standard, full look, the total width of your curtain panels should be at least double your window's width. For a more luxurious and billowy effect, especially with heavy fabrics like velvet, aim for 2.5 times the width. This ensures your curtains look generous and pleated, not flat and skimpy.
Yes, you absolutely can hang curtains without drilling. Excellent no-drill solutions include tension rods and high-strength adhesive hooks. Tension rods work inside the window frame and are perfect for lightweight curtains. For heavier panels, look for strong adhesive brackets, making sure to check their weight limit (some can safely hold up to 15 lbs) and prepping the wall surface properly for the best hold.
Ready to tackle your next window project with confidence? Explore the wide selection of curtain hardware and damage-free solutions at Joey'z Shopping today and find everything you need for a flawless finish at https://joeyzshopping.com.