
Join the Joey'z Family!

Ready to transform a room with new curtains? The secret to that polished, professional look isn't a complex designer trick—it's all about how you install your curtain rods. Getting the placement right can make your windows look bigger, your ceilings taller, and the entire space feel more intentional.
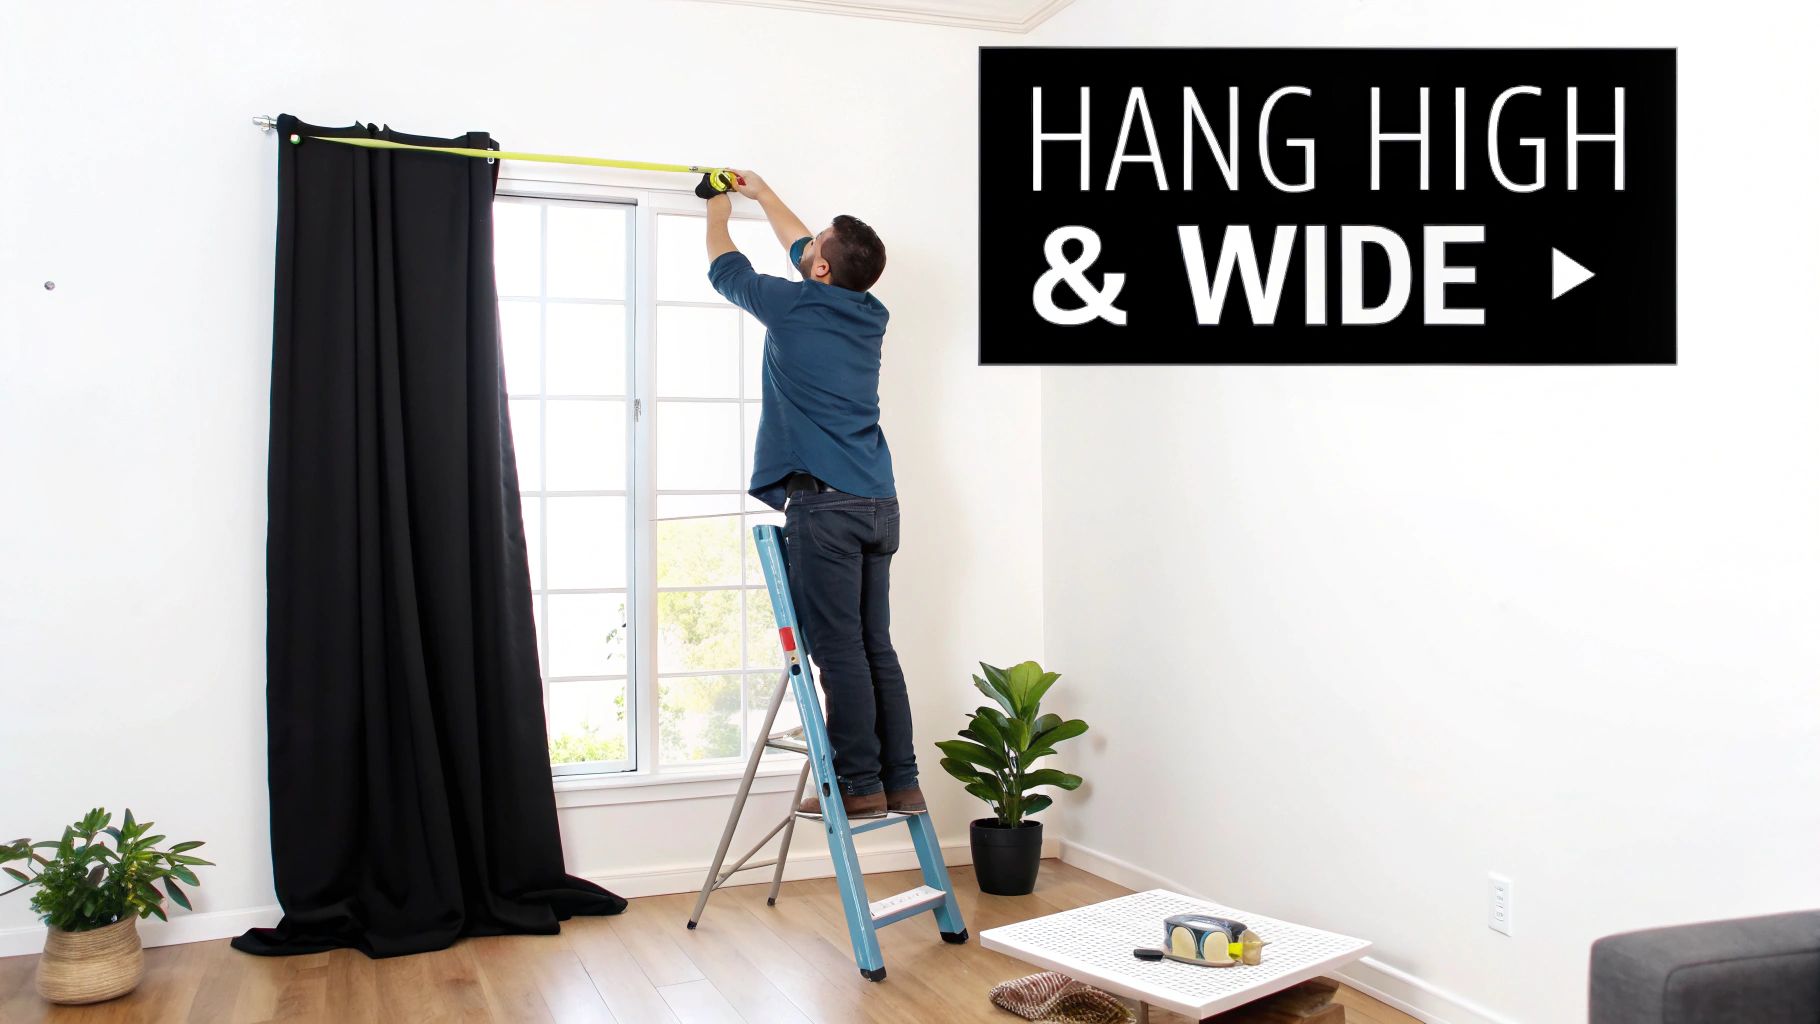
The short answer for how to install curtain rods is simple: hang them high and wide. I always recommend aiming for 4-6 inches above the window frame and extending 3-6 inches past it on each side. This one move makes your windows look larger and gives the whole room a more dramatic, airy feel.
Before you even think about drilling, let's gather your tools. You’ll absolutely need a tape measure, a level, a pencil, a drill, and the right wall anchors for your wall type (this is crucial!). Taking a few minutes to prep now saves you from the headache of sagging rods and crooked curtains later on.
Installing a curtain rod is a project of precision, not brute force. Your goal is to create a secure, level frame for your window that makes the room feel better. It's not just about putting screws in a wall; it’s about creating an illusion of height and space.
To give you a clear picture of what’s involved, I’ve put together a simple table that breaks down the whole process. It walks you through each stage, what you're trying to accomplish, and the tools you'll need.
| Phase | Key Objective | Essential Tools |
|---|---|---|
| Prep and Measure | Gather tools and determine ideal rod placement | Tape measure, pencil, level, drill |
| Mark and Drill | Precisely mark bracket spots and create secure holes | Pencil, level, stud finder, drill bits, wall anchors |
| Mount and Hang | Attach the brackets, rod, and curtains | Screwdriver or drill, curtain rod, curtains |
| Final Adjustments | Ensure the rod is secure and curtains drape perfectly | Level, your own keen eye |
Having this bird's-eye view helps you visualize the project from start to finish, so there are no surprises along the way.
Before marking your wall, let’s talk tools. Having the right equipment ready to go is the difference between a breezy project and one that has you making frustrated trips to the hardware store. This isn’t just about having a drill; it’s about having the right bits and anchors for your specific walls.
Think of it like cooking: you wouldn’t try to chop onions with a butter knife. The tools you choose will directly impact how stable and straight your new curtains end up looking.
The basics here are straightforward, but each one plays a critical role. A quality tape measure is non-negotiable. You’ll also need a level—a classic bubble level works great, but a laser level can make things even easier—to guarantee your rod isn't crooked. Of course, a pencil and a power drill are essential for the actual installation.
Pro Tip: Your new best friend is a stud finder. Drilling a bracket directly into a wooden stud gives you the strongest possible support, which is vital if you're hanging heavy drapes. It’s a small tool that prevents major headaches.
I can’t stress this enough: the most common reason curtain rods fail is because the wrong wall anchors were used. Your kit will come with screws and probably some tiny plastic anchors, but nine times out of ten, those are only good enough for very lightweight curtains in standard drywall.
For heavier fabrics or different wall types, you’ll need to upgrade your hardware.
Getting this part right is what ensures your beautiful curtains and drapes will hang securely for years to come.
Getting your measurements right is what separates a DIY-looking job from a professional design that elevates the room. We’re not just covering the window; we're creating an illusion of height and space, making your room feel bigger and more thoughtfully put together.
The secret is a pro technique I call the “High and Wide” principle. It’s all about placing your curtain rod significantly higher and wider than the window frame. A solid rule of thumb is to measure 4-6 inches above the top of the window trim and extend the rod 3-6 inches past the frame on each side.
Of course, not every window lives on a perfect, open wall. If you’ve got a window crammed into a corner, you can still go high, but you’ll just extend the rod on the one open side. For a big bay window, treat the whole thing as one large unit—place brackets at each corner and add a support bracket in the middle to handle the long span.
When you have multiple windows in the same room, consistency is everything. I always use a laser level to make sure my top bracket marks are perfectly aligned across the room. This creates a clean, cohesive sightline that just looks right.
This diagram breaks down the installation flow, showing how everything starts with measurement before you pick up a drill.
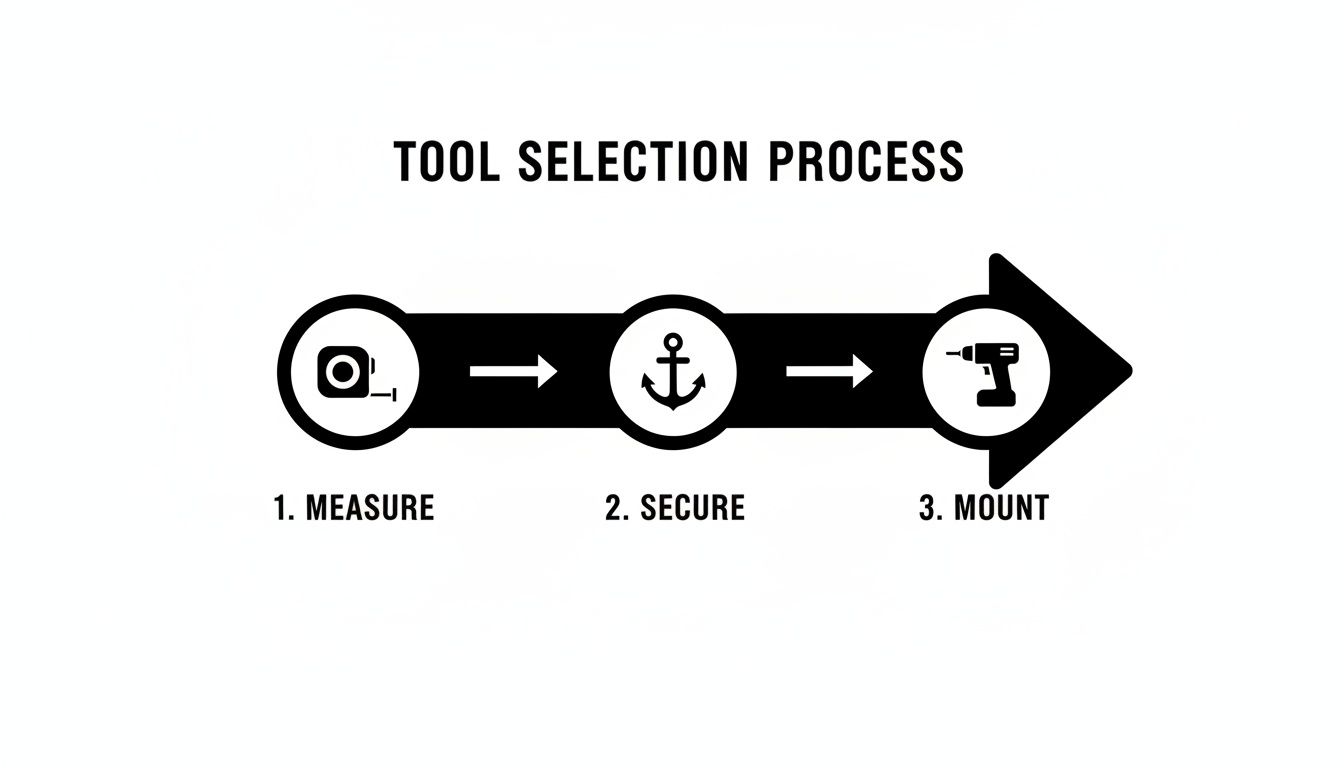
As you can see, careful measurement is the foundation. Get this right, and the rest of the job becomes so much easier.
Here’s a tip many people miss: you have to account for stack back. This is just the space your curtains take up on the wall when they’re pulled all the way open.
By extending your rod wide enough, you ensure the curtain stack frames the window nicely instead of blocking precious daylight. The fabric should rest on the wall, not cover the glass. Our detailed curtain rod size chart is a huge help for figuring out the perfect rod length for maximum light and a polished finish.
Getting the measurements right is like creating a blueprint. It’s the most critical planning phase that dictates the final outcome, ensuring your curtains hang beautifully and function perfectly.
Okay, your measurements are sorted. Now it’s time to put pencil to wall. This is where precision pays off—taking an extra minute here prevents crooked rods and a wall full of patch-up jobs later.
I always start by drawing a very faint, perfectly level pencil line to connect the spots where the tops of my brackets will sit. Then, hold each bracket up to that line and mark the screw holes directly through the bracket. This trick removes all guesswork and guarantees your drill holes will line up perfectly.
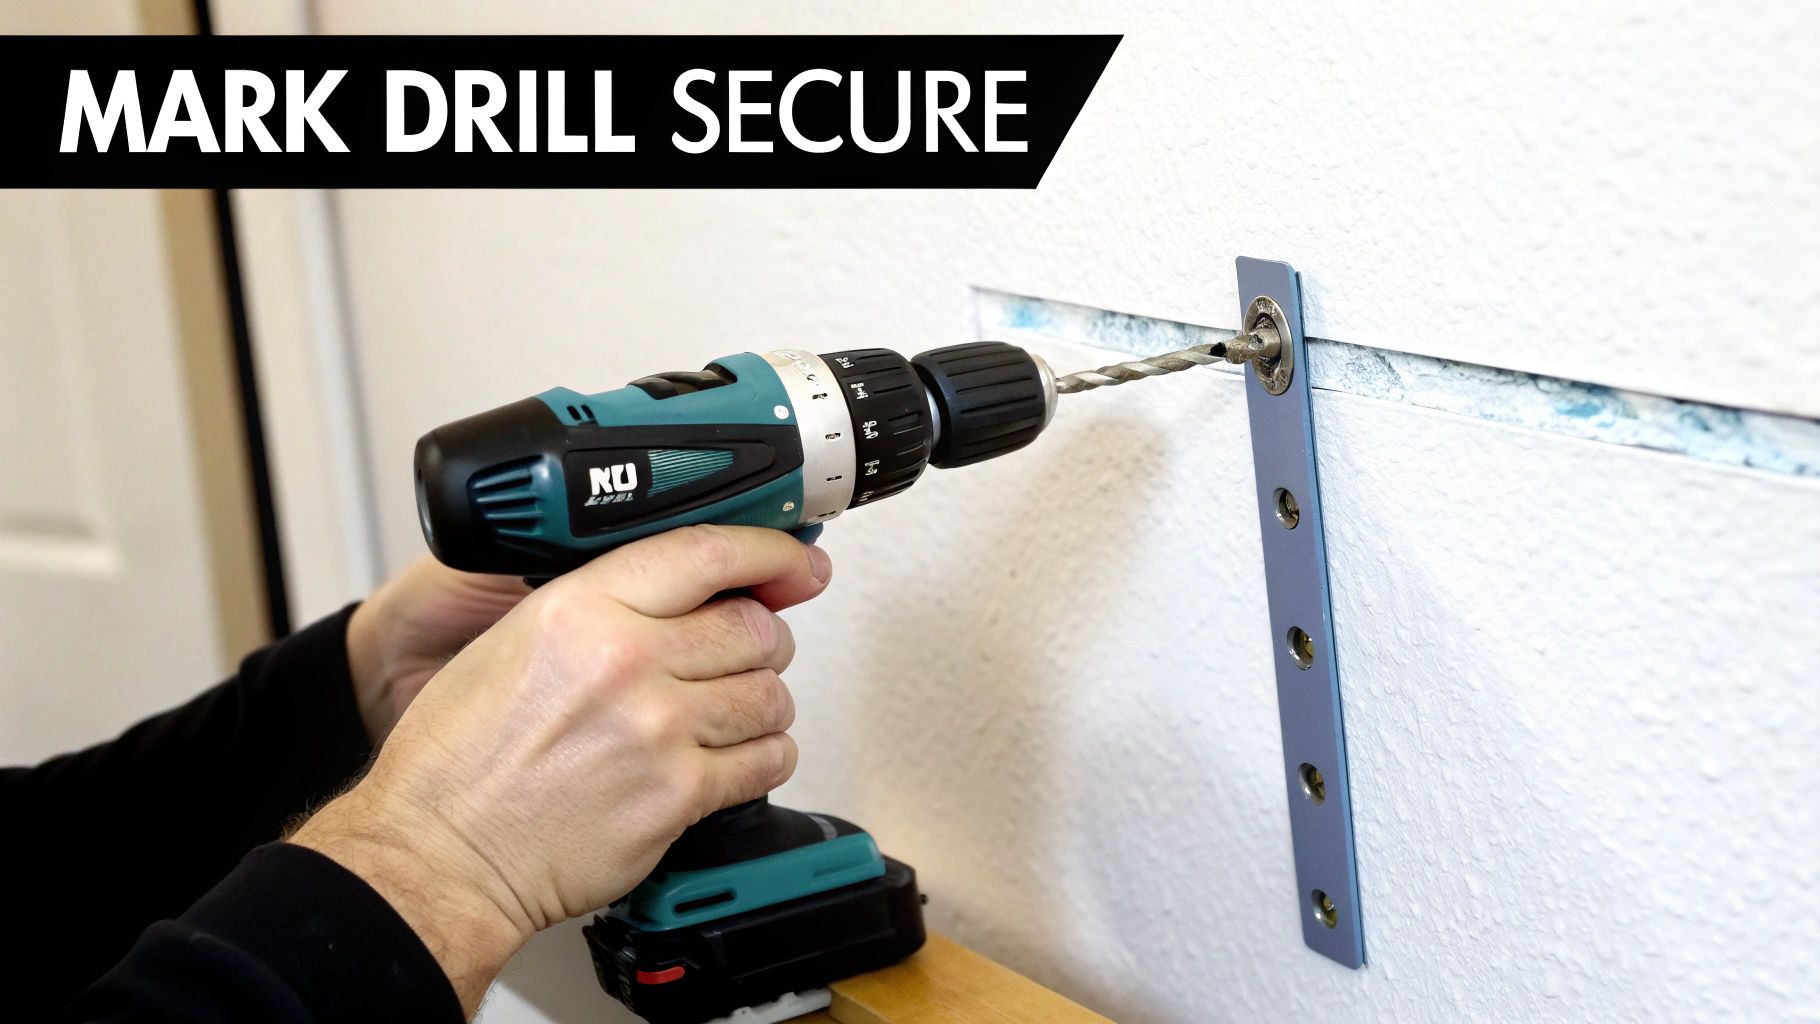
Before drilling, grab a stud finder. This is non-negotiable. If you can drive a screw directly into a wooden stud behind the drywall, you’ve hit the jackpot. That's the most secure mount you can get, especially for heavy drapes.
But let's be real, studs are rarely located exactly where you need them. That’s where wall anchors come in.
This careful prep work is what separates a flimsy installation from a rock-solid one. The core principles are the same whether you're installing curtain rods or following a guide for hanging your picture with precision.
If you're working with standard drywall, check out our detailed guide on how to hang curtain rods in drywall for more targeted advice. Nailing this stage means your new curtains will hang beautifully for years.
You’ve done the hard part. Now for the big reveal. With your anchors set, all that’s left is to mount the hardware and hang those beautiful new curtains.
Go ahead and screw the brackets into the anchors. Here’s a little tip: don't tighten the screws all the way down just yet. Leaving them a bit loose gives you wiggle room for last-minute adjustments.
Next, thread your curtains onto the rod. The best way to do this depends on the style:
Once the curtains are on the rod, gently set it into the brackets. If your hardware came with set screws to lock the rod in place, secure them now. After that, you can go back and fully tighten the bracket mounting screws, locking everything in place.
For more complex setups, like layering different curtain types, our guide on how to hang double curtain rods has extra tips.
The final step is always the most rewarding. Step back, admire what you’ve accomplished, and arrange the fabric. Gently guide the material into even pleats to create a beautiful, finished drape that hangs just right.
This last touch takes your window treatment from simply installed to professionally styled.
Even with the best planning for how to install curtain rods, sometimes the wall has other ideas. Hitting a snag is a normal part of any DIY project, but knowing how to solve the problem gets you to a beautiful finish.
Imagine you're drilling, and the bit suddenly stops. You've likely hit a metal stud or a protective plate covering wiring. Whatever you do, do not force it. Your best move is to shift your bracket location an inch to the side and try again. That small adjustment can save you from a much bigger problem.
A sagging curtain rod is probably the most common issue I see, but it's completely fixable. The culprit is almost always related to weight distribution or not having enough support.
If your rod spans more than 60 inches, it absolutely needs a center support bracket. Without one, it's just a matter of time before it starts to bow under the weight of the curtains.
Another thing to check is your wall anchors. Those little plastic ones that come in the kit often aren't strong enough for heavy drapes. If you notice your rod pulling away from the wall, the solution is to upgrade to a more robust anchor, like a self-drilling anchor or a toggle bolt.
Older homes with plaster walls can present a unique challenge. Plaster is notoriously brittle, and a standard anchor might just cause the wall to crumble around the hole. This is where a toggle bolt becomes a lifesaver.
Toggle bolts have spring-loaded "wings" that open up behind the wall, distributing the weight over a much larger surface area. They provide a rock-solid hold where other anchors would fail.
Installing curtain rods often involves a bit of trial and error. You might end up with stripped screw holes or need to patch old ones. Learning how to repair drywall screw holes is an essential skill for a clean, professional finish.
Remember, every problem has a practical solution. A little troubleshooting ensures your beautiful curtains and drapes will hang securely and look fantastic for years to come.
Even when an installation goes smoothly, a few questions can pop up. Let's walk through the most common ones we hear, so you can feel completely confident.
The short answer is 4 to 6 inches above the top of your window frame. This placement draws the eye upward, creating a sense of height and making your ceilings feel taller. Avoid mounting the rod directly on the window trim, as this can make the window feel cramped and small.
Yes, unless you are lucky enough to drill directly into a wooden stud. Drywall alone isn't strong enough to hold the combined weight of a rod and curtains over time. Wall anchors are designed to expand behind the drywall, creating a secure grip that prevents screws from pulling out.
After marking the height for your first bracket, use a long level (a 24-inch one is great) to draw a faint, perfectly horizontal line across to where the second bracket will go. Mark your screw holes on that line for a guaranteed level installation. A laser level can make this step even faster.
For any curtain rod longer than 60 inches, you absolutely need a center support bracket. Without it, the rod will eventually sag in the middle under the weight of the curtains. Most long rod kits include one, but they can also be purchased separately to ensure your curtains hang straight and true.
Ready to find the perfect curtains to finish off your project? At Joey'z Shopping, we have a huge selection of beautiful and affordable window treatments to match any style you can imagine.