
Join the Joey'z Family!

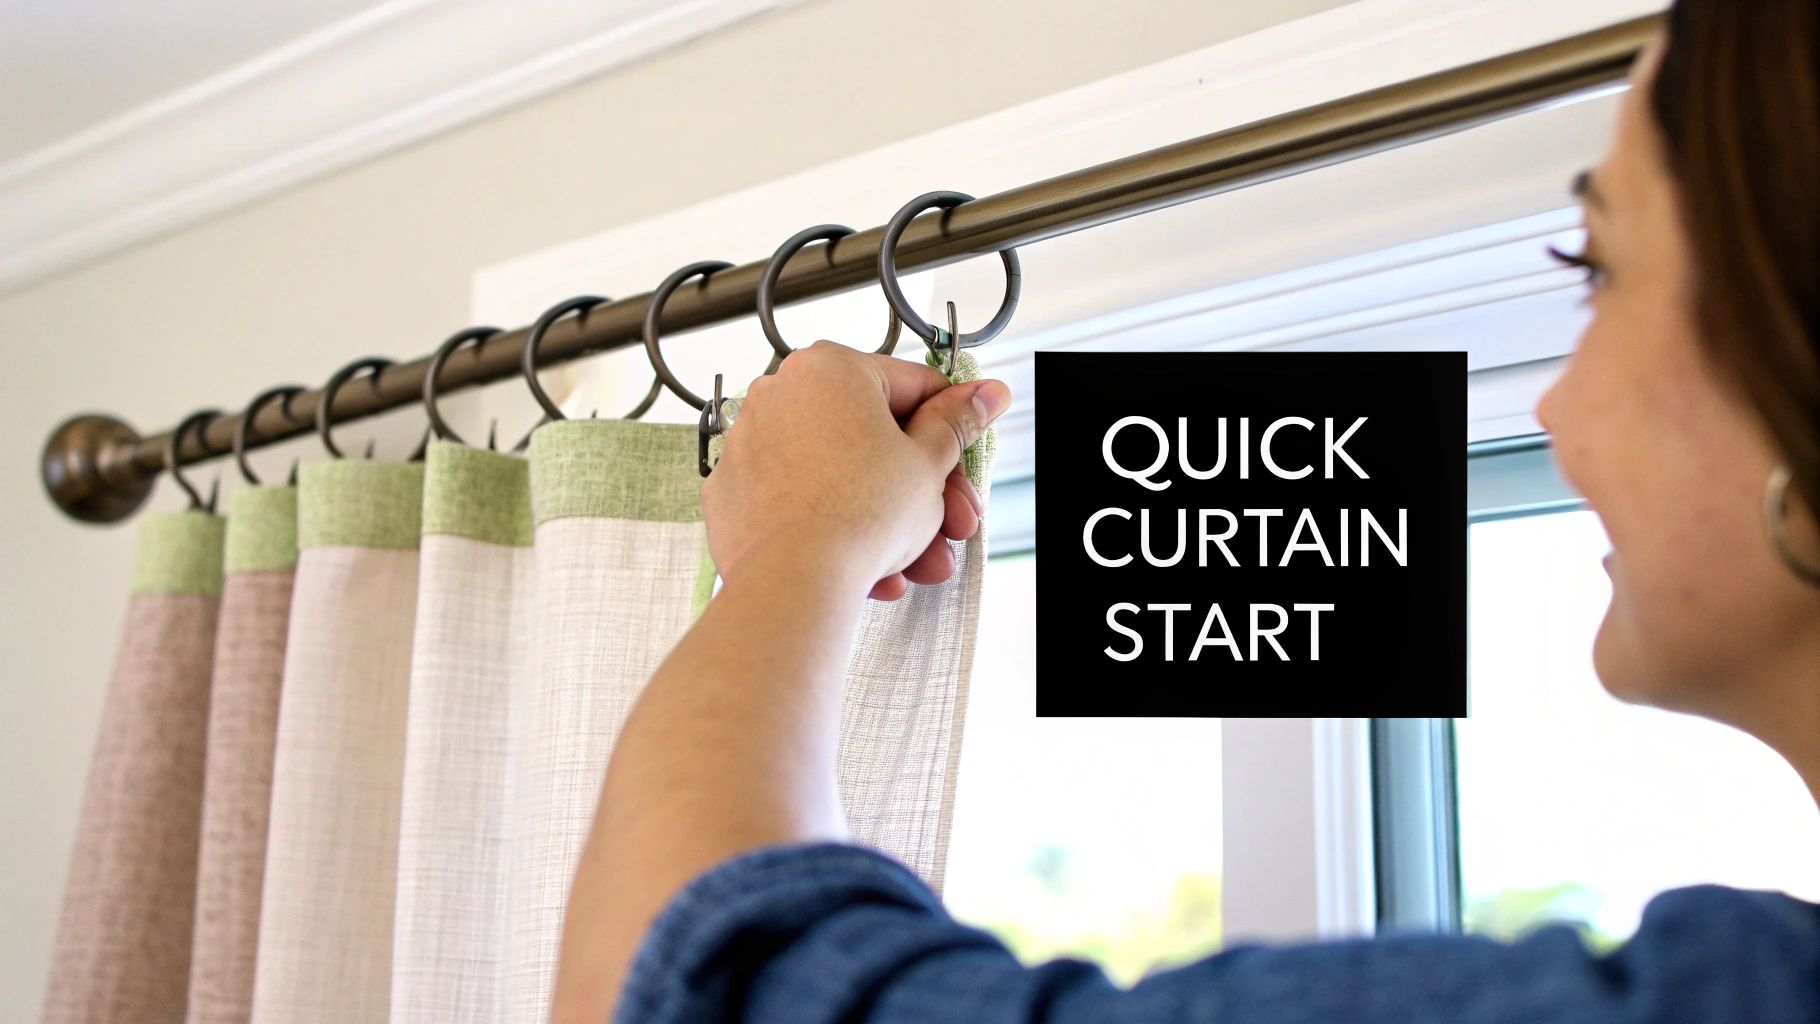
Staring at a fresh pack of curtain hardware can feel a bit confusing, but hanging curtains with hooks and rings is far simpler than it seems. This guide will walk you through every step, from choosing the right parts to hanging them for a polished, professional look.
The short answer is this: the rings slide onto your curtain rod, while the hooks act as the bridge connecting your curtain fabric to those rings. Let's master this classic setup together.
Table of Contents
Learning how to use curtain hooks and rings is your ticket to achieving that polished, professional look for your windows. Forget fumbling with fussy clips or rod pockets that snag. This timeless combination lets your curtains glide smoothly and hang with elegant, even pleats. It's a simple two-part system that works beautifully.
This isn't just about looks—it's about function. When you install hooks and rings correctly, your curtains open and close effortlessly. This small detail reduces the daily wear and tear on both the fabric and the hardware itself. There's a reason interior designers love this method: it delivers a high-end feel that’s both practical and beautiful.
The magic behind this system is all in its thoughtful design. By separating the part that glides (the rings) from the part that holds the fabric (the hooks), you get the best of both worlds.
This small detail makes a huge impact on your home's decor. It’s so foundational, in fact, that it’s part of a surprisingly large industry. The global drapery hardware market, which covers essentials like hooks and rings, was valued at $5.76 billion in 2025 and is expected to climb to $9.21 billion by 2035. You can learn more about these drapery hardware market trends and see just how this industry is growing.
Sometimes, just seeing which hook goes with which ring is the fastest way to get started. Here’s a quick-reference table to help you match the right hardware for your project.
| Hook Type | Best Ring Type | Common Use Case |
|---|---|---|
| Pin-On Hooks | Rings with Eyelets | Versatile for most pleated or flat panel curtains. |
| Pleater Hooks | Rings with Eyelets | Specifically for creating uniform pleats in header tape. |
| S-Hooks | Rings with Clips | A decorative option for lightweight, tab-top, or grommet curtains. |
This table should help clear up any confusion and get you on the right track, whether you're working with heavy drapes or light sheers.
The real secret to curtains that hang just right? It all comes down to the hardware. Picking the right hooks and rings is what separates a professional-looking window treatment from one that just looks… off. Think of this as your personal guide to getting it right, ensuring your curtains not only look fantastic but glide smoothly for years to come.
Your first clue for choosing the right hardware is the curtain's header style—that’s the very top part of the fabric. A mismatch here is one of the most common mistakes I see, and it's almost always the culprit behind droopy, uneven curtains.
If you have traditional curtains with structured folds, like pinch pleats, then pin-on hooks are what the pros use. These sharp, pointed hooks are designed to pierce the stiff header tape on the back of the curtain. This creates a super secure connection that holds the pleat’s shape perfectly.
In fact, pinch-pleat hooks are an industry staple, showing up in about 41% of curtain rod setups. They attach to the back of the fabric, lifting the curtain to create that elegant, high-end drape. You can get a feel for these trends in this drapery hardware market report.
Looking for something more casual, especially for flat panel curtains? Clip rings are a fantastic no-sew option. They combine the ring and a small clip into one piece, so you can just pinch the top edge of the fabric. It’s an easy, modern vibe that’s incredibly simple to install.
Expert Tip: While clip rings are versatile, I'd steer clear of using them on very delicate or heavy fabrics. The clips can leave marks on materials like silk or velvet, and they might not offer enough muscle for heavier drapes, which can lead to sagging over time.
Beyond the style, a few practical details make all the difference.
It also helps to picture how different curtain styles work. For instance, modern white sheer grommet curtain sets have the rings built right into the fabric, so they don’t need separate hooks at all. Understanding these alternatives can help you land on the perfect look for your space. And for systems that need even more specialized gear, check out our guide on how to install a curtain track wall mount.
Alright, you’ve picked your curtains and hardware—now for the fun part. This is where we go from planning to actually hanging them, giving you that polished, designer look right from the start.
Getting the prep work right is a non-negotiable for a professional finish. Before you even think about putting a hook in the fabric, we need to focus on measuring and marking everything precisely. This is the secret to getting those consistent, beautiful folds and avoiding that dreaded saggy look.
The whole idea is to create those rhythmic, evenly spaced folds that look so good. To get started, lay your curtain panel completely flat on a clean floor or large table with the top part (the header) facing you.
Grab a fabric pencil or chalk and your measuring tape. You'll want to mark where each hook will go. For a really clean finish, place the hooks at the very ends of the panel about 1-2 inches in from the edge. This anchors the curtain nicely and helps it sit flush against the wall.
This simple chart is a great way to visualize how your hardware decisions connect, from the style of your curtain to the final finish of the rings and rod.
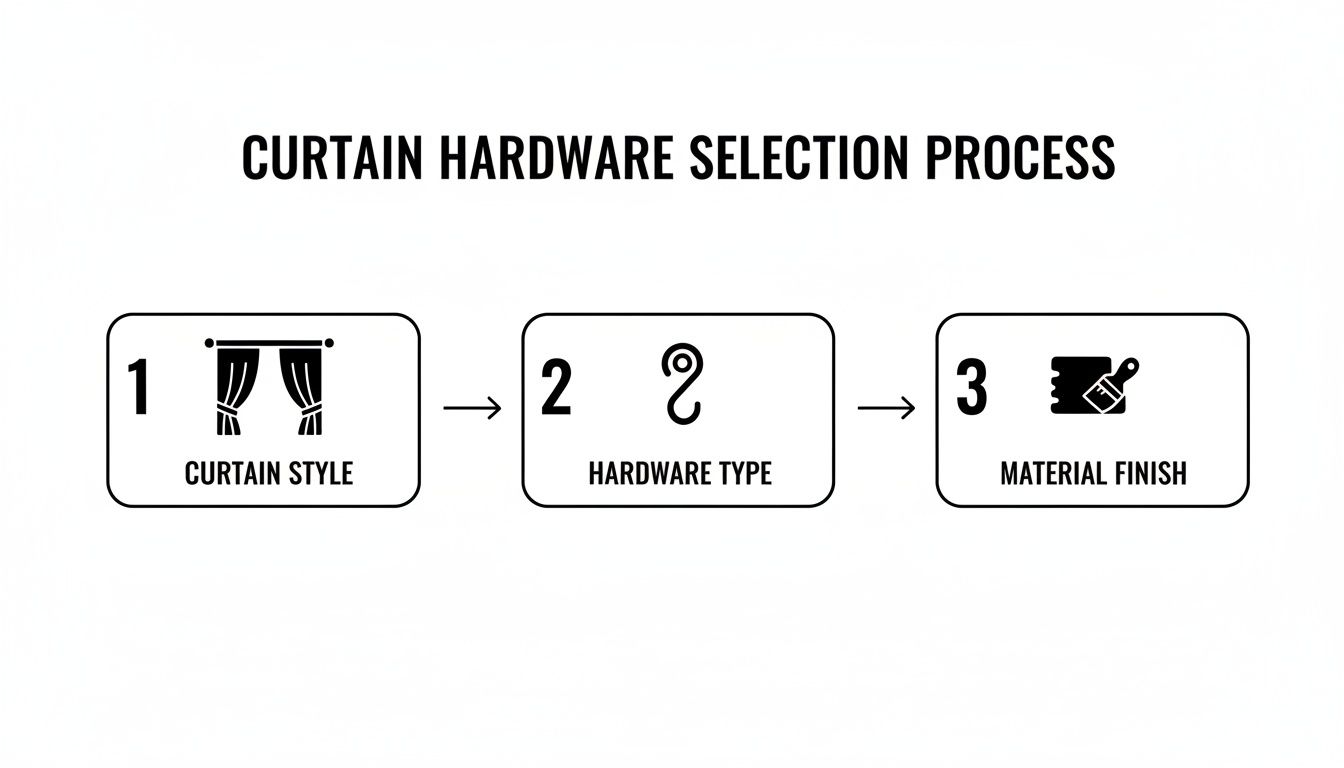
As you can see, the curtain style you choose really dictates the hardware you'll need, which then influences the whole vibe through different materials and finishes.
Now, let's talk about spacing. To make sure your curtains slide open and closed without a hitch, the pros recommend using 8-12 rings for a standard panel. Space them out evenly, about 4-6 inches apart. I've seen it time and time again on DIY forums—this simple step prevents around 70% of common sagging issues. It really makes a difference.
With all your spots marked on the header, it’s time to get the hooks in. The exact method changes just a bit depending on what kind of hook you’re using.
Once your hooks are all set, slide your curtain rings onto the rod. If the rod is already up, you’ll probably need to take it down for this part. If you need a refresher on getting the rod level and secure, our guide on how to hang a curtain rod has you covered.
Insider Tip: On each end of the rod, leave the very last ring on the outside of the bracket (between the bracket and the finial). This is a game-changer. It anchors the curtain panel in place, so it won’t slide toward the middle, perfectly framing your window.
Finally, you’ll carefully hook each pin into the little eyelet on the bottom of each ring. Then, lift the whole assembly—rod, rings, and curtain—and settle it securely onto the brackets.
To make sure you don't miss a beat, here's a quick checklist to follow. I've broken it down into phases so you can tackle it one step at a time.
| Phase | Action Item | Pro Tip |
|---|---|---|
| Preparation | Lay curtain panel flat on a clean surface. | A clean floor is your best friend here. |
| Measurement | Mark hook placement 1-2 inches from each end. | Use a fabric pencil that will easily brush away. |
| Spacing | Mark remaining hook spots 4-6 inches apart. | Consistency is key for even, beautiful folds. |
| Installation | Insert hooks into the header at your marked spots. | The technique will vary slightly for pin-on vs. pleater hooks. |
| Assembly | Slide rings onto the rod, leaving one on each end outside the bracket. | Don't forget this trick! It's a pro move. |
| Final Steps | Attach hooks to the rings and place the rod on its brackets. | Do a final check to ensure everything is secure. |
Following this checklist helps guarantee a smooth process from start to finish.
Okay, the curtains are up, but we're not quite done. There’s one last step the pros use called "training" the curtains. It helps the fabric remember the folds, so they hang in a structured, elegant way.
Start by gently arranging the fabric into neat, even pleats, running your hands down from top to bottom. Once you have them looking just right, loosely tie some soft fabric strips or ribbons around the top, middle, and bottom of the bundled curtain.
Let them sit like this for two or three days. When you untie the ribbons, the fabric will naturally fall back into those crisp, perfect folds every time you open and close them. This little bit of patience makes a huge difference and is what separates a decent curtain job from a truly great one.
Even when you’ve planned everything perfectly, sometimes the finished project just doesn't feel right. Don't worry, we've all been there. Most curtain hanging issues are surprisingly common and have simple, quick fixes. This section is your go-to for turning those little frustrations into a flawless, professional-looking finish.
One of the most frequent complaints I hear is about sagging curtains. You’ve hung them, but there's a noticeable dip between each ring or hook, creating a droopy, unfinished look. This almost always comes down to spacing.
The short answer? Your hooks and rings are too far apart. Go back and measure the distance between them, aiming for that sweet spot of 4 to 6 inches. Sometimes, adding just one or two more rings per panel, like our versatile curtain rings with eyelets, can completely transform the drape and get rid of that sag for good.
What do you do if your hooks constantly slip out of the curtain's header tape? It’s beyond annoying and can make your pleats look messy and uneven.
To fix the slipping hook problem, a simple little trick can make all the difference. After you insert the pin hook into the header tape, grab a small pair of pliers. Gently pinch the very bottom of the hook’s opening to narrow the gap just a tiny bit. This small adjustment creates a much more secure grip, preventing it from popping out when you open and close the drapes.
For rings that feel loose, there's a clever technique the pros use. In major markets like Europe, where drapery hardware is a huge focus, experts often twist the eyelet of the ring a full 90 degrees during installation for a more secure hold. This simple move can reduce wear and tear by up to 50% over the life of your curtains. You can find more of these professional insights into the drapery market for other great tips.
My Personal Fix: If your rings keep catching on the joint of an extendable curtain rod, grab a bit of clear candle wax or even some furniture polish. Rub a small amount right onto the seam of the rod. This lubricates the surface just enough for the rings to glide over it smoothly without a single snag.
Do your curtains look lopsided, with one side hanging lower than the other? Before you start blaming the curtains themselves, grab a level and check your rod. If the rod is straight, then the issue is almost certainly your hook placement.
You've gone through the effort of picking out and hanging your curtains, and they look absolutely perfect. So, how do you keep them that way? A little bit of care goes a long way in making sure your curtain hardware lasts and your drapes continue to open and close smoothly for years to come.
Regular cleaning is the secret. It stops that annoying dust and grime from building up, which can make your rings stick or glide unevenly. This simple habit preserves the finish—whether it's metal, wood, or plastic—and keeps the whole window looking polished and fresh.
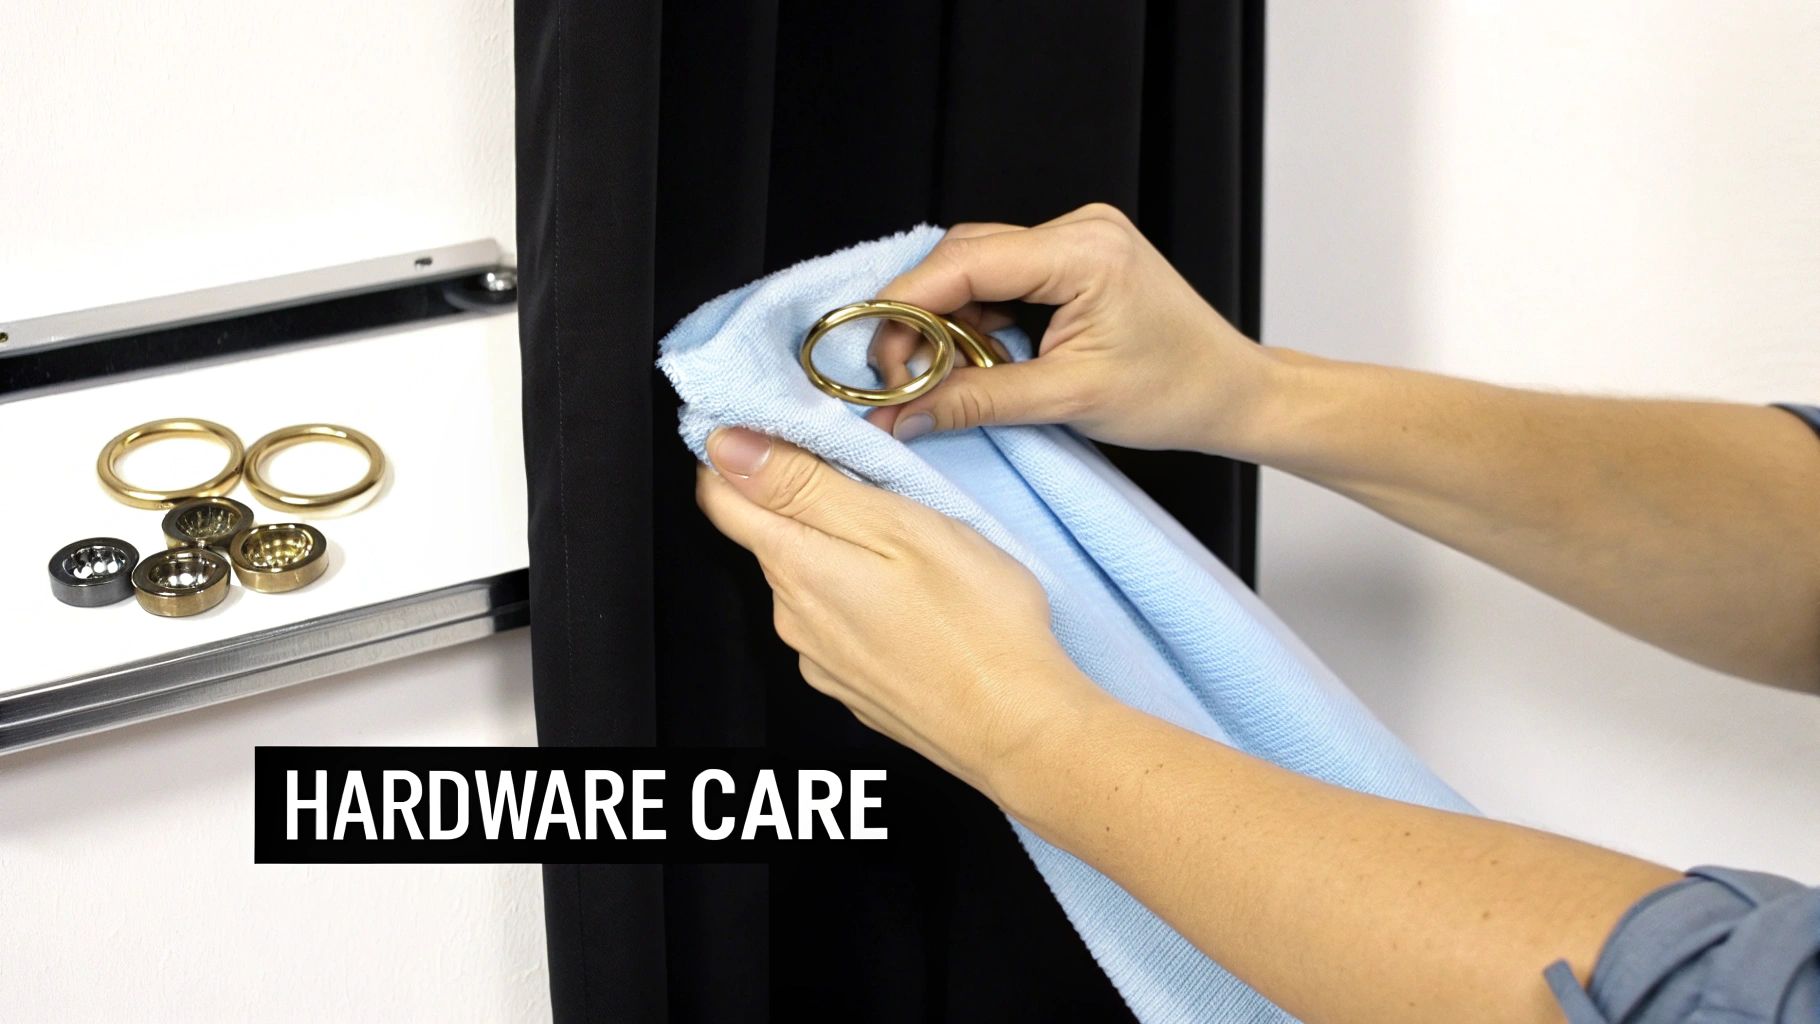
How you clean your curtain hardware really depends on what it's made of. A consistent routine is your best defense against buildup that causes sticky rings or discoloration over time.
When it's time to wash the curtains themselves, the thought of re-inserting all those little hooks can feel like a huge chore. Here's a pro tip I swear by: before you take a single hook out, snap a quick photo of the placement on your phone. It gives you a perfect visual map for putting everything back exactly where it was.
To keep those beautiful pleats looking sharp, carefully unhook the curtain and lay it out flat. When you're ready to rehang, just pull up your photo to guide each hook back into its original pocket. This little trick ensures you get that same even spacing you worked so hard for. And if you want to add another layer of polish, check out our ultimate guide to curtain tiebacks for styling ideas.
Safety First: If you have kids or pets running around, securely anchored hardware is an absolute must. Every so often, give your rod brackets a little check to make sure they're still firmly attached to the wall and that the rod itself is stable. A wobbly curtain rod is a serious safety hazard.
This focus on safety is actually a big driver of innovation in home decor. In commercial settings, for instance, the adoption of smart, motorized curtain systems jumped by 19% last year. It’s a clear sign of the move toward automated and cordless solutions that make window treatments safer for everyone. You can discover more about this growing drapery hardware market and see where things are headed. Proper installation with sturdy hardware from the start is the best way to ensure your curtains are both beautiful and safe.
When it comes to hanging curtains, the little details make all the difference. To help you get it right the first time, I've rounded up the most common questions people ask about using curtain hooks and rings, with clear, practical answers to get you back on track.
The rule of thumb is to place one ring for every 4 to 6 inches of your curtain's width. For a standard 50-inch curtain panel, you'll want somewhere between 10 and 12 rings. Using the right number gives your curtains beautiful, uniform pleats and ensures they glide smoothly. Skimping on rings is a classic mistake that leads to a droopy, unfinished look.
While you technically can, I strongly advise against it. Clip rings are brilliant for flat panel curtains when you want a quick, no-sew solution, but they aren't built for the structure of a pleated drape. The clips can flatten the crisp folds and damage the header fabric over time. For any pleated drape, always stick with pin-on hooks, which are designed to support the pleats properly. You can find a great selection of durable curtain hooks designed for exactly this purpose.
This almost always happens with extendable curtain rods right where the two sections overlap. That little bump is notorious for catching rings. The fix is simple: grab an unscented candle and rub a bit of clear wax over the joint, or give it a quick spray with a silicone lubricant. This creates just enough of a slick surface to help the rings glide right over the bump without getting caught.
If your curtains look lopsided, it’s usually one of two things. First, grab a level and make sure your curtain rod is perfectly horizontal. If the rod is level, the problem is your hook placement. Take the panel down, lay it flat, and measure the distance from the top edge of the curtain to where you’ve inserted each hook. Even a tiny quarter-inch difference can create a noticeable slant once it’s hanging.
Ready to hang your curtains like a pro? At Joey'z Shopping, we have all the hardware you need to get that flawless, designer finish. Explore our collection and find the perfect hooks and rings for your next project.