
Join the Joey'z Family!

You're probably standing in front of the bay right now with a tape measure, thinking this should be simple because it's “just a window.” It isn't. A bay window is three problems sitting next to each other, and that's exactly why so many off-the-shelf rods, blinds, and curtain panels end up looking slightly wrong.
If you want to know how to cover bay windows without wasting money, start with one rule: measure and treat each section separately. That one decision affects everything else, from whether an inside mount will physically fit to whether your curtains clear the glass when open.
Meta description: Learn how to cover bay windows with the right measurements, treatment types, cordless safety picks, and budget-friendly installation ideas.
Bay windows became much more common after the UK Building Act changed in 1894, allowing windows to project outward instead of staying flush with the outer wall. That shift helped make bay windows a staple of late Victorian and Edwardian homes, and it also explains why they're awkward to dress with standard flat-window treatments (historical overview of bay windows and covering challenges).
The shape is the whole issue. A flat wall lets you fake your way through with one rod, one blind, one easy measurement. A bay doesn't. Each panel can have a different width, depth, and return angle. Ignore that, and you'll get hardware that rubs, panels that crash into each other, or curtains that leave bright gaps at the corners.
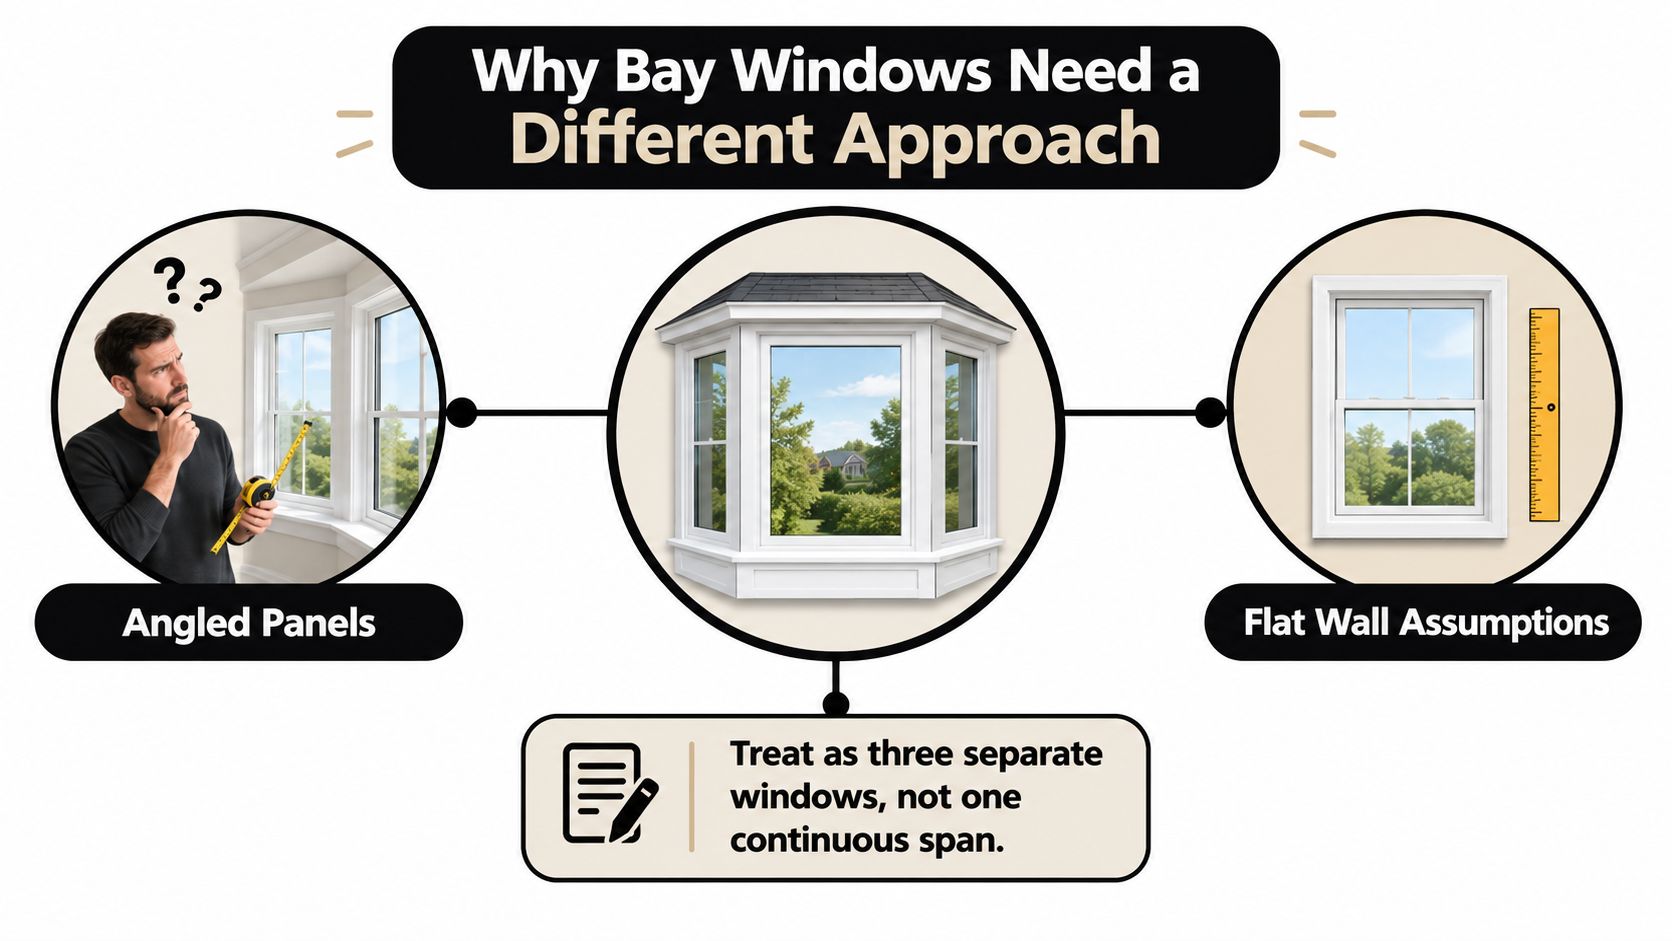
The smartest way to cover a bay is to stop thinking in one long span.
Record each section on its own:
Practical measuring guides for bay treatments recommend taking width, height, depth, and the corner angle for each panel separately, because left, center, and right openings often differ enough to cause fit problems when you use one overall width (bay window measurement guidance).
Practical rule: If you wrote down one total width for the whole bay, you're not finished measuring.
Most bay window disasters come from forcing a standard solution onto a non-standard shape.
Here are the repeat offenders:
Bay windows also come in different forms, including angled bays, curved bow windows, and box bays. Many style guides acknowledge that, but they often stop short of answering the practical question of whether an inside mount will even work in a shallow bay or how bracket clearance changes by layout (bay window treatment guide covering the measurement gap).
The global window coverings market was valued at about USD 32.76 billion in 2022 and projected to reach roughly USD 60.16 billion by 2030, with blinds and shades accounting for USD 13.10 billion in 2022. The same market research also notes that manual mechanisms held 74.13% of the market in 2025, which fits what I see in real homes: custom-fit, manual, semi-custom solutions still dominate because awkward layouts need precise measuring more than flashy automation (window coverings market data).
That's the takeaway. Bay windows reward accurate measuring and sane hardware choices, not guesswork.
The short answer is this: don't measure the whole bay as one width. Measure left, center, and right separately, and use templates before you order anything.
For bay-window blinds, one of the most reliable professional methods uses cardboard or paper templates cut to blind depth. You place the templates into both bay corners, mark the front-corner intersection points, then measure the left, center, and right widths from those marks. The same guide recommends deducting about 7.5 mm from each width for clearance so the blinds don't bind during operation (professional bay blind measuring method).
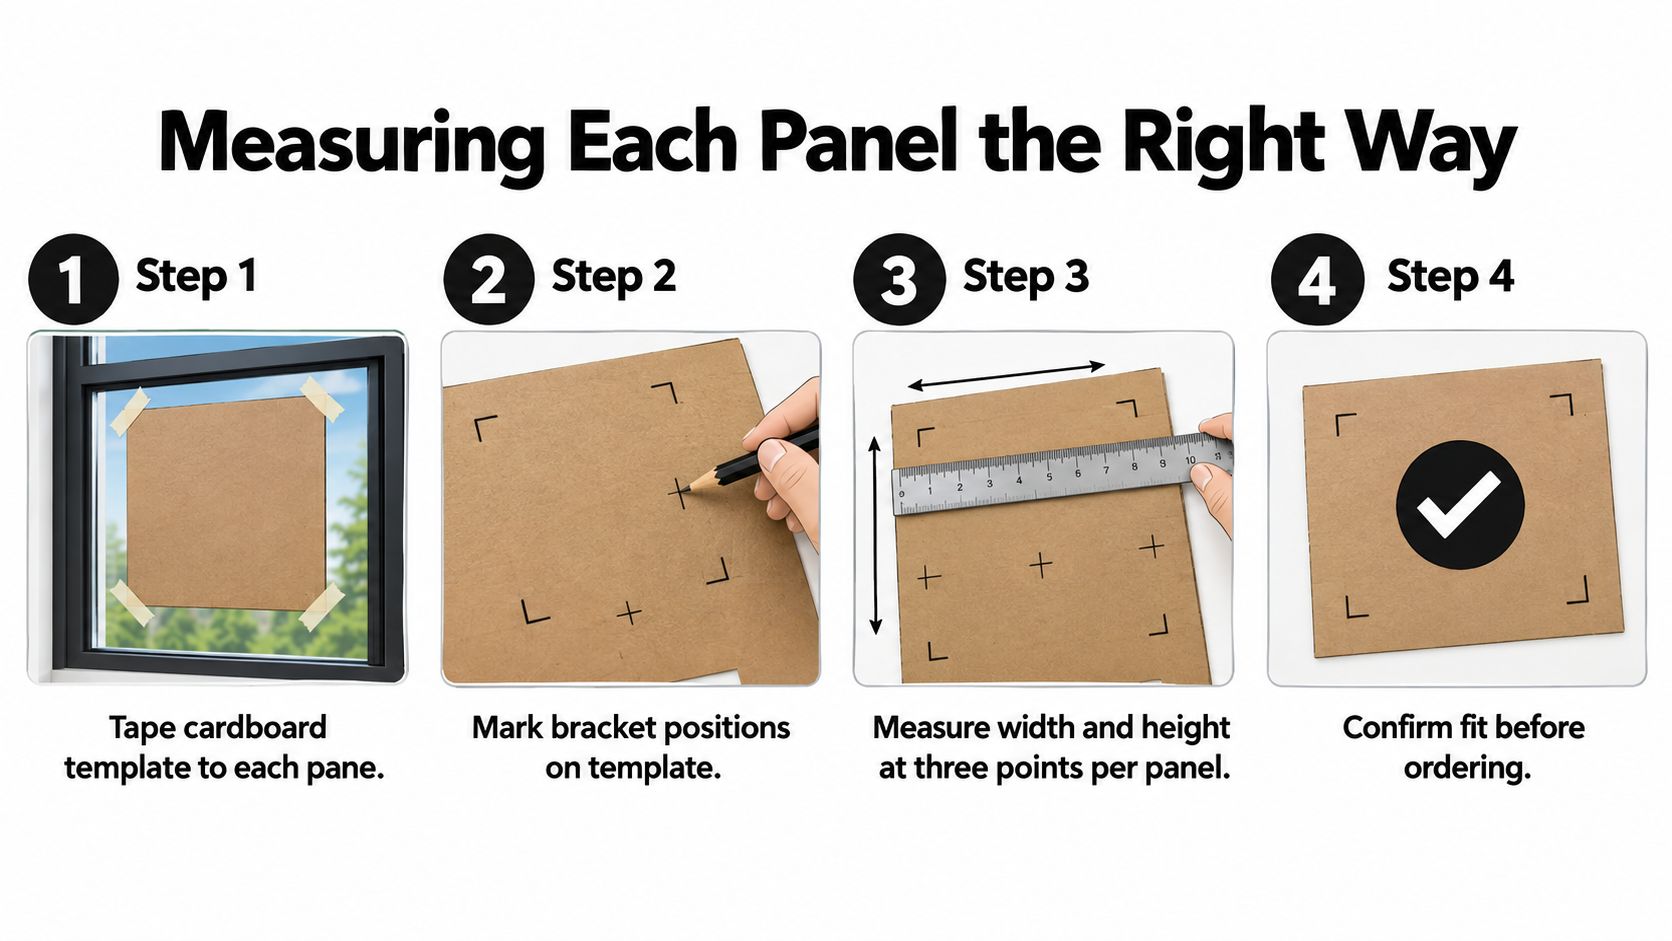
Use stiff cardboard, painter's tape, a metal tape measure, pencil, and a simple angle finder or protractor.
Skip the template step and you're guessing at geometry, not measuring it.
Your worksheet should include more than width and height.
Record:
For drapery, don't size only to the glass. A bay-window measuring guide recommends extending the first and last sides by an extra 20 to 30 cm each to create enough return and stackback space, and another design benchmark puts stackback at about 12 inches per panel (bay curtain pole and drapery measuring advice).
If you want a general refresher on measuring windows before tackling a bay, Joey'z has a straightforward window measurement guide that helps with the basics.
The short answer is this: match the treatment to the bay depth and angle, not to the trend you saw on social media. The wrong treatment will annoy you every single day, even if it looked good in the product photo.
Here's the cleanest rule of thumb I use:
| Treatment | Best Bay Type | Light Control | Price Tier |
|---|---|---|---|
| Cellular shades | Shallow angled bays | Very good, especially for privacy and filtered light | Budget to mid-range |
| Curtains and panels | Deep bays and bays with seating | Good to excellent, depends on fabric and lining | Mid-range to premium |
| Roman shades | Medium-depth bays with flatter returns | Good, softer look than blinds | Mid-range |
| Roller shades | Tight, modern bays with limited depth | Good, clean profile | Budget to mid-range |
Cellular shades are my practical favorite for awkward bays. They have a compact profile, don't fight tight angles, and look tidy when each panel is mounted individually. If your bay is shallow, this is usually the least painful route.
Roller shades also behave well in tighter spaces. They're simple, low-profile, and don't crowd the joints between panels. If you want clean lines and minimal visual fuss, they're hard to argue with.
Roman shades look better than basic rollers in many living rooms, but they need enough room to hang and fold cleanly. In a bay with uneven returns or cramped corners, they can start to look lumpy instead of neat.
Curtains and panels are best when the bay has enough depth to support them. They add softness and can make the whole window read as one architectural feature rather than three separate panes. But don't force heavy lined drapery onto a flimsy single rod spanning odd angles. That's how you end up with sagging hardware and ugly stackback.
If your bay is tight, rigid products need to earn their place. Slim profiles win.
If your room needs flexible privacy during the day and a polished look at night, a combination setup usually beats a single treatment.
Cordless isn't just a style upgrade anymore. It's the sensible default in a lot of homes.
The U.S. Consumer Product Safety Commission says the updated ANSI/WCMA A100-2018 standard requires stock or substantially fabricated window coverings to be cordless, or to use inaccessible cords or short cords of 8 inches or less in any position (CPSC window covering safety update). For the broader U.S. market, the revised safety standard's compliance date for manufacturers, distributors, and sellers is June 1, 2024, and it also sets a default operating-cord length limit of 40% of the blind height (revised safety standard details).
| Tier | Control Method | Price per Panel | Best For |
|---|---|---|---|
| Manual cordless | Push-pull, spring-assist, cordless lift | Lower | Most family rooms, rentals, everyday use |
| Battery motorized | Remote-controlled rechargeable motor | Mid-range | Hard-to-reach bays, second-story windows |
| Hardwired or solar-assist motorized | Wall control, remote, or smart-home integration | Higher | Renovations, custom homes, frequent daily use |
Manual cordless is the sweet spot. It removes dangling cords, looks cleaner, and handles daily use without overcomplicating the window.
Battery motorized shades make sense when the bay is behind furniture, over a seat, or in a spot you can't comfortably reach. They're also useful if you're opening and closing multiple panels often and don't want to fuss with each one.
Hardwired or solar-assisted systems are for people already doing a bigger project. They're hard to justify as a standalone splurge unless convenience is a major priority.
Current bay-window guidance often recommends cordless or motorized cellular shades when the window includes a seat, and trend coverage points to growing demand for automated and smart treatments. But the reason to upgrade is simpler than trend talk: safety, cleaner operation, and easier reach in awkward spots (bay window cordless and motorized guidance).
Choose cordless or motorized if:
Skip the upgrade if a simple wand or cordless manual shade already solves the daily problem.
For a deeper look at safer options, Joey'z also has a useful guide to window shades without strings.
Here's the part people underestimate: the treatment may be right, but the mount may still be wrong. Bay windows often force you into an outside mount even when you wanted a neat inside fit, because the sash depth or corner clearance won't cooperate.
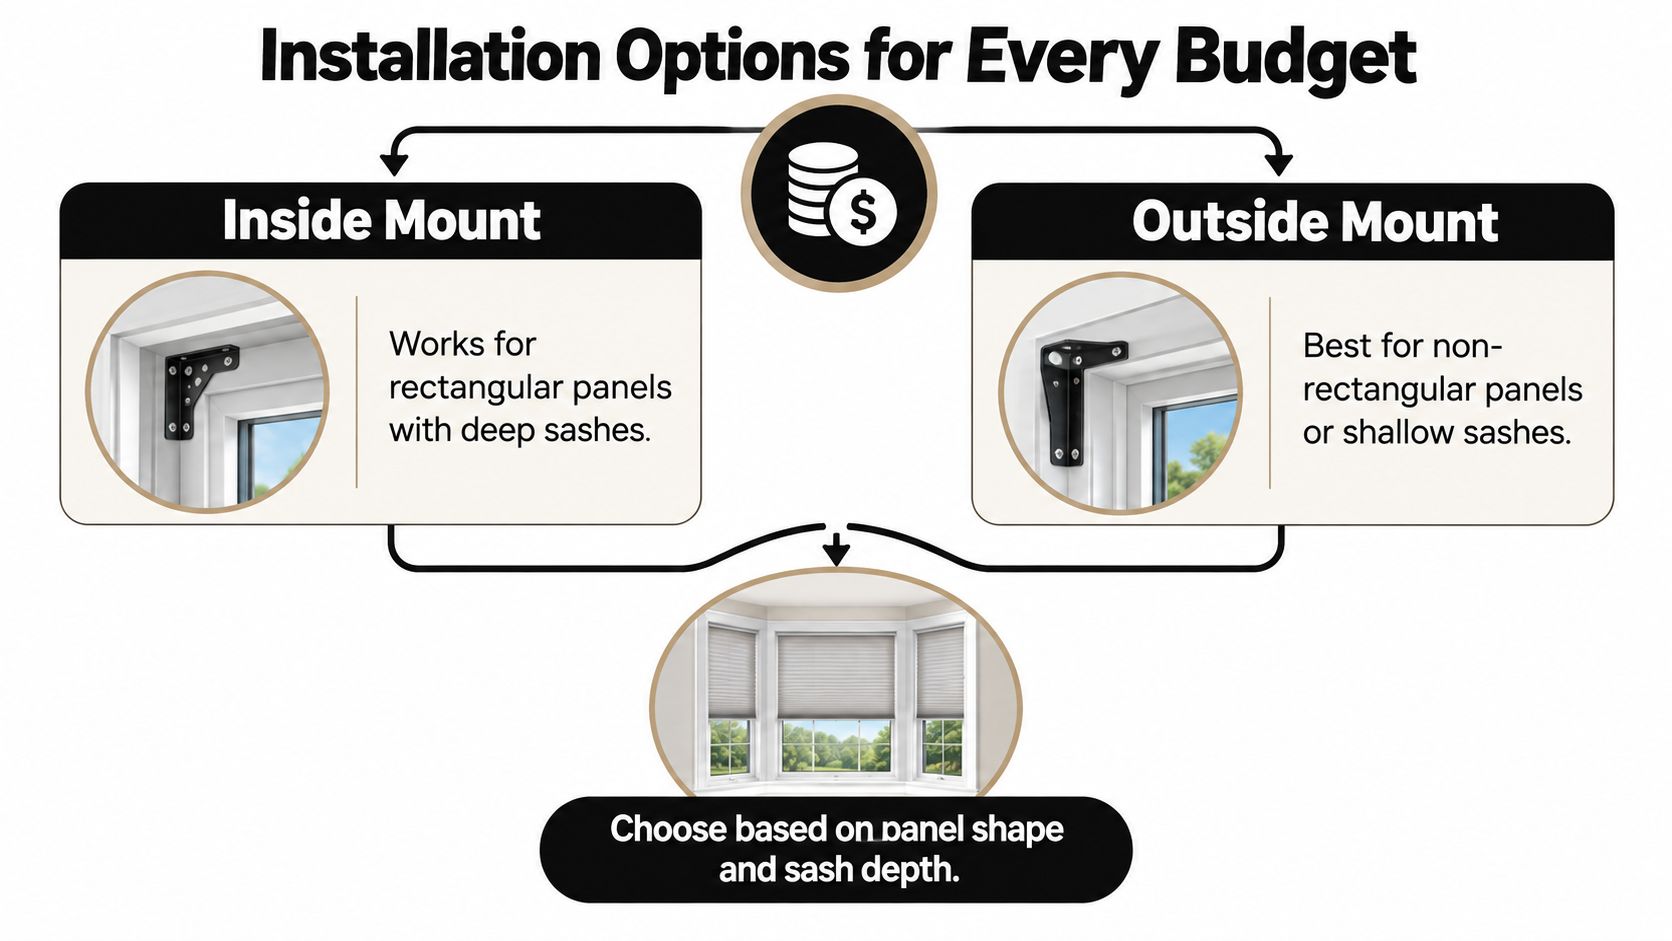
Inside mount works best when each panel is fairly rectangular and the recess is deep enough for the headrail and bracket. It gives the cleanest look, especially with cellular and roller shades.
Outside mount is often the rescue plan for shallow bays, uneven frames, or windows with trim that steals space. It can also make the bay look larger because the treatment sits proud of the frame instead of squeezed into it.
Worth remembering: A bay window doesn't care what look you wanted. It only cares whether the hardware physically fits.
Lower budget
Think tension rods, slim café rods, removable brackets, and lightweight curtains. This route suits renters and anyone dressing the window without making a permanent commitment.
Mid-range budget
You get drill-in brackets, proper shade hardware, corner connectors, and better curtain returns. It's usually the sweet spot for homeowners who want the install to look intentional without going fully custom.
Higher budget
Custom tracks and professionally fit angled hardware earn their keep in difficult bays. If the window is a focal point in the room, custom track systems can make the whole setup look cleaner and operate better.
Curtains need somewhere to go when they're open. If you skip that allowance, the bay stays half-covered all day.
For drapery, a practical benchmark is adding 20 to 30 cm on the first and last sides for return and stackback space, as noted earlier in the article. That space is what lets the fabric tuck back instead of blocking the glass.
A few quick install calls:
If your bay sits on a feature wall or you're upgrading the whole room at once, it's worth seeing how trim, paint, and texture work together. This guide on how to build an accent wall right is useful for making the bay feel integrated instead of tacked on.
If you're trying to keep things landlord-friendly, Joey'z also has practical ideas for no-drill window treatments.
If you want one setup that looks polished without being fussy, I'd choose Roman or cellular shades on each panel, then drapery over the top. It's forgiving, functional, and far easier to live with than trying to make one treatment do everything.
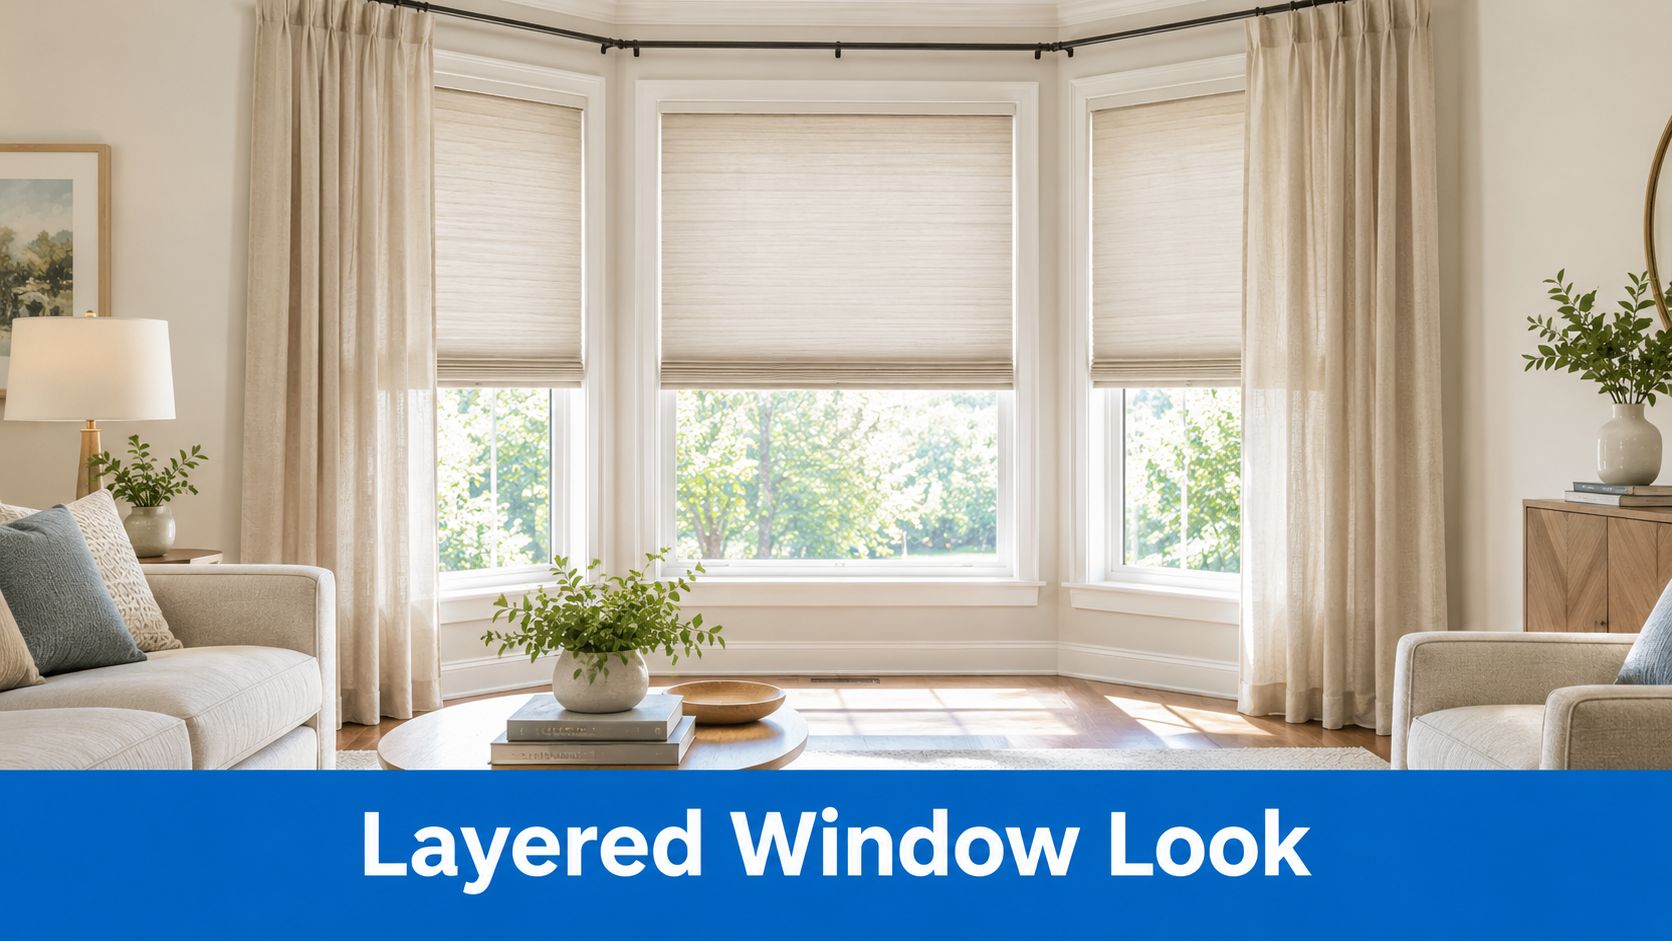
Put a neutral cellular or Roman shade on each individual section first. That handles privacy and daily light control.
Then add a ceiling-mounted or high-mounted traverse rod spanning the full bay shape, with two wider drapery panels that meet near the center when closed. This softens the angles and makes the whole bay feel deliberate instead of chopped into pieces.
For fabric:
Don't match the drapery exactly to the wall color. That flattens the window and wastes the architecture.
A better formula is simple:
Good bay styling also depends on what the room lighting does at night. If you're reworking the full seating area around the window, this guide to Columbus living room lighting from Vinson Fine gives smart ideas for balancing daylight from the bay with evening lamps and overhead light.
Here's a quick visual reference before you commit to a layered look:
Not every bay needs the full designer treatment.
Try one of these instead:
The bay already has personality. Your job is to support it, not bury it.
The best answer to how to cover bay windows isn't one product. It's a sequence.
First, match the treatment to the shape and depth of the bay. Second, measure each panel separately instead of pretending the whole thing is one opening. Third, choose cordless if kids, pets, or a window seat make cords a bad idea.
A little maintenance prevents most headaches.
What is the best way to measure a bay window for coverings?
Measure each panel separately. Record width, height, depth, and corner angle for the left, center, and right sections instead of using one full-span measurement.
Are curtains or blinds better for bay windows?
It depends on the bay. Blinds and shades usually work better in shallow or tight bays, while curtains shine in deeper bays where stackback and returns have room to function properly.
Can I use inside-mount shades on a bay window?
Yes, but only if the recess depth and corner clearance allow it. Tight bays often push you toward an outside mount.
Are cordless shades worth it for bay windows?
Usually, yes. They're cleaner visually and make more sense in homes with kids, pets, or built-in seating near the window.
If you're at the point where you've measured the bay and narrowed the style, that's when shopping gets easier instead of more confusing.
If you're ready to turn measurements into an actual finished window, Joey'z Shopping offers curtains, blinds, and valances that fit the kinds of choices this guide covers. It's a practical next stop when you want to compare styles, keep the budget in view, and finally get that awkward bay looking intentional.