
Join the Joey'z Family!

Bay windows are a stunning architectural feature, but dressing them can feel like a puzzle. The best solution is a curved curtain rod for a bay window. It creates a seamless, elegant drape that follows the window's natural arc, giving you a high-end, functional finish that standard rods just can't deliver.
Bay windows are designed to be a room's focal point, flooding the space with gorgeous light and adding dimension. But those unique angles often leave homeowners stumped. The common "fix" is using multiple straight rods with clunky corner connectors, which almost always leads to a disjointed look.
I've seen it countless times: curtains snag on the joints, light bleeds through the gaps, and the whole setup feels more like a clumsy workaround than a deliberate design choice.
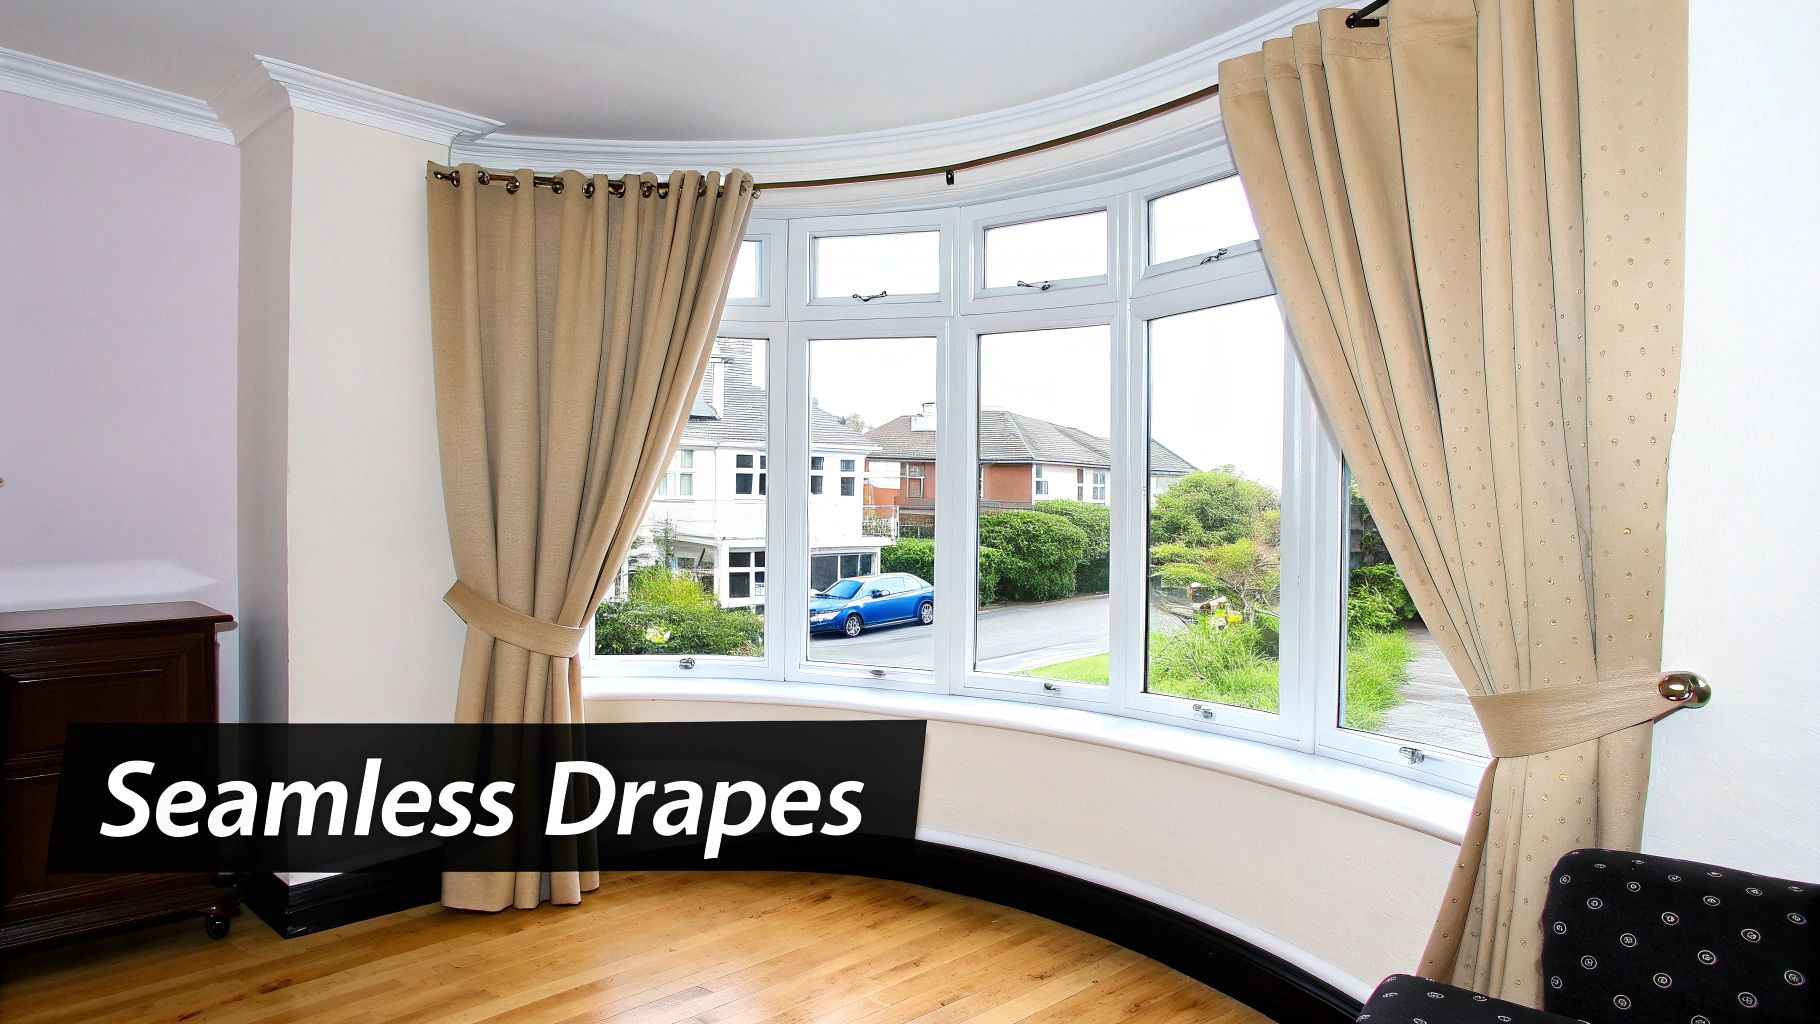
A single, continuous curved curtain rod solves all these problems in one elegant swoop. It’s made to trace the exact angles of your window, creating a smooth, uninterrupted track. This means your curtains can glide effortlessly from one end to the other, making them a joy to open and close.
Opting for a dedicated curved rod offers several immediate benefits for both the look and function of your window treatments.
The right window dressing does more than just look good. Strategically chosen curtains on curved rods can be a key part of how to keep your house cool without AC, especially during warmer months.
Ultimately, investing in a proper curved rod honors your home's architecture, paying off in daily convenience and timeless style.
Still on the fence? Let's break down the real-world differences between a single curved rod and the pieced-together alternative.
| Feature | Single Curved Rod | Multiple Straight Rods |
|---|---|---|
| Curtain Movement | Smooth, uninterrupted glide from end to end. | Curtains snag and catch on corner connectors. |
| Visual Appeal | Clean, elegant line that enhances the window's curve. | Disjointed, segmented look that can appear clumsy. |
| Light & Privacy | Minimal light gaps for better room darkening & privacy. | Gaps at corners let light and drafts sneak through. |
| Installation | Often simpler with fewer, stronger support brackets. | Requires multiple brackets and precise corner alignment. |
| Long-Term Durability | Stronger, more stable design built for the window's shape. | Corner joints can become weak points over time and sag. |
While using multiple rods might seem like an easy fix, a single curved rod is the superior choice for a professional look and frustration-free function.
Before picking out that perfect curved curtain rod, you have to play detective with your home's architecture. Why is this so important? The short answer is that not all bay windows are built the same, and knowing your type saves you from frustration and measurement headaches.
Think of it like this: you wouldn’t buy a hat without knowing your size. The unique angles of your window determine the kind of rod you need for that polished, professionally installed look.
Most homes have one of three classic bay window designs. Each one has its own personality and structural quirks that directly impact your hardware choice.
Pro Tip: Don't just eyeball the angles! Grab a simple protractor or a digital angle finder from the hardware store to measure where the window panels meet. This one small step gives you the exact numbers you need for a perfect fit.
Getting a handle on your window's geometry is everything when choosing the right hardware. A rod designed for a polygonal bay is engineered differently from one made for a continuous bow window. A rod made for a sharp 45-degree angle simply will not work on a gentle 10-degree curve.
The market for specialized drapery rods is growing because these tailored solutions are so necessary. Knowing these details helps you understand why one rod doesn't fit all. If you want to dive deeper, you can discover more insights on JoeyzShopping.com.
At Joey’z Shopping, our adjustable curved curtain rods were designed with all these variations in mind. By figuring out your window type first, you can narrow down your options and confidently pick a rod that will perfectly complement your home’s unique character.
Getting the measurements right for your curved curtain rod for a bay window is the most critical part of the process. Think of it as the foundation—if it's off, everything else will be too. Spending extra time here will save you the headache of returns.
The goal is to measure the path the rod will follow, accounting for every angle and segment. Grab a metal tape measure, a pencil, and a notepad. Let's walk through this together.
First, you’ll need to measure the width of each individual window pane or section that makes up your bay. Most bay windows have a large central window with two smaller, angled windows on the sides.
Here's exactly what to measure:
Add these numbers together to get the total length for the main body of the rod.
The image below helps you identify your bay window type, which guides where you need to measure.
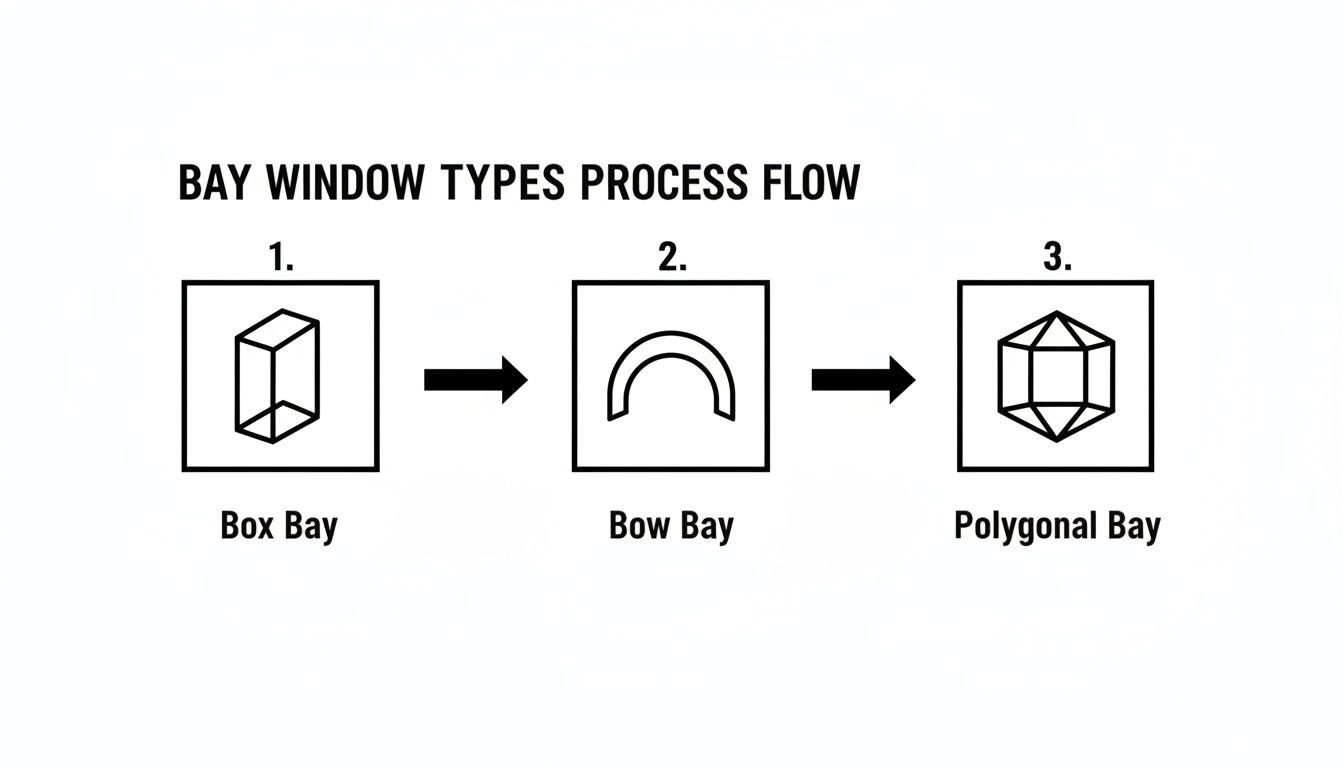
This visual guide helps you spot if you're working with the sharp corners of a Box Bay or the gentle curve of a Bow Bay, so you know you're measuring the right parts.
The 'return' is the small piece of the curtain rod at each end that curves back toward the wall. It’s more than decorative—it’s functional. A proper return blocks that annoying sliver of light that sneaks in from the sides, giving you better light control and privacy.
A standard return is about 3-4 inches long. You’ll need to add the length of both returns to your total measurement to get the final number for your rod. For a deeper dive, our guide on how to measure windows for curtains covers this and other pro tips.
Pro Tip: Always measure twice and order once. It’s an old rule for a reason. Double-checking your numbers before you buy is the best insurance you can have.
Finally, think about where your brackets will go. A good rule of thumb is to plan for brackets at each corner and at the ends. This gives the rod the support it needs so it won't sag under the weight of your curtains.
Once you’ve nailed the measurements, the fun part begins—choosing a curved curtain rod that elevates your room's entire look. The right material, finish, and diameter create a cohesive style.
Think of your rod as the foundation. A delicate rod will sag under heavy blackout curtains, while a thick, industrial-style rod could overpower airy, lightweight sheers.
The material of your curtain rod does more than just provide support; it sets the tone for your decor.
Here are a few popular options:
The demand for high-quality, durable window treatment systems has grown as homeowners show a clear preference for custom solutions that can handle substantial fabrics.
The type of curtain header you choose impacts how your curtains hang and glide along a curved curtain rod for a bay window. Grommet-top curtains offer a modern look and slide effortlessly, while pinch pleats provide a more formal, structured appearance.
To achieve a seamless look, pairing your curved rod with the right window treatments is key. You can explore our selection of curtains to find the perfect match.
Insider Tip: For the smoothest operation on a curved rod, I always recommend curtain rings or grommets. These styles are far less likely to snag at the bends compared to rod pocket curtains, which can bunch up and be difficult to slide.
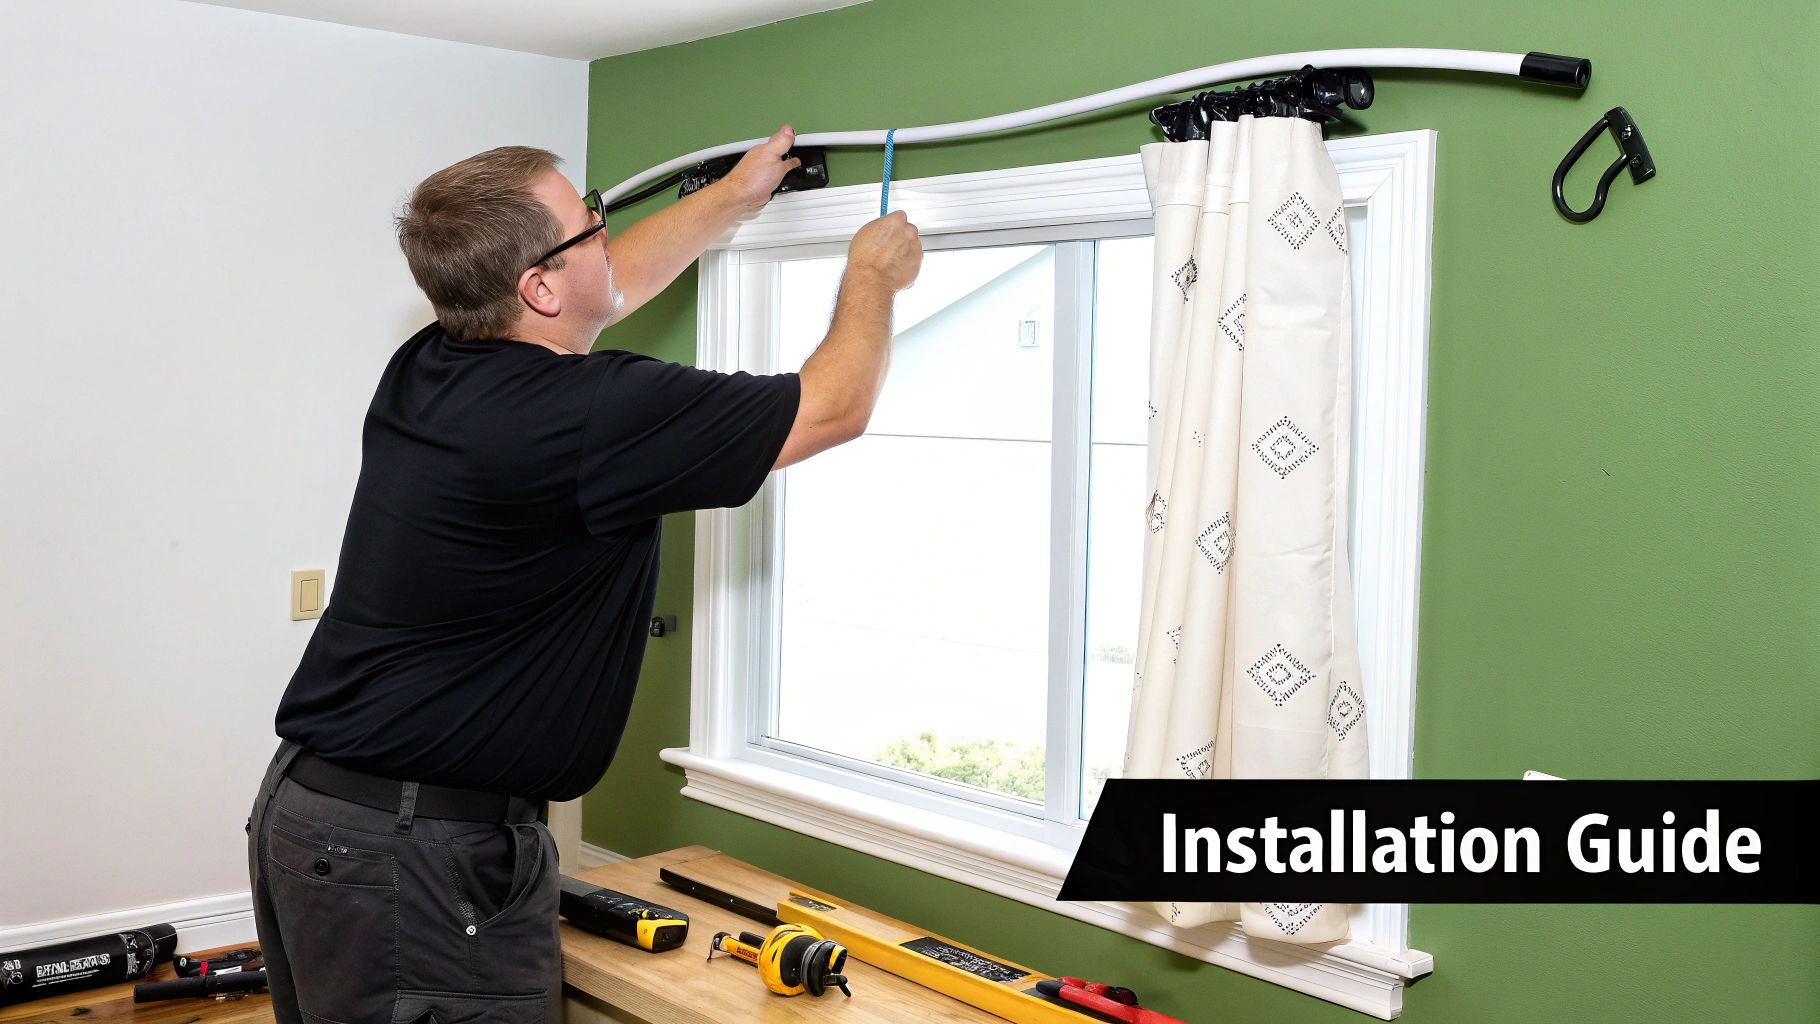
You’ve picked the perfect rod and have your measurements—now for the rewarding part. Installing your curved curtain rod for a bay window is a manageable job that can transform your room in an afternoon.
Before you start, let’s get your tools together. Having everything within reach will save you from trips back and forth to the garage.
Your Installation Toolkit:
The secret to a flawless installation is getting your brackets perfectly level and evenly spaced. I recommend starting with the center support bracket first, then working your way out.
A great rule of thumb is to place the brackets about 4-6 inches above the window frame. This extra height creates an illusion of a taller ceiling and a grander window.
Use your level to draw a faint, straight line across the top of the entire bay window where you want the brackets to sit. Mark the drill holes for your first bracket, drill, and install it. Repeat this for each bracket, placing one at each corner and at both ends of the rod.
For a more detailed walkthrough, our guide on how to hang curtains on a curved window breaks it all down.
The global curtain hardware market was valued at USD 4.8 billion in 2023. With U.S. residential construction spending hitting USD 625 billion in 2022, the demand for quality hardware and reliable advice has never been higher.
With the brackets securely in place, it’s time for the main event. Gently set your curved rod into the brackets and tighten any locking screws. Give the rod a little tug to make sure it feels stable.
Pro Tip: For a polished, hotel-like finish, leave one curtain ring on the outer side of the end bracket when sliding your curtains onto the rod. This anchors the end of the panel to the wall and stops it from sliding toward the middle.
Now, thread your curtains onto the rod, lift it back into place, and secure it. Stand back and admire your handiwork! You’ve just tackled one of the trickiest window treatments out there.
Even the most straightforward home project can leave you with questions. To help you move forward with confidence, we’ve put together the most common questions we hear about choosing and installing a curved curtain rod for a bay window.
The short answer is, it depends on your curtains, but we almost always recommend a solid, pre-curved rod. While flexible, bendable rods seem like an easy fix, they are only built for the lightest, sheerest curtains.
If you’re hanging anything with more weight—like standard cotton, linen, or blackout drapes—a sturdy, pre-bent rod is the way to go. These solid rods are engineered to handle the weight across the long spans of a bay window without sagging, ensuring your curtains glide smoothly.
Yes, absolutely. For both style and daily use, a single, continuous curved rod is the hands-down winner. It creates a seamless track that lets your curtains glide effortlessly around the entire bay without snagging on clunky corner connectors or leaving awkward gaps.
While you could piece together multiple straight rods, it often creates a choppy, segmented look that interrupts the beautiful lines of your window. For a professional finish and a frustration-free experience, a dedicated curved curtain rod is the best investment.
A 'return' is the small curve at the very end of the curtain rod that bends back toward the wall. It’s a small detail that makes a world of difference.
Here’s why returns are so important:
Just remember to account for the length of the return on both ends when you take your final measurements!
The number of brackets depends on the rod's total length and the curtain's weight. A good rule of thumb is to start with a bracket at each end and one at each corner. From there, add extra support brackets every 30-40 inches along any longer, straight sections.
Our Pro Tip: When in doubt, add more support. If you're hanging heavy fabrics like velvet or thermal-lined blackout curtains, an extra bracket or two is your best friend. It prevents the rod from bowing over time, keeping everything looking great for years.
At Joey'z Shopping, we believe the right hardware can take a room from nice to stunning. Our collection of curved curtain rods is designed to give you that perfect mix of style, strength, and smooth operation for any bay window.
Ready to find the perfect fit? Explore our full range of window treatment solutions at Joey'z Shopping.